Setting up VirtualBox with Windows 10
An excellent tool, which is also free (as in beer), is Oracle's VirtualBox. We'll utilize this software package to create our malware analysis environment with a Windows 10 VM.
To begin, we'll navigate to the VirtualBox download page, which can be found at https://virtualbox.org/wiki/downloads. The page should look like the one shown in the following screenshot:

Figure 1.1 – Downloading VirtualBox for macOS, Windows, and Linux
Let's now move on to downloading and installing VirtualBox.
Downloading and verifying VirtualBox
Here, we can select our host OS, with Linux, macOS, and Windows all supported platforms. In this instance, the process will be completed in macOS, but post-installation, the steps are largely the same, and generally platform-agnostic. Begin by selecting your host OS and downloading the latest package for VirtualBox.
As with downloading any binary or package from the internet, it is an excellent idea to ensure that the download is neither corrupt nor has been tampered with during transit.
Thankfully, Oracle provides pre-computed SHA256 sums of their packages, and we can use sha256sum on either Linux or Mac to ascertain whether we have the correct package:

Figure 1.2 – The SHA256 sum of the downloaded file
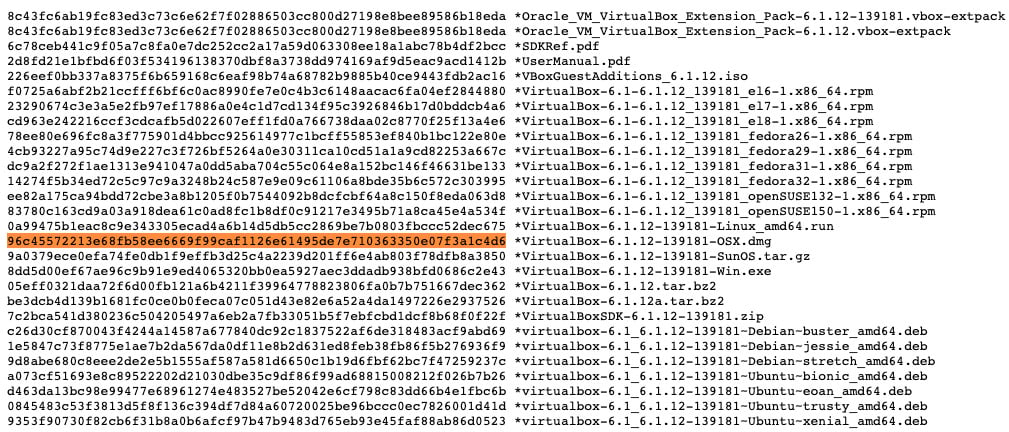
Once we have computed the SHA256 in our terminal, we can compare it to known hashes on the VirtualBox page found at https://www.virtualbox.org/download/hashes/6.1.12/SHA256SUMS. Here, we can see that we have a matching hash and can proceed with the installation:

Figure 1.3 – The list of known good hashes published for VirtualBox's installer packages
Installing Windows 10
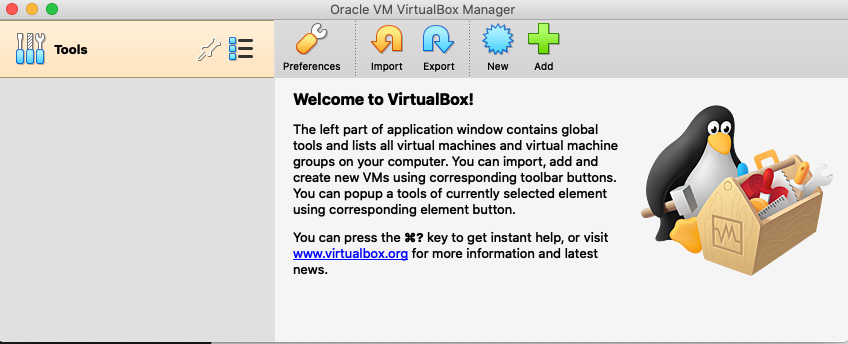
Once you have gone through the installation steps for VirtualBox on your platform and have run the application, you'll be presented with the following screen. We can now begin building our environment:

Figure 1.4 – The VirtualBox main screen
In order to create our malware analysis environment, it will be necessary to have a Windows 10 installation ISO. If you do not already have a Windows 10 ISO, one may be obtained from Microsoft at https://www.microsoft.com/en-us/software-download/windows10. You will be required to purchase a license key in order to activate your copy of Windows:
- To begin creating our VM, we'll click the New button in VirtualBox, as seen in the following screenshot:

Figure 1.5 – Click New to begin creating your analysis VM
- Clicking the New button will reveal a new pane requiring several selections. Here, we'll want to select Windows 10 (64-bit). The machine may be named anything of your choosing. Once these fields are filled in, click Continue:

Figure 1.6 – Name your VM and select the proper OS configuration
At this point, VirtualBox will guide you through several steps. Proceed with the defaults here – no additional customization is necessary for our use case, with one exception: if you have sufficient memory on your host machine, strongly consider changing the memory to 4,096 MB for a smoother experience (and to bypass some possible anti-analysis techniques! More on this later).
- Once done with the creation of the VM, we are dropped back at our initial screen with a VM available to us. However, it is necessary to specify the ISO file that the VM's OS should be installed from. For this, highlight the VM we've just created, and click Settings, as shown in the following screenshot:

Figure 1.7 – Click the Settings button in VirtualBox's main pane
- A new pane will be presented that outlines the many settings currently applied to the VM. Here, we'll select Storage, and then the compact disc icon in the tree. From here, we can click the browse icon and then select the applicable ISO for installation. Then, click OK:

Figure 1.8 – Selecting the virtual optical disk file
- Once the applicable ISO has been loaded, it's time to boot the VM and begin installation of Windows. To do this, simply highlight the VM you have created and then select Start:

Figure 1.9 – Clicking the Start button will launch our analysis VM
If everything has been done correctly to this point, the VM will boot and a Windows 10 installation screen will appear! Here, we can click Next and then proceed as usual through our Windows 10 installation steps:

Figure 1.10 – Select the appropriate language and keyboard layout for your region
- We'll continue by creating a new partition and begin our installation as shown in the following screenshot:

Figures 1.11 – Create a new partition by utilizing the New button
Once this is finished, a Windows installation screen will appear. Please wait for it to finish:

Figure 1.12 – Installation of Windows 10
- Once the installation of Windows has completed, a screen will appear asking for a username to be utilized, along with a corresponding password:
Analysis tip
It is highly advisable to make the password entirely unique to the instance in which we are working. Malware often steals passwords for reuse in further campaigns or operations.

Figure 1.13 – Choose a totally unique password for this VM
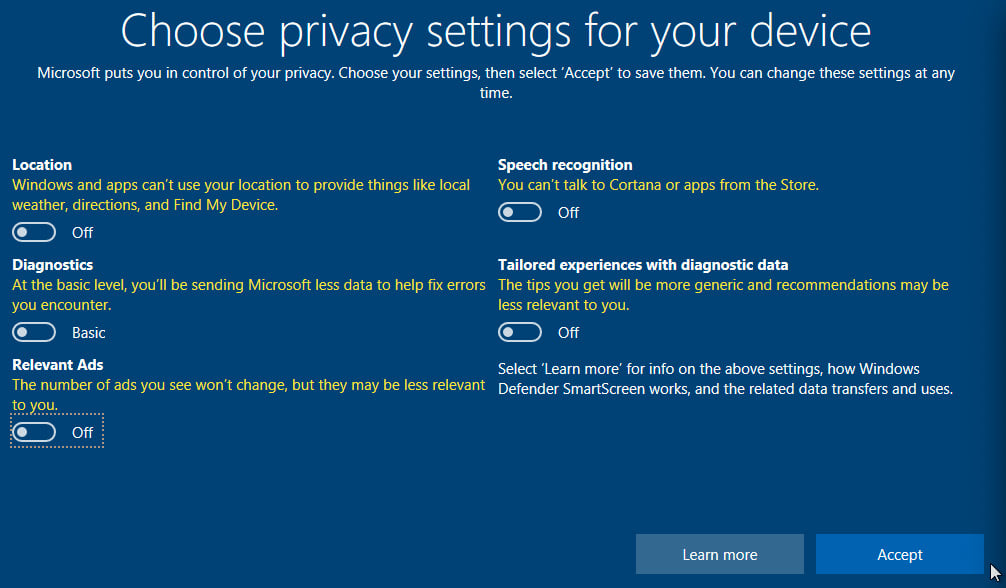
- Once the user has been created, Windows will prompt for a few more settings related to privacy – which you may answer how you choose:

Figure 1.14 – Windows 10's privacy settings
Analysis tip
You may consider replicating the settings pictured here. While disabling Windows 10 telemetry isn't required, you may not want to deliver data to Microsoft over the internet if you're utilizing it to analyze sensitive samples.
Once all the selections have been completed, Windows will perform a number of final initialization steps for the OS and drop you at the desktop!


