Creating a GUI the way we just did works okay for very small scripts, but a much more scalable approach is to subclass Tkinter widgets to create component widgets that we will then assemble into a completed application.
Subclassing is simply a way of creating a new class based on an existing one, adding or changing only what is different in the new class. We will use subclassing extensively in this book to extend the functionality of Tkinter widgets.
Let's build a more robust Hello World script that demonstrates some patterns we'll use throughout the remainder of the book. Take a look at the following steps:
- Create a file called better_hello_tkinter.py and begin with the following lines:
"""A better Hello World for Tkinter"""
import tkinter as tk
from tkinter import ttk
This time, we aren't doing the star imports; instead, we'll keep Tkinter and the ttk objects in their own namespaces. This keeps our global namespace from being cluttered up and eliminates a potential source of bugs.
Star imports (from module import *) are seen often in Python tutorials and example code, but in production code they should be avoided. Python modules can contain any number of classes, functions, or variables; when you do a star import, you import all of them, which can lead to one import overwriting the objects imported from another module. If you find a module name cumbersome to type over and over, alias it to something short, as we've done with Tkinter.
- Next, we create a new class called HelloView, as follows:
class HelloView(tk.Frame):
    """A friendly little module"""

    def __init__(self, parent, *args, **kwargs):
        super().__init__(parent, *args, **kwargs)
Our class is subclassed from Tkinter.Frame. The Frame class is a generic Tk widget that is typically used as a container for other widgets. We can add any number of widgets to the Frame class, then treat the whole thing as though it were a single widget. This is a lot simpler in the long run than individually placing every last button, label, and input on a single master window. The first order of business in the constructor is to call super().__init__(). The super() function gives us a reference to the super class (the class we've subclassed, in this case, tk.Frame). By calling the super class constructor and passing along *args and **kwargs, our new HelloWidget class can take any arguments that Frame can take.
In older versions of Python, super() had to be invoked with the name of the child class and a reference to the current instance, such as super(MyChildClass, self). Python 3 allows you to call it with no arguments, but you will probably encounter code that uses the older invocation.
- Next, we're going to create two Tkinter variable objects to store the name and greeting strings, as follows:
        self.name = tk.StringVar()
        self.hello_string = tk.StringVar()
        self.hello_string.set("Hello World")
Tkinter has a collection of variable types including StringVar, IntVar, DoubleVar, and BooleanVar. You might wonder why we'd use these when Python has perfectly good data types for all of these (and more!). Tkinter variables are more than just containers for data: they have special functionality that regular Python variables lack, such as the ability to automatically propagate changes to all the widgets that reference them or trigger an event when they're changed. Here we'll use them as a way to access the data in a widget without having to keep or pass around references to the widget itself.
Notice that setting a value to a Tkinter variable requires use of the set() method, rather than direct assignment. Likewise, retrieving the data requires use of a get() method. Here, we set the value of hello_string to Hello World. We start building our view by creating a Label object and Entry, as follows:
        name_label = ttk.Label(self, text="Name:")
        name_entry = ttk.Entry(self, textvariable=self.name)
The Label() invocation looks familiar, but the Entry object gets a new argument: textvariable. By passing a Tkinter StringVar variable to this argument, the contents of the Entry box will be bound to the variable, and we can access it without needing to reference the widget. Whenever a user enters text in the Entry object, self.name will immediately be updated wherever it appears.
- Now, let's create Button, as follows:
        ch_button = ttk.Button(self, text="Change",
            command=self.on_change)
In the preceding code, we again have a new argument, command, which takes a reference to a Python function or method. We call a function or method passed this way a callback, and, as you might expect, this callback will be called when the button is clicked. This is the simplest way to bind functions to a widget; later, we'll learn a more flexible method that will allow us to bind various keystrokes, mouse clicks, and other widget events to function or method calls.
Make sure you don't actually call your callback at this point—it should be self.on_change, not self.on_change(). The callback should be a reference to the function or method, not the output from it.
- Let's create another Label, as follows, this time to display our text:
        hello_label = ttk.Label(self, textvariable=self.hello_string,
            font=("TkDefaultFont", 64), wraplength=600)
Here we've passed our other StringVarvariable variable, self.hello_string to the textvariable argument; on a label, the textvariable variable determines what will be displayed. By doing this, we can change the text on the label by simply changing self.hello_string. We'll also set a much larger font by using the font argument, which takes a tuple in the format (font_name, font_size).
You can enter any font name you want here, but it must be installed on the system to work. Tk has some built-in aliases that map to sensible fonts on every platform, such as
TkDefaultFont used here. We'll learn more about using fonts in Tkinter in
Chapter 8,
Improving the Look with Styles and Themes.
The wraplength argument specifies how wide the text can be before it wraps to the next line. We want our text to wrap when it reaches the edge of the window; by default, label text does not wrap, so it would be cut off at the edge of the window. By setting the wrap length to 600 pixels, our text will wrap at the width of the screen.
- So far, our widgets have been created, but not yet placed on HelloView. Let's arrange our widgets as follows:
        name_label.grid(row=0, column=0, sticky=tk.W)
        name_entry.grid(row=0, column=1, sticky=(tk.W + tk.E))
                ch_button.grid(row=0, column=2, sticky=tk.E)
                hello_label.grid(row=1, column=0, columnspan=3)
In this case, we're adding our widgets using the grid() geometry manager, rather than the pack() geometry manager we used before. As the name implies, grid() allows us to position widgets on their parent object using rows and columns, much like a spreadsheet or HTML table. Our first three widgets are arranged across three columns in row 0, while hello_label will be on the second row (row 1). The sticky argument takes a cardinal direction (N, S, E, or W—you can either use strings or the Tkinter constants), which specifies which side of the cell the contents must stick to. You can add these together to stick the widget to multiple sides; for example, by sticking the name_entry widget to both the east and west sides, it will stretch to fill the whole width of the column. The grid() call for hello_label uses the columnspan argument. As you might expect, this causes the widget to span three grid columns. Since our first row established three columns for the grid layout, we need to span all three if we want this widget to fill the width of the application. Finally, we'll finish the __init__() method by adjusting the grid configuration:
self.columnconfigure(1, weight=1)
In the preceding code, the columnconfigure() method is used to make changes to a widget's grid columns. Here, we're telling it to weight column 1 (the second column) more than the others. By doing this, the second column of the grid (where our entry lives) will expand horizontally and squash surrounding columns to their minimum widths. There is also a rowconfigure() method for making similar changes to grid rows.
- Before we finish our HelloModule class, we have to create the callback for ch_button, as follows:
def on_change(self):
    if self.name.get().strip():
        self.hello_string.set("Hello " + self.name.get())
    else:
        self.hello_string.set("Hello World")
To get the value of the text entry, we call the get() method of its text variable. If this variable contains any characters (notice we strip the white space), we'll set our hello text to greet the name entered; otherwise, we'll just greet the whole world.
Notice by using the StringVar objects we don't have to interact directly with the widgets. This saved us from having to keep a lot of widget references in our class, but, more importantly, our variable could be updated from any number of sources or update any number of destinations without us having to explicitly write code to do so.
- With HelloView created, we move onto the actual application class, as follows:
class MyApplication(tk.Tk):
    """Hello World Main Application"""

    def __init__(self, *args, **kwargs):
        super().__init__(*args, **kwargs)
        self.title("Hello Tkinter")
        self.geometry("800x600")
        self.resizable(width=False, height=False)
This time, we subclass Tk, which will represent our main application object. There is some debate in the Tkinter world whether or not this is best practice. Since there can be only one Tk object in the application, it could theoretically create problems if we want multiple MyApplication objects somewhere down the line; for simple, single-window applications, it's perfectly fine.
- As with our module, we call super().__init__() and pass along any arguments. Notice we don't need a parent widget this time, since the Tk object is the root window and has no parent. Then there are the following three calls to configure our application window:
- self.title(): This call sets the window title, which usually appears in the task list and/or window bar in our OS environment.
- self.geometry(): This call sets the size of our window in pixels, in the format x * y (width x height).
- self.resizable(): This call sets whether the program window can be resized. We're disabling resizing here, both in width and height.
- We finish our application class by adding our view to the main window, as follows:
        HelloView(self).grid(sticky=(tk.E + tk.W + tk.N + tk.S))
        self.columnconfigure(0, weight=1)
Notice that we create and place HelloView in a single line of code. We do this in situations where we don't need to keep a reference to the widget, but since grid() does not return a value, you'll have to stick to the two-statement version if you want to access the widget later in your code.
Because we want the view to fill the application window, our grid() call sticks it to all sides of its cell, and our columnconfigure() call causes the first column to expand. Note that we've omitted the row and column arguments without them, and grid() simply uses the first column of the next available row (in this case, 0, 0).
- With our classes defined, we'll start the actual execution of the code, as follows:
if __name__ == '__main__':
    app = MyApplication()
    app.mainloop()
In Python, if __name__ == '__main__': is a common idiom to check if a script is being run directly, such as when we type python3 better_hello_world.py at a terminal. If we were to import this file as a module into another Python script, this check would be false and the code after would not be run. It's a good practice to put your program's main execution code below this check so that you can safely reuse your classes and functions in larger applications.
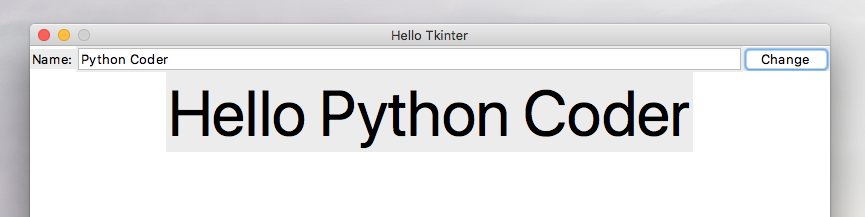
Remember that MyApplication is a subclass of Tk, so it acts as the root window. We only need to create it and then start its main loop. Take a look at the following screenshot:
This was certainly overkill for a Hello World application, but it demonstrates the use of subclassing to segment our application into modules, which will vastly simplify layouts and code organization as we build larger programs.