
Many users want to keep their ageing PCs alive on their new Mac hardware, and VMware Fusion is the perfect tool to do it. It's a great way to "upgrade your life" by getting a Mac, but still keep the tools that you are aware of. Here, we'll describe the steps you can take to clone your physical PC into a VMware Fusion virtual machine.
In order to migrate your PC, the PC must be connected to your home network. A wireless connection will take an extremely long time (I've seen days). It's recommended that you use a Gigabit Ethernet connection for both the Mac and the PC. You could also directly connect the Mac and the PC with an Ethernet cable and turn on Internet Sharing on the Mac by navigating to System Preferences | Sharing. This will allow the Mac and the PC to connect with each other without needing a router.
The process is pretty straightforward if you follow the wizard. To get started, make sure both your PC and Fusion are up and running. Both need to be connected to your network or to each other directly. Use Ethernet to connect everything for performance and stability.
Follow these steps:
Within VMware Fusion, start the Migration Assistant by navigating to File | Migrate Your PC… and following the prompts. It will require that you download a small agent onto your PC and type a four digit security code created by it into the Migration Assistant, as shown in the following screenshot:

VMware Fusion provides an estimate of the time it could take to convert your machine. Once again, Ethernet is definitely recommended. In the previous screenshot, I am using Microsoft Remote Desktop for Mac (RDP) to connect to a computer in my lab and am about to start converting it over my Ethernet network.
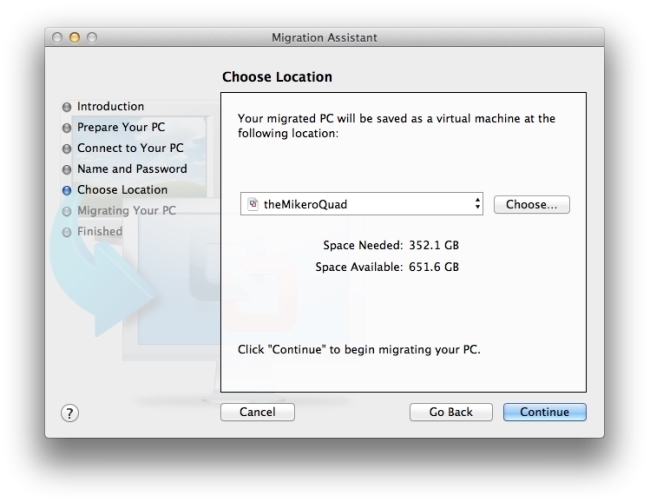
When running through the Migration Assistant, be sure to take note of how much space you have and how much is required to convert your PC.

As you can see in the preceding screenshot, I don't have enough space on my MacBook Pro's main drive! So, I have to choose an external drive. A Thunderbolt or USB 3 drive would work best, as disk speeds need to be fast for an optimal virtual machine experience. A FireWire 800 drive is also adequate. We don't have to keep the VM on the Mac to run it or keep it in the virtual machine library; we just need to make sure the USB, FireWire, or Thunderbolt disk is connected when we want to run the VM.
In the following screenshot, we can see there is now enough space available on the volume where we'll be migrating the old PC:
Remember, this process is going to take some time. In my example, I had 300 GB to convert, and I had to leave it running overnight. By comparison, a smaller machine of mine, which only consumed about 10 GB, took about 30 minutes.
The process works because of the agent that was installed in the PC. Aside from just connecting the PC to the Fusion Migration Assistant with the four digit code, the agent copies the PC from the inside while it's running, and places the copy on your local Mac via the network. The fastest network connection would be using Gigabit Ethernet. Using Wi-Fi is not recommended. To compare, Wi-Fi (802.11n) usually pushes around 100-150 Mbps; Gigabit Ethernet, however, can hit 1000 Mbps. Plus, a large transfer like that over Wi-Fi is prone to interruption due to interference. Starting a 40-hour transfer all over again because someone turned the microwave on halfway through is certainly no fun!
The Migration Assistant that comes with Fusion isn't the only way to convert your PC of course! Read on for other options.
The VMware Fusion Migration Assistant is great because it's built on the enterprise-class VMware vCenter Converter. If for some reason the Migration Assistant doesn't work for you, or if you want to save your image to a disk because you only have Wi-Fi between your Mac and PC, you can use VMware vCenter Converter instead. vCenter Converter is free and gives you many more options when converting your PC to a virtual machine.
You can find VMware Converter and its documentation for download at:
You can even use the Migration Assistant to transfer a virtual machine from another computer to Fusion. For example, if you had another Mac on your network and it had a VM running in Fusion, you could copy that VM by using the Migration Assistant in the same way. It would also work for VMs in Workstation, or even other hypervisors such as Xen, Hyper-V, VirtualBox, or even vSphere/ESXi. As long as Fusion can reach the Windows VM on the network, it should work.