
Printing doesn't have to be hard, but there are a few things to consider when printing from a virtual machine on a Mac. Getting a printer going on a Mac is pretty easy, so the nice thing about Fusion is it extends that simplicity to your Windows VM. It does this through a feature appropriately called Printer Sharing. This feature automatically creates a virtual printer in Windows that only really points to the real printer installed on the Mac.
While the Printer Sharing feature is pretty simple to use, it doesn't do anything fancy, such as double-sided printing, duplexing, report ink level status, or any of the features you'd find in an All-In-One printer, such as a scanner.
Thankfully, there's more than one way to connect a printer to Windows, and you can take full advantage of the printer's full features if you need to.
There are three ways that you can connect your printer from your Mac to your Windows VM:
The Printer Sharing feature
USB pass-through
Standard network printer setup
For standard printing, the built-in Printer Sharing feature is perfect. If you need to use the scanner part of an All-In-One printer, they need to be connected using USB pass-through. Printers that are connected to your Mac over the network can be connected directly, bypassing the Printer Sharing feature, so it can report on ink levels.
In this recipe, we'll go through setting up Printer Sharing, try USB pass-through, and connect to the printer directly from within Windows via the network.
With so many ways to print, let's look at how we can get the job done. Remember that you shouldn't use all of these methods, but pick one that works with your setup and stick with that. Once you're there, you can always switch to a different option, but just don't try to do more than one at a time, as they will conflict.
Printer Sharing should be enabled by default, but in case it's not in your VM's Settings window, you can add the shared printer with the following steps:
First, check if it's there and enabled by following these steps:
From the virtual machine library, click on the virtual machine's Settings button.
Click on Printers.
Click on the checkbox that says ON as shown in the next screenshot:

If you don't have a Printers icon, you can add a new one by following these steps:
Click on the Add Device… button within the settings.
Click on Printer.
Click on Add.
Simple enough!
Connecting to the printer directly via USB pass-through is essentially the same as plugging the printer directly into a physical Windows PC using a USB cable. Because Windows is virtual in our case, it means that you have to take the USB connection away from the Mac to give it to Windows. This means that you can only have the printer connected to either the Mac or Windows at one time, but not both.
To use USB pass-through, follow these steps:
Click on the Printer icon from the bottom of the virtual machine window.
Click on Connect <your printer name>.
Or, follow these steps:
Click on the menu bar.
Go to Virtual Machine | USB.
Click on Connect <your printer name>.
However, when you plug the printer in via USB, Fusion will ask you what you want to do with the device. You can tell it to always connect it to Windows if you wish to use this method, and you'll never have to bother with going through that menu to pass it through to Windows from the Mac side again, as shown in the following screenshot:

This action is the same as plugging the printer into a USB port on a Windows PC.
From here, standard Windows printer installation steps apply as directed by the printer manufacturer (installing drivers, software, and so on), as shown in the following screenshot:
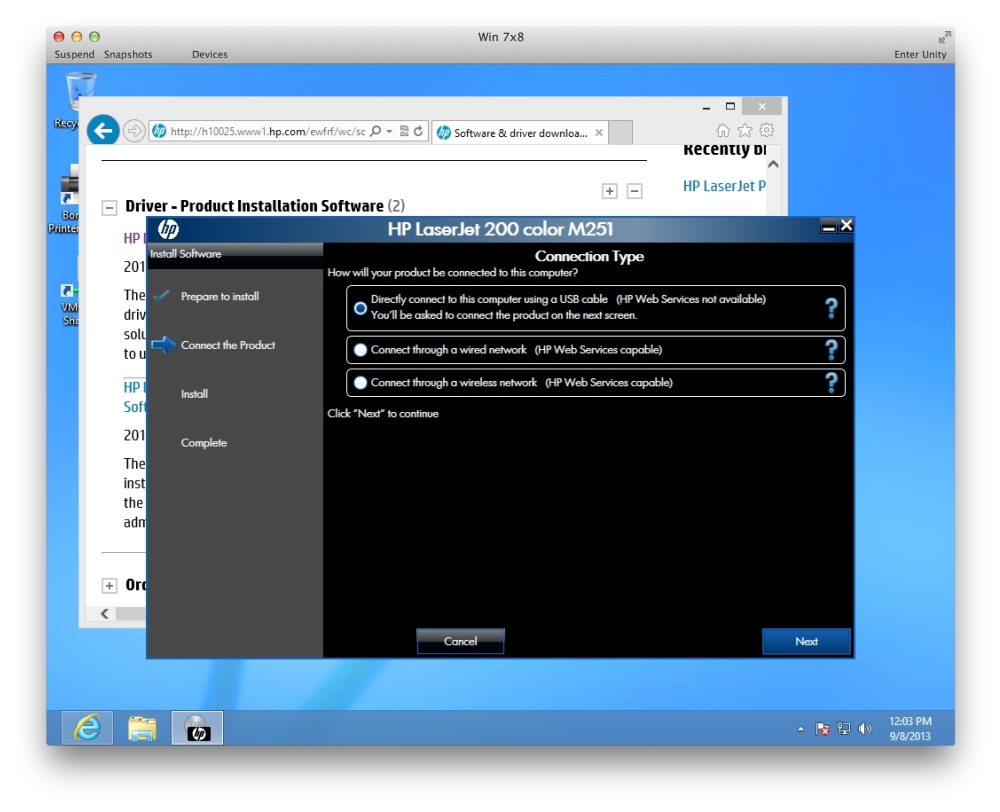
If your printer happens to be a network printer with an Ethernet port or a wireless option, you can have the best of both worlds by just installing it the same way you would on a normal PC: as a network printer.
Remember that Printer Sharing only installs a printer proxy which looks like a regular printer in Windows, but in fact only connects to the currently installed Mac printer.
Connecting to the printer directly via the network gives you more control over your printer in Windows than Printer Sharing; so, it's great if you want to print to big, wide-output printers, 3D printers, vinyl printers, embroidery devices, futuristic sewing machines, and so on.
Ultimately, you do not need to use the built-in Printer Sharing feature in order to make your virtual machine print to any printer, so it really depends on what your needs are.
So, in this case, you would not plug the printer into the computer via USB. You would just install the printer, which is connected to your network (mine, for example, has both Wi-Fi and Ethernet options, and is a terrific little color laser printer!), the same way that you would if your virtual machine were a physical one.
Simple, right?
Printer Sharing offers a very basic driver to Windows and allows you to print from both Windows and the Mac at the same time without changing any settings, but is limited in its capability.
Connecting directly via USB pass-through is the same as plugging the printer into a Windows PC with a USB cable, providing full functionality of the printer, but you can only connect it to either the Mac or Windows at one time, not both.
Connecting via the network is the best of both worlds if possible, providing both connections to the Mac and the Windows VM at the same time, while delivering full functionality to both.