To deploy our first Ceph cluster, we will use the ceph-deploy tool to install and configure Ceph on all three virtual machines. The ceph-deploy tool is a part of the Ceph software-defined storage, which is used for easier deployment and management of your Ceph storage cluster. In the previous section, we created three virtual machines with CentOS7, which have connectivity with the Internet over NAT, as well as private host-only networks.
We will configure these machines as Ceph storage clusters, as mentioned in the following diagram:

We will first install Ceph and configure ceph-node1 as the Ceph monitor and the Ceph OSD node. Later recipes in this chapter will introduce ceph-node2 and ceph-node3.
Install
ceph-deployonceph-node1:# yum install ceph-deploy -yNext, we will create a Ceph cluster using
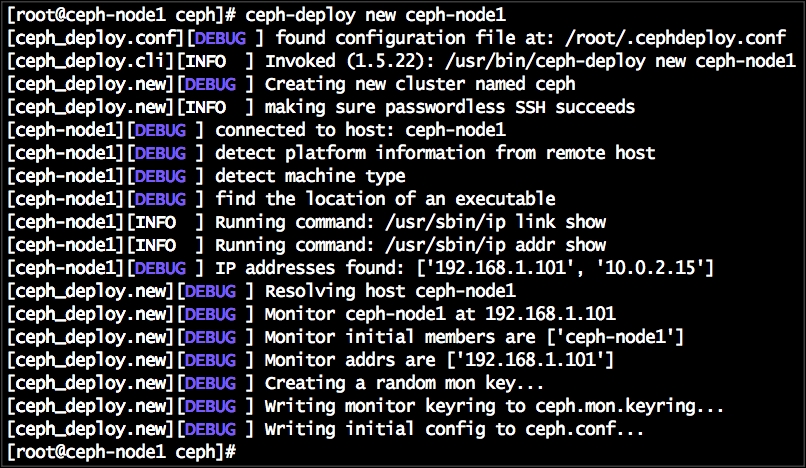
ceph-deployby executing the following command fromceph-node1:# mkdir /etc/ceph ; cd /etc/ceph # ceph-deploy new ceph-node1
The
newsubcommand inceph-deploydeploys a new cluster withcephas the cluster name, which is by default; it generates a cluster configuration and keying files. List the present working directory; you will find theceph.confandceph.mon.keyringfiles:
To install Ceph software binaries on all the machines using
ceph-deploy, execute the following command fromceph-node1:# ceph-deploy install ceph-node1 ceph-node2 ceph-node3The
ceph-deploytool will first install all the dependencies followed by the Ceph Giant binaries. Once the command completes successfully, check the Ceph version and Ceph health on all the nodes, as shown as follows:# ceph -vCreate first the Ceph monitor in
ceph-node1:# ceph-deploy mon create-initialOnce the monitor creation is successful, check your cluster status. Your cluster will not be healthy at this stage:
# ceph -s
Create OSDs on
ceph-node1:List the available disks on
ceph-node1:# ceph-deploy disk list ceph-node1From the output, carefully select the disks (other than the OS partition) on which we should create the Ceph OSD. In our case, the disk names are
sdb,sdc, andsdd.The
disk zapsubcommand would destroy the existing partition table and content from the disk. Before running this command, make sure that you are using the correct disk device name:# ceph-deploy disk zap ceph-node1:sdb ceph-node1:sdc ceph-node1:sddThe
osd createsubcommand will first prepare the disk, that is, erase the disk with a filesystem that is xfs by default, and then it will activate the disk's first partition as data partition and its second partition as journal:# ceph-deploy osd create ceph-node1:sdb ceph-node1:sdc ceph-node1:sddCheck the Ceph status and notice the OSD count. At this stage, your cluster would not be healthy; we need to add a few more nodes to the Ceph cluster so that it can replicate objects three times (by default) across cluster and attain healthy status. You will find more information on this in the next recipe:
# ceph -s


