
Signing up for VMware vCloud Air is a fairly simple process. At the time of writing this book, VMware has set up an Early Access Program (EAP). If you are a new user and interested in the EAP, then simply sign up for the program at http://vcloud.vmware.com/service-offering/virtual-private-cloud-ondemand.
The link takes you to a short questionnaire. Once the form is filled in, simply click on the Submit button. You will receive an email at the email address that you provided during the sign-up process. This email will contain a link and a temporary password to create an account on vCloud Air. Click on the link to get started:
If you already have a My VMware Account, then simply login by providing your email address and password under LOG IN/CREATE ACCOUNT, or you can optionally create a new My VMware account.
The following screenshot shows the VMware vCloud Air OnDemand Services log-in/sign-up page:

Enter your credit card and billing information and click on Complete Sign-Up. You can optionally provide a different billing address as well if required.
The following screenshot shows the page where you fill in the credit card and billing information:

Once VMware has validated your account information, you will receive a confirmation email that will provide you with a URL to access your vCloud Air along with a few other necessary account activation instructions.
Navigate to the given URL and set a new password for accessing your account. Always use a strong password, and remember to check the I accept checkbox before you click on Continue.
The following screenshot shows the VMware vCloud Air password setup screen:

Provide your username and password and click on Sign in to begin using your vCloud Air subscription. You will be prompted to accept VMware vCloud Air's terms and conditions. Simply click on Submit and continue.
Note
For subsequent logins, go to https://vca.vmware.com and log in using your username and password.
The following screenshot shows the VMware vCloud Air log-in screen:

Once logged in, you will see vCloud Air's main dashboard, as shown in the following screenshot:

Here, you can see that VMware has already provided you with an On-Demand vCloud service. Get started by selecting the Virtual Private Cloud On-Demand. This will bring up a dialog box that will allow you to select the default Region out of which you will operate.
Regions are a collection of one or more physical datacenters that can be geographically separated from each other. Users can select any region in VMware vCloud Air to get started. However, a good choice will be to select the region that's closest to you.
Why provide a choice of regions? Well, failures can happen, and hosting all your workloads in a single datacenter is not a best practice. Having your workloads available in multiple regions allows users to deploy highly redundant and fault tolerant applications, which can work even if one entire datacenter goes down. Having multiple regions also means that you can run your workloads a lot closer to where your customers reside, and at the same time, comply with various local legal regulations and laws.
The following screenshot shows the VMware vCloud Air Virtual Private Cloud OnDemand region selection screen:

In this case, VMware vCloud Air is showing three regions, two in the US and one in UK. For the purpose of this guide, I have selected the UK region (UK - Slough - 6), but you can always go back and change this using the vCloud Air dashboard.
Once you have selected your region, you will see the main dashboard, as shown previously. This is the starting point for all your vCloud Air activities. Let's have a quick look into what each tab is going to be used for; first up is the Resource Usage tab.
As the name implies, the resource usage tab displays historic as well as real-time usage of your cloud's resources. You can even view detailed reports for up to a month using this console.
The following screenshot shows the VMware Private Cloud OnDemand Resource Usage tab:

Note
You will not be charged for any resources unless you start using them. The following console views the estimate costs to date of each of your resources.
If you want an in-depth usage and cost report, then log in to your My VMware account and traverse to Services | Subscription Service Detail, as shown:

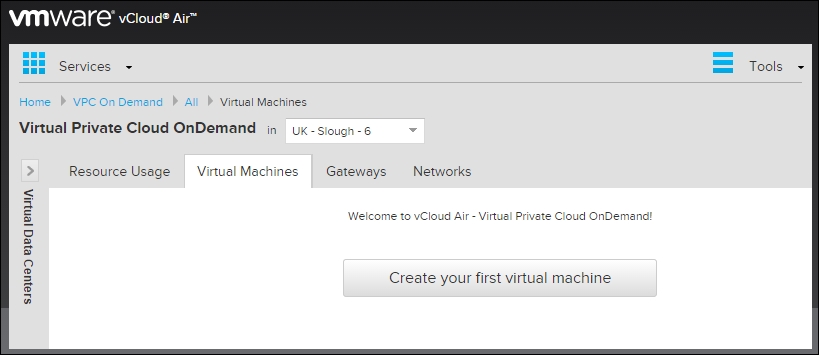
A virtual machine is a software-based computer which, as a physical computer, runs on a host operating system. Virtual machines are first-class objects in vCloud Air interactions, and you can manage them individually.
Using the virtual machines tab, you can create, edit, delete and view all your virtual machines or instances. By default, vCloud Air provides a list of readymade templates including CentOS, Ubuntu, and Windows Server OSs, with which you can create your own instances; however, you can also create or upload your own custom templates and ISO images, and spawn instances from them. This will be covered in depth in the subsequent chapters.
The vCloud Air uses Software Defined Networking (SDN) concepts and technology for creating and using networking elements, such as gateways and routers.
The gateway in vCloud Air is basically responsible for routing traffic to and from your internal vCloud environment to the outside world, that is, the Internet.
When you subscribe to a Virtual Private Cloud service, VMware creates your virtual data center for you, and adds a gateway to that virtual data center, as it's done in this case. When you subscribe to a Dedicated Cloud service, you have to log in to the vCloud Air console, and create your first virtual data center. When you allocate a public IP address range to your virtual data center, vCloud Air creates a gateway in that virtual data center.
By default, a gateway provides the following properties:
Small footprint: a gateway doesn't use much disk or compute resources
High availability: by default, this feature is disabled, but you can enable it by using VMware vCloud Director
IP Networks: by default, the gateway will provide you with an internal network (generally a 192.168.xxx.xxx series IP range with a default gateway), and an external facing IP as well

A gateway provides additional services, such as firewall, NAT, DHCP VPN, and load balancing as well, each of which will be explored in depth in the subsequent chapters.
Note
By default, all the services mentioned above are set to be disabled. So, when you assign a virtual machine to the default gateway, it will not provide any connectivity to the outside world. In order for the virtual machine to get internet connectivity, you will have to open up the relevant ports and enable NAT as well on the gateway, so that the internal (192.168.xxx.xxx) IP address of the VM is translated into the external (gateway) one.
The Networks tab displays the overall networks that can be consumed by the virtual machines in a vCloud Air environment. There are two types of networks that can be created here:
The following screenshot shows the VMware vCloud Air Networks tab:
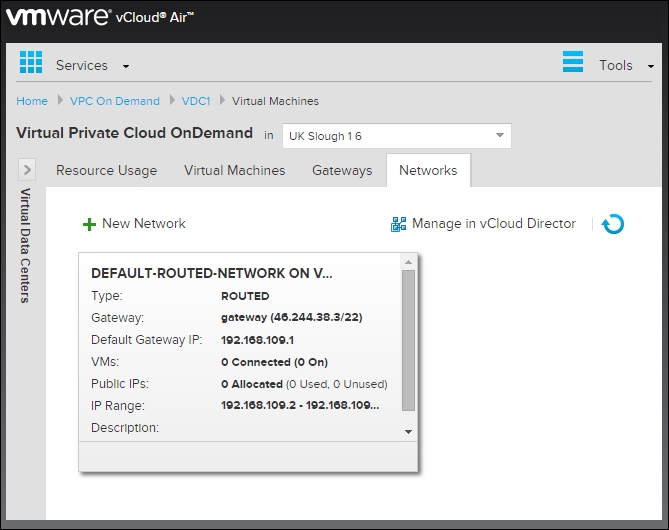
Both the default-routed and isolated networks use a range of internal IP addresses. These IP addresses can be viewed in the vCloud Air dashboard itself by selecting the particular network that you want to view.