To install VMware View Connection servers, here are the prerequisites:
A dedicated service account with Domain Administrator privileges for VMware Horizon View or a service account with the following permissions:
List Contents
Read All Properties
Write All Properties
Read Permissions
Reset Password
Create Computer Objects
Delete Computer Objects
FQDN or IP address of the vCenter server.
Login information for the vCenter server with local administration rights.
Download the following from http://my.vmware.com:
Horizon View Connection Server (x64)
Horizon View Composer
Horizon View Agent (64-bit) or Horizon View Agent (32-bit) to match your guest OS
Two Windows servers, version 2008 R2 or higher.
The Windows firewall should be turned on for the View Connection server; the View Connection server will automatically add the required firewall rules as part of the installation.
Each Windows server should be joined to Active Directory.
FQDN names of the Horizon View Connection servers.
A shared FQDN name for both Horizon View Connection servers with DNS load balancing.
A certificate trusted by the clients, with the DNS names of both Horizon View Connection servers and the shared FQDN.
A web browser with the latest version of Adobe flash player installed.
OCDB connection setup for the View Event database, along with credentials.
Tip
For system requirements, please visit the VMware Documentation Center and verify the requirements against your environment:
The following steps need to be performed:
Launch the VMware Horizon View Connection Server installer.
On the page that says Welcome to the Installation Wizard for VMware Horizon View Connection Server, hit Next.
On the license agreement page, select I accept the terms in the license agreement and hit Next.
Select the installation path for the VMware Horizon View Connection server. You can use the Change… button to select the path. Hit the Next button.
Select View Standard Server and ensure Install HTML Access has been checked. Click on Next.

On the Data Recovery window, enter a data recovery password and then re-enter it. Select Next when finished.

On the Firewall Configuration screen, select Configure Windows Firewall automatically. Click on Next to continue.

On the Initial View Administrators screen, select Authorize a specific domain user or domain group. Enter the domain group or user that will be authorized as View Administrator(s).

On the User Experience Improvement Program screen, click on Next.
On the Ready to Install the Program window, click on Install.
On the Installer Completed window, click on Finish.
Next, we will install the View Replica Server:
On the page that says Welcome to the Installation Wizard for VMware Horizon View Connection Server, hit Next.
On the license agreement page, select I accept the terms in the license agreement and hit Next.
Select the installation path for the VMware Horizon View Connection server. You can use the Change… button to select the path. Click on the Next button.
On the Installation Options window, select View Replica Server and ensure Install HTML Access is selected. Click on Next.

On the Source Server window, type the full FQDN path of the initial View Connection server. Ensure that the replica server can directly communicate with the original View Connection server.

On the Firewall Configuration screen, select Configure Windows Firewall automatically. Hit Next to continue.
On the Ready to Install the Program window, click on Install.
On the Installer Completed window, click on Finish.
Next, we will configure the View Connection servers for use with our environment:
We open up a web browser to our View Connection Server administration page
https://<fqdn of view connection server 1>/admin(for example,https://view6_1.mydomain.com/admin).Next, log in using your View Administrator credentials.
Expand the inventory tree on the right-hand side of the window.
Navigate to View Configuration | Product Licensing and Usage.

Select Edit License… and enter a valid VMware Horizon View license.

Navigate to View Configuration | Servers.

Select the vCenter Servers tab and hit Add….

Enter the FQDN of the vCenter as value for the Server address field. Enter the username for connecting to the vCenter server. Enter the password for the vCenter user. Click on Next and accept any certificates that pop up.

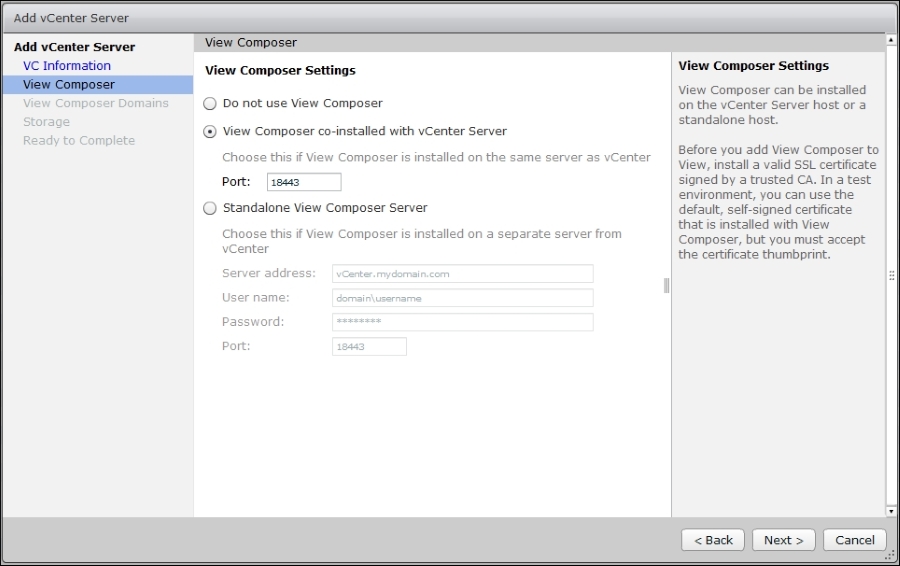
Enter the details about your View Composer and hit Next. Accept any certificates that pop up.

Add the domain(s) that View virtual desktops will be joined to. Click on Next.

On the Storage window, select Reclaim VM disk space and Enable View Storage Accelerator. Reclaiming VM disk space will cause the virtual desktops to be periodically scanned for empty space. Using Thin Provision technology, the extra space will be periodically freed for the underlying storage to use.
Enabling View Storage Accelerator allocates a small amount of RAM on each ESXi host that will work as a read cache for the virtual desktops. The default is 1024 MB and is considered optimal in most cases. Hit Next.

On the Ready to Complete window, review your settings and select Finish.
Navigate to View Configuration | Event Configuration.

Select Edit… and enter the details for Event Database.

We have now configured two View Connection servers in a redundant pair. The ADAM database stored on each View Connection server will now automatically replicate any changes made to the rest of the cluster.


