
In this section, let us try to understand some details about the Bluemix Dashboard. This is essential in learning to work with IBM Bluemix.
In this section, we will learn about some of the key concepts used in Bluemix. Your Bluemix account can be administered from the Bluemix console. Understanding of the concepts within Bluemix, which are surfaced on the console, will help you learn how to plan the usage of your account and the resources within it.
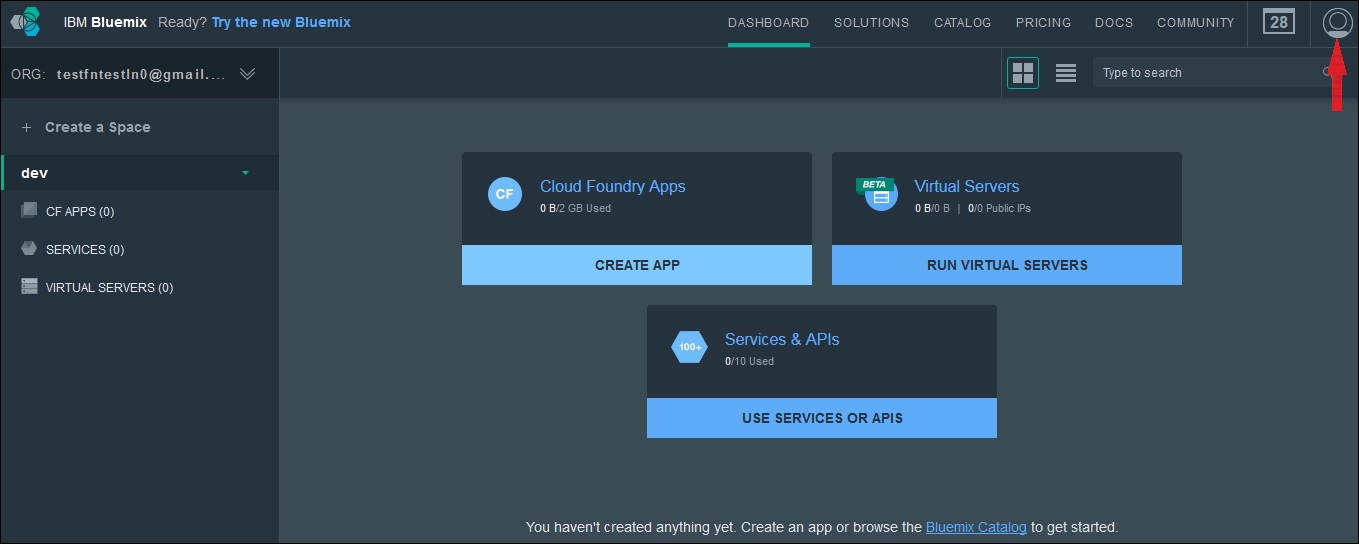
Clicking the icon to the extreme top-right of your dashboard will bring up information on your Bluemix account:
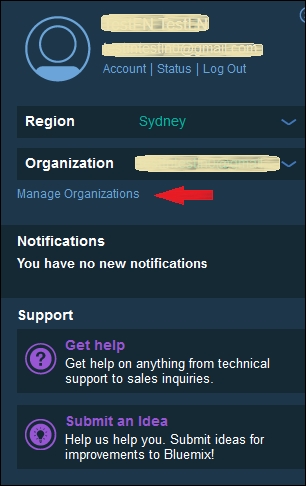
The account details are shown as follows; it displays the account owner's name, registered e-mail address, and organization. You will see your account details here.
Organization is an all-encompassing entity in the case of a public Bluemix account. This is the topmost level in the hierarchy of entities that a user will work with on Bluemix. For a public Bluemix user who has created a Bluemix account, he is the account owner and organization is his topmost entity. Usually, the account owner's e-mail is defaulted to his organization name. This can be edited by the account owner; we will see how to do that in future sections:

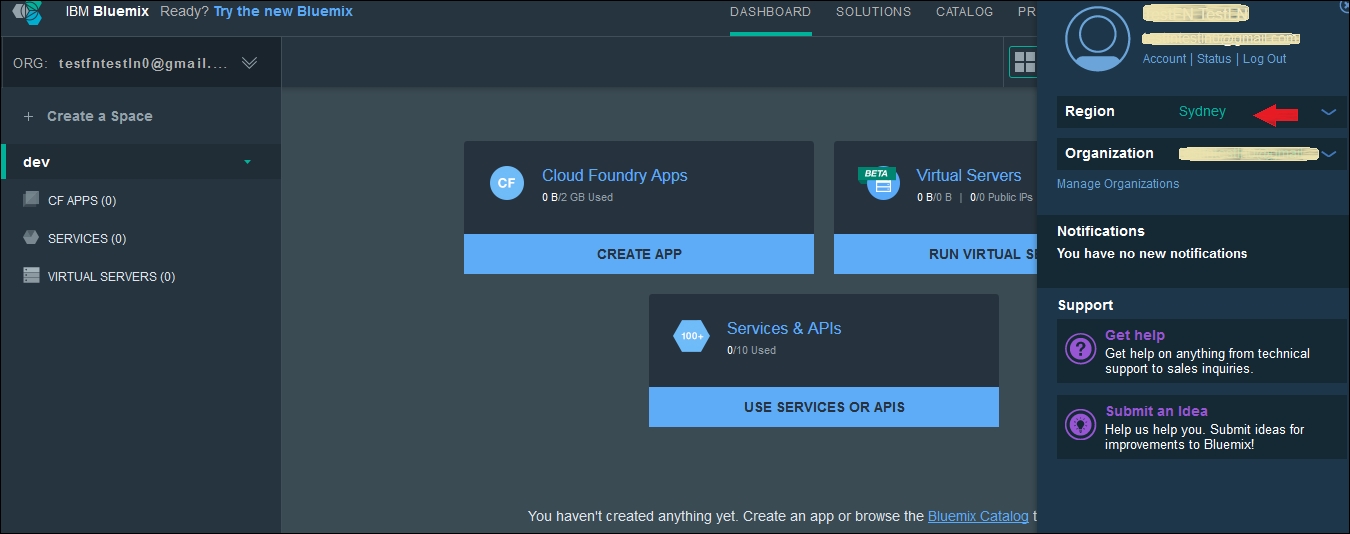
You can manage your organization by clicking the icon to the extreme top-right corner of the console, also called the Account Details view:

This would bring up the following screen, where you can click Manage Organizations:
This will bring up the page from where you can administer your Bluemix organization:
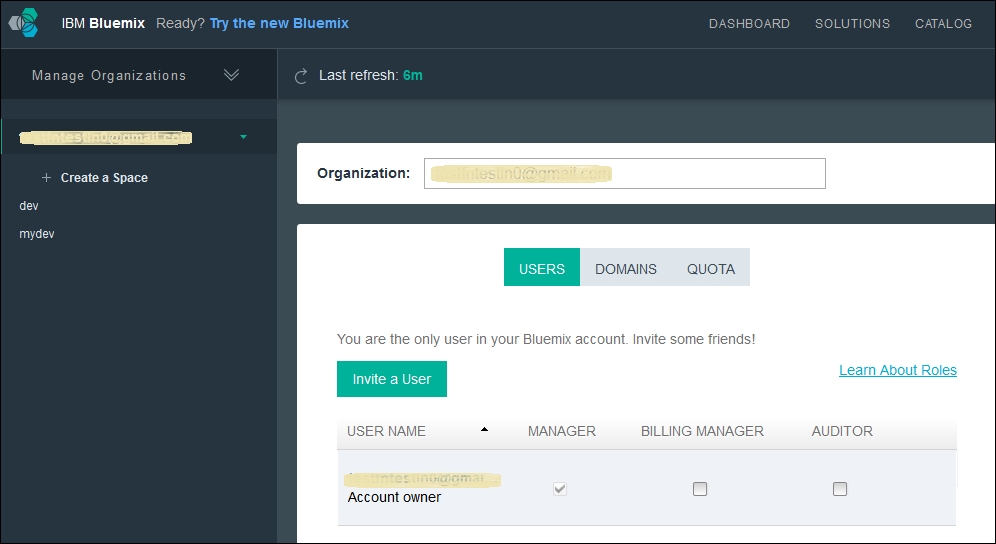
There are three important concepts to be understood here under organization management. You will see that there are three tabs here for USERS, DOMAINS, and QUOTA. Organization management amounts to actions that you perform with respect to managing the users and domains in the organization.
USERS
The account owner is the default user listed. Now, in a typical development environment, you would want multiple users to be able to access and work on a given space within your organization. This is a must for collaborative development needs. To enable this, you will need to invite a user to your organization and assign him a space.
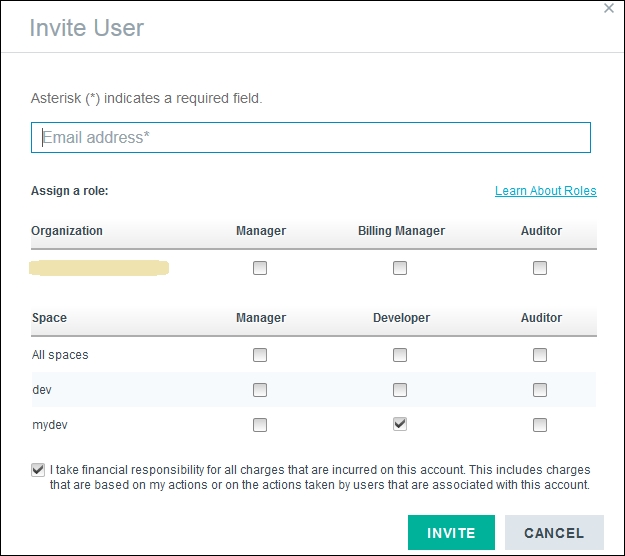
Click Invite a User; you will see the following screen, where you will need to enter the e-mail address of the person you want to invite. You can assign the user you are inviting a role within your organization, which is to manage your organization, or you can simply choose to only give the user access to your space, as a developer:
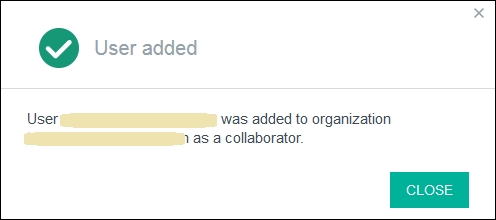
The user you invite can have an account on Bluemix. You will see his user name listed within your organization once you have invited the user. If you are inviting the user using his e-mail address, which is linked to his IBM ID, then he will be added as a member; if the user does not have an IBM ID, then an IBM ID is created for the user with the e-mail address and he is added as a member. However, in our example, the user already has a Bluemix account linked to the given e-mail address, so he will be added as a collaborator.
Click INVITE to invite the user. You will see a confirmation, as follows:
Within your organization, under the USERS tab, you will see the new user listed as follows:

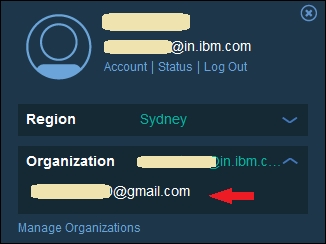
The user that you have invited will be able to see your organization along with his own organization in the account details page; from here he will be able to switch to your organization and will be able to work with the space that you have assigned him to, as shown in the following screenshot:
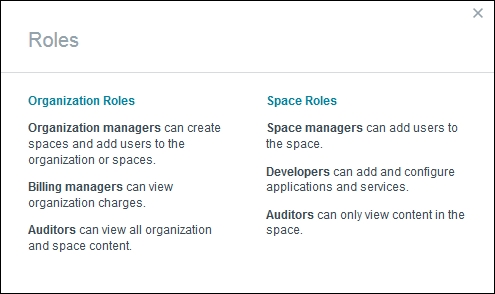
You can learn more about each of the user roles within an organization and a space by clicking on Learn About Roles:
DOMAIN
Click the DOMAIN tab from the manage organizations page; you will see the default system domain assigned, which in the case of the demo account would be au-syd.mybluemix.net. The public Internet route for your organization is defaulted to the system domain, and the host in the route is usually your application name:
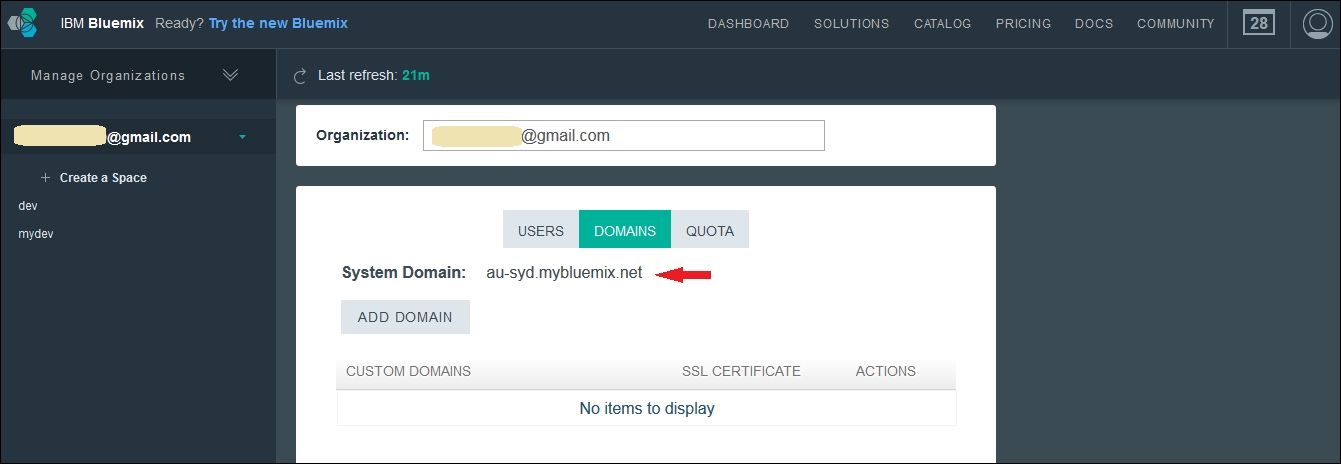
You will be able to add custom domains to your organization by clicking ADD DOMAIN. You can associate your applications to use the custom domains instead of the default system domain. The discussion of custom domains is outside the scope of this book. To know more on custom domains, you can refer to the Bluemix documentation at www.bluemix.net/docs .
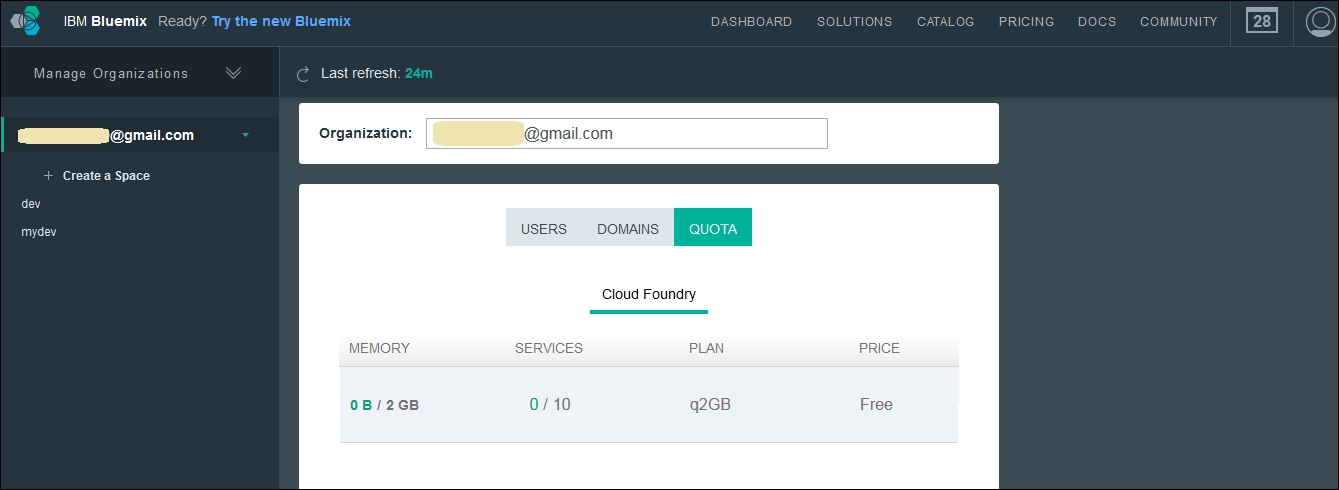
QUOTA
Quota defines the resources allocated to an organization. This will provide information on what is the maximum memory that can be used by applications across spaces in your organization. Quota also provides the total number of cloud service instances that can be created in your organization across spaces. Quota is allocated when the account is created. You can increase your quota by moving to the pay as you go or subscription plans for your Bluemix account. The following screenshot shows the quota for the demo account we are using in this chapter; this would be similar to the quota on the trial account you have created following the steps in this chapter:
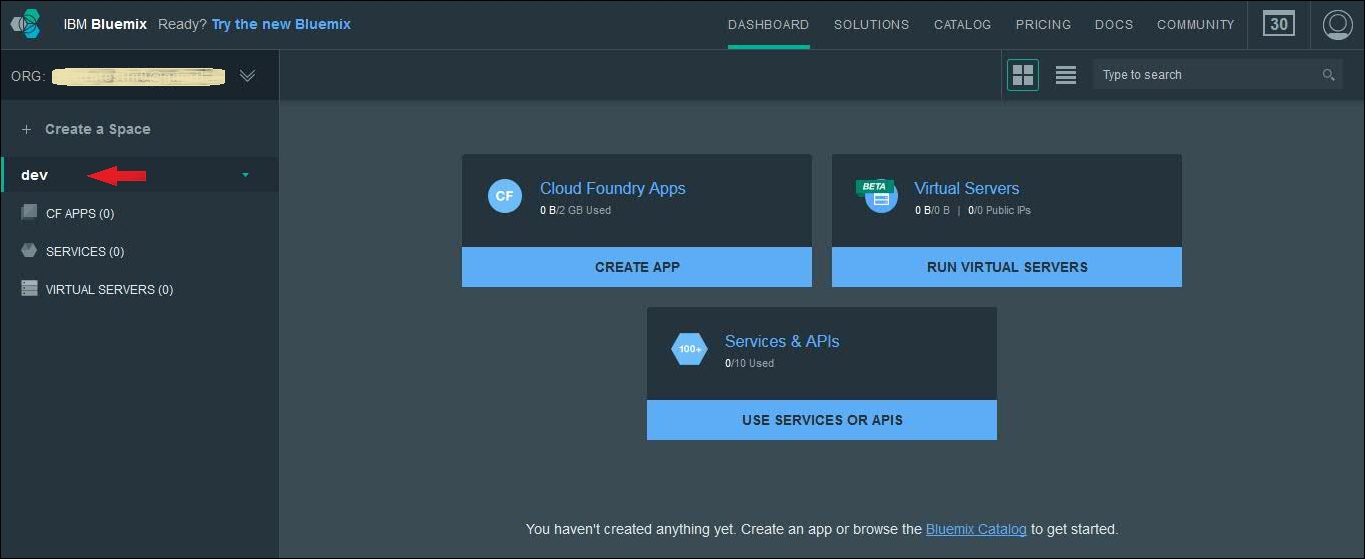
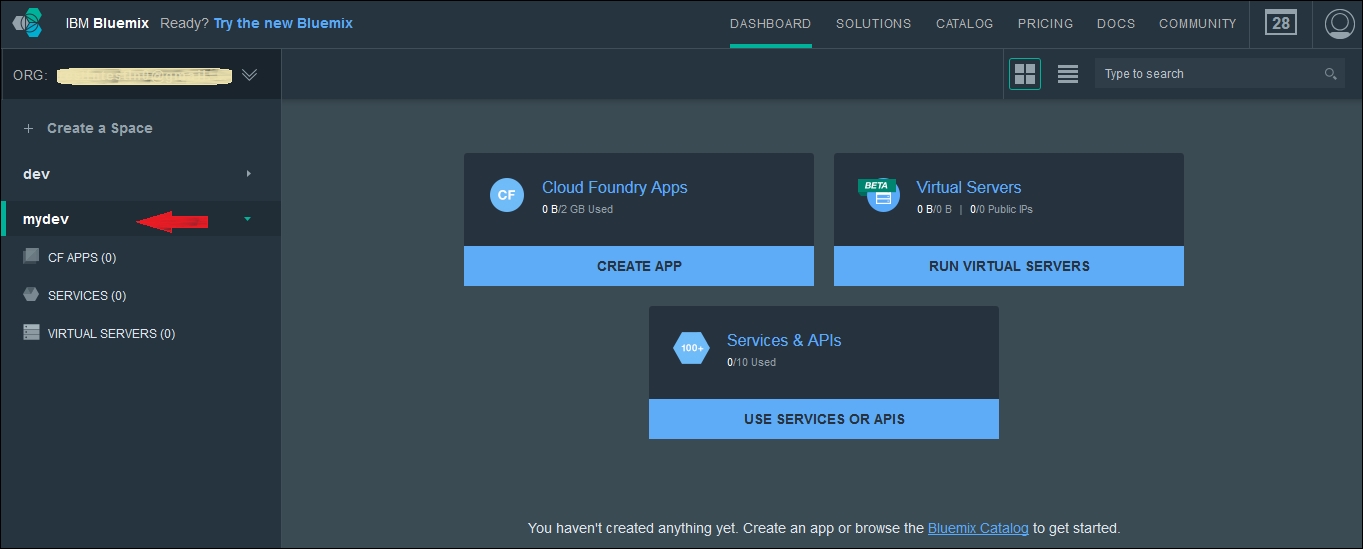
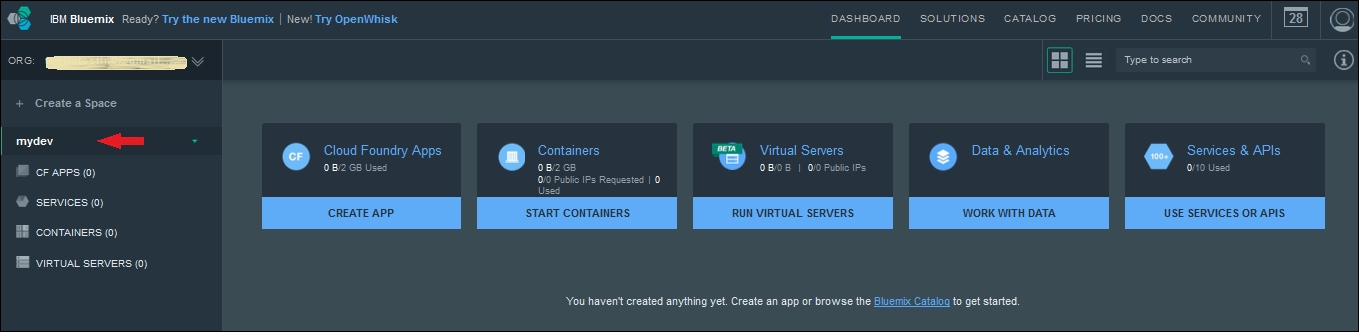
Space is a logical grouping of resources on the platform. Multiple Spaces can be created within an organization. Doing so allows the account owner to invite other users to his account and share resources with them by providing resource isolation; he does this by assigning users to a given Space. While inviting users to work on a Space, he can also assign roles for the users that would define what the users can do with the resources and the platform. This is an essential concept, that makes collaborative development a possibility on the platform. In addition, it gives the flexibility of maintaining similar but different environments within the user account. One of the most popular needs to do this would be for someone to isolate test environments from that of development and production. You will notice dev is the default Space that is created for your organization:
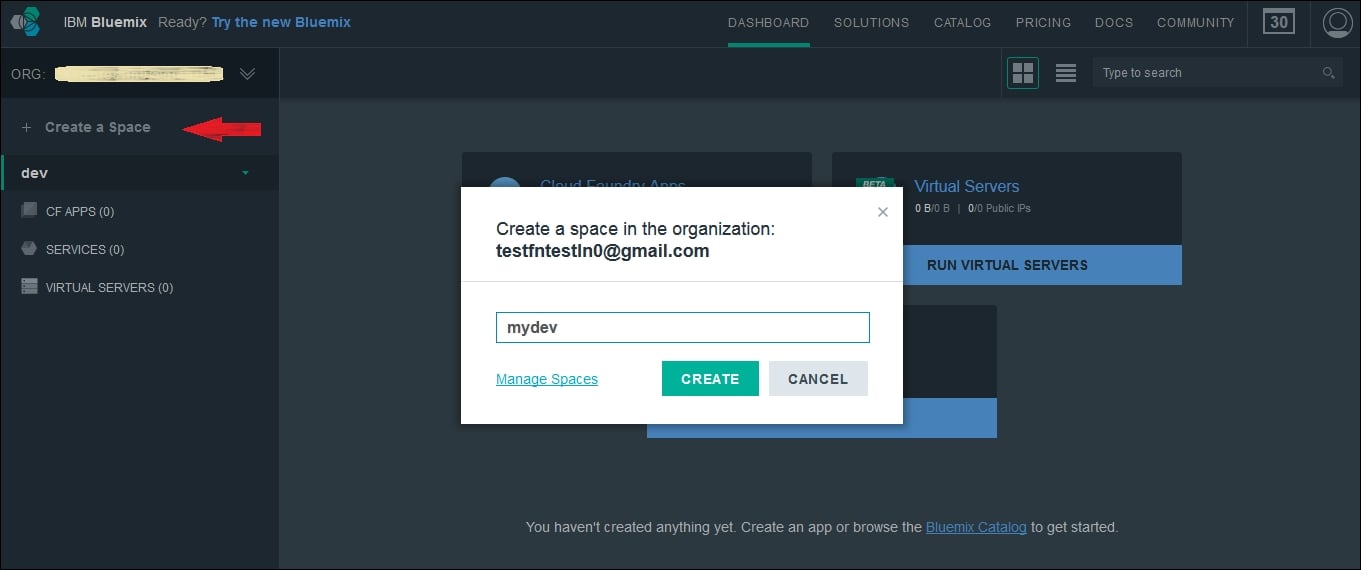
You can create a new Space by clicking Create a Space and providing the name of your Space in the dialog that comes up, as shown here:
Once your Space is created, you can see it listed to the left, as shown here:
You can work with your Space in the same way as you would with the default dev Space. Both the Spaces in your organization have access to and can work with the same set of resources of the platform.
Go to the account details view and click Manage Organizations; you can select the Space you want to manage, as shown here:

In the screenshot, you see that we have selected the mydev Space; the user and domain details for this Space can be managed from here. You can remove users in your Space from here. You can also delete the Space from here by clicking on DELETE.
Region is an important concept that you need to understand; you see that the Region is displayed in the account details page and this is a drop-down menu, which means that you can switch the region for your account from here:
Note
Region-based URLs
The access URLs for directly accessing your account on any of the three data centers are as follows:
https://console.ng.bluemix.net (Dallas, US South)
https://console.eu-gb.bluemix.net (London, UK)
https://console.au-syd.bluemix.net (Sydney, Australia)
Region implies the datacenter where the public Bluemix is hosted. Currently, at the time of writing this book, public Bluemix is available in three datacenters, which can be seen by expanding the drop-down menu on the account details page, explained in the previous section:
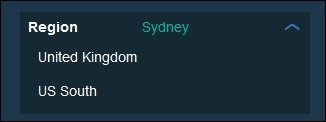
The three datacenters are as follows:
Dallas, US South
London, United Kingdom
Sydney, Australia
Any user who creates an account on Bluemix is provided an ORG and default Space in one the datacenters. However, the user can also access his account on any of the other datacenters by creating a Space for his organization.
When you first sign up for your account and go to the login URL from your confirmation e-mail, you will notice being redirected to one of the three URLs mentioned in the preceding information box. That will give you the information on the datacenter where your account and default Space exists.
The demo account used in this chapter is created in the Sydney, Australia datacenter, as you would see from the account details screenshot where Sydney is selected as the default Region. Now, if I would like to use Bluemix from another Region, say, US South for example, I can change the drop-down value of the Region in the account details page to US South. This will automatically redirect me to https://console.ng.bluemix.net , which you can witness in the address bar of the browser. Now, since this is a datacenter region that I am going to for the first time since my account creation and since this is not the default datacenter where my default Space was created, you will see the following in your browser:
Note
Working with different Regions
Throughout this book, we will work across Regions on Bluemix and you should now know how to switch your Region using the Bluemix console.
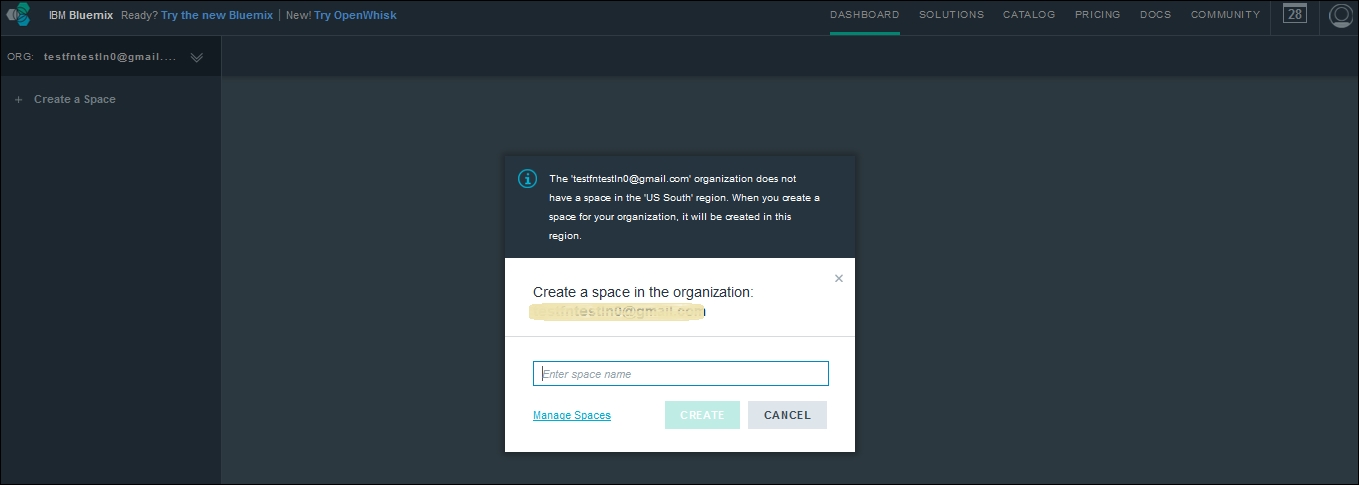
You will see here that you do not have a default Space in this datacenter. You are, however, prompted to create one to continue to use your account on this datacenter.
Enter the name of the Space you would like to create in this region and click CREATE:
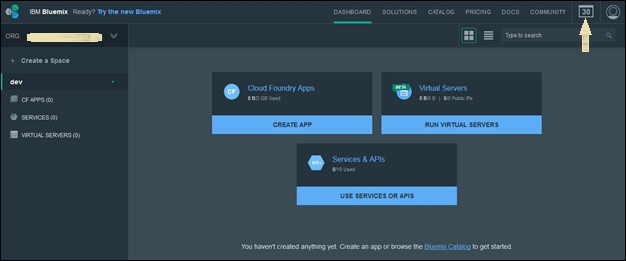
You will see that my mydev Space is created, and now I am on my account on the US South datacenter.
The dashboard for you is displayed as shown in the screenshot. You will observe that the dashboard that you saw when the region of this demo account was Sydney, Australia, is slightly different from the dashboard in the US South region; this is because Bluemix is continuously evolving as a platform. The latest and greatest set of capabilities of the platform are first pushed to the US South datacenter, which is then incrementally and in a phased manner pushed to the other datacenters.
Now let us switch the Region back to Sydney from the account details page.
The number of days your account will be active is indicated on your dashboard, as seen in the following screenshot. Since we have signed up for the free trial period, you will see 30 days indicated in your dashboard. As you progress with Bluemix, with passing days on your account, you will see a countdown to the number of days left for your account:
Clicking the icon showing the number of days left, as shown in the following screenshot, brings up the information on how you can upgrade your Bluemix account from being a trial account to a paid account:

You can get more information on Bluemix pricing by going to www.bluemix.net/pricing/ .