Book Image

Amazon Web Services Bootcamp

Book Image

Amazon Web Services Bootcamp

Overview of this book

AWS is at the forefront of Cloud Computing today. Businesses are adopting AWS Cloud because of its reliability, versatility, and flexible design. The main focus of this book is teaching you how to build and manage highly reliable and scalable applications and services on AWS. It will provide you with all the necessary skills to design, deploy, and manage your applications and services on the AWS cloud platform. We’ll start by exploring Amazon S3, EC2, and so on to get you well-versed with core Amazon services. Moving on, we’ll teach you how to design and deploy highly scalable and optimized workloads. You’ll also discover easy-to-follow, hands-on steps, tips, and recommendations throughout the book and get to know essential security and troubleshooting concepts. By the end of the book, you’ll be able to create a highly secure, fault tolerant, and scalable environment for your applications to run on.
Table of Contents (16 chapters)

Group


AWS IAM Group allows us to group multiple policies together, which can then be attached to IAM Users. This group provides the flexibility to IT administrators to manage groups based on admins, developers, teams, departments, or organizations. The group contains a list of policies, which contain permissions to access AWS resources.

Let's look at different ways to create the AWS IAM Group.

AWS Management Console

The AWS Management Console allows us to create and manage the groups.

Creating a group

Create a new group under your AWS account using the following steps:

  1. Go to AWS IAM Management Console at https://console.aws.amazon.com/iam/home and click on Groups from the left navigation or you can directly go to https://console.aws.amazon.com/iam/home#/groups
  2. Under Groups, you can see a list of the groups you created
  1. Click on the Create New Group button:

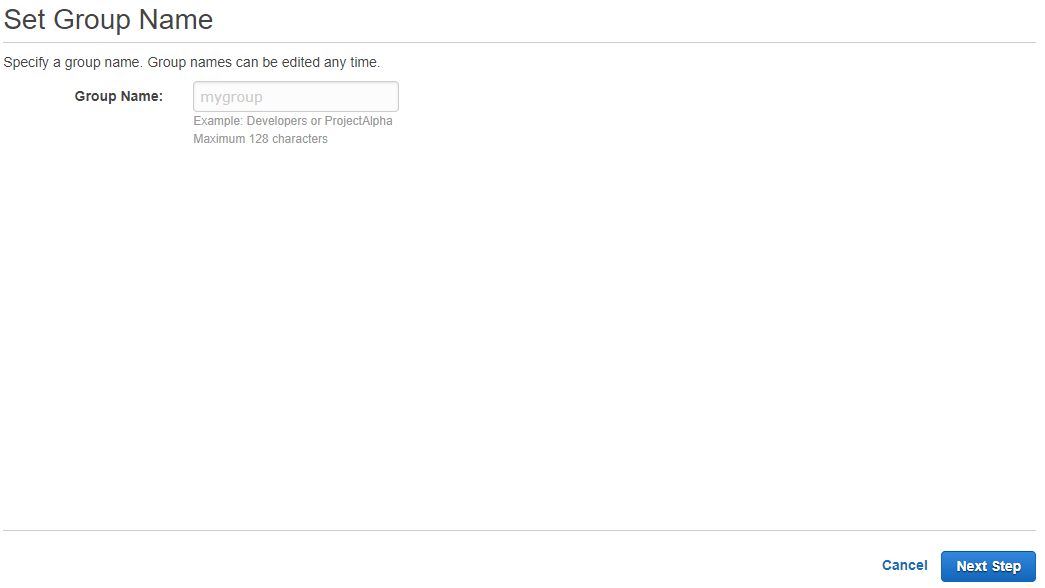
Figure 2.8: Set Group Name

Provide a friendly name for the group to be created and click on Next Step

  1. The next step is to click on Attach Policy...