
With the scripts as simple as we have seen so far, there is little that can go wrong or need debugging. As the script grows and decision paths are included with conditional statements, we may need to use some level of debugging to analyze the scripts' progress better.
Bash provides two options for us, -v and -x.
If we want to look at the verbose output from our script and the detailed information about the way the script is evaluated line by line, we can use the -v option. This can be within the shebang, but it is often easier to run the script directly with bash:
$ bash -v $HOME/bin/hello2.sh fred
This is especially useful in this example as we can see how each element of the embedded basename command is processed. The first step is removing the quotes and then the parentheses. Take a look at the following output:

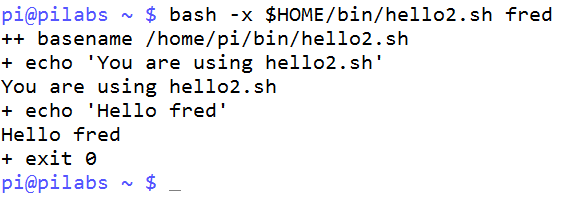
The -x option, which displays the commands as they are executed, is more commonly used. It's useful to know the decision branch that has been chosen by the script. The following shows this in action:
$ bash -x $HOME/bin/hello2.sh fred
We again see that the basename is evaluated first, but we do not see the more detailed steps involved in running that command. The screenshot that follows captures the command and output:
The previous method might be hard for beginners or people who have a programming background in which they debugged their code visually.
Another modern way of debugging shell scripts is by using Visual Studio Code.
There is a plugin called bash debug that enables you to debug bash scripts visually, as is the case for any other programming language.
You can step into, step over, add watches, and do all the other usual debugging stuff you know.
After installing the plugin, from the File menu, open your shell-scripts folder. Then you can configure the debugging process by pressing Ctrl + Shift + P and typing the following:
Debug:open launch.json
This will open an empty file; type in the following configurations:
{
    "version": "0.2.0",
    "configurations": [

        {
            "name": "Packt Bash-Debug",
            "type": "bashdb",
            "request": "launch",
            "scriptPath": "${command:SelectScriptName}",
            "commandLineArguments": "",
            "linux": {
                "bashPath": "bash"
            },
            "osx": {
                "bashPath": "bash"
            }
        }
    ]
}
This will create a debug configuration named Packt Bash-Debug:
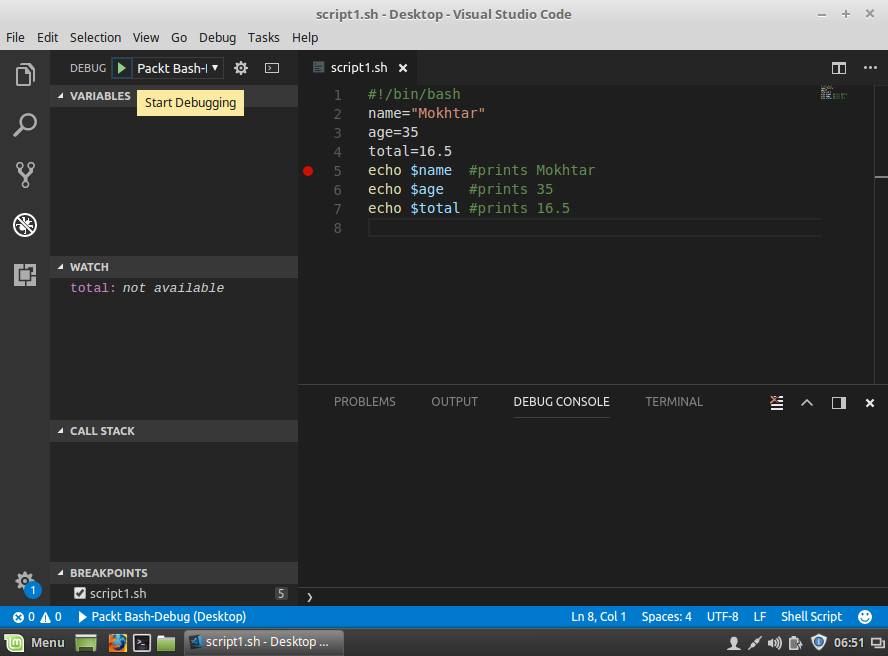
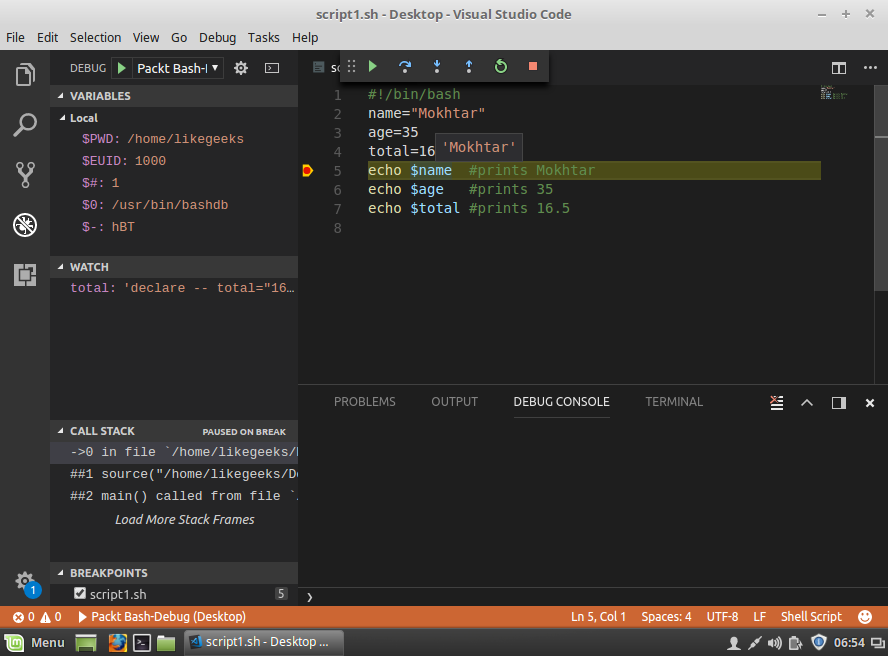
Now insert a breakpoint and press F5, or start debugging from the Debug menu; it will show you the list of .sh files:
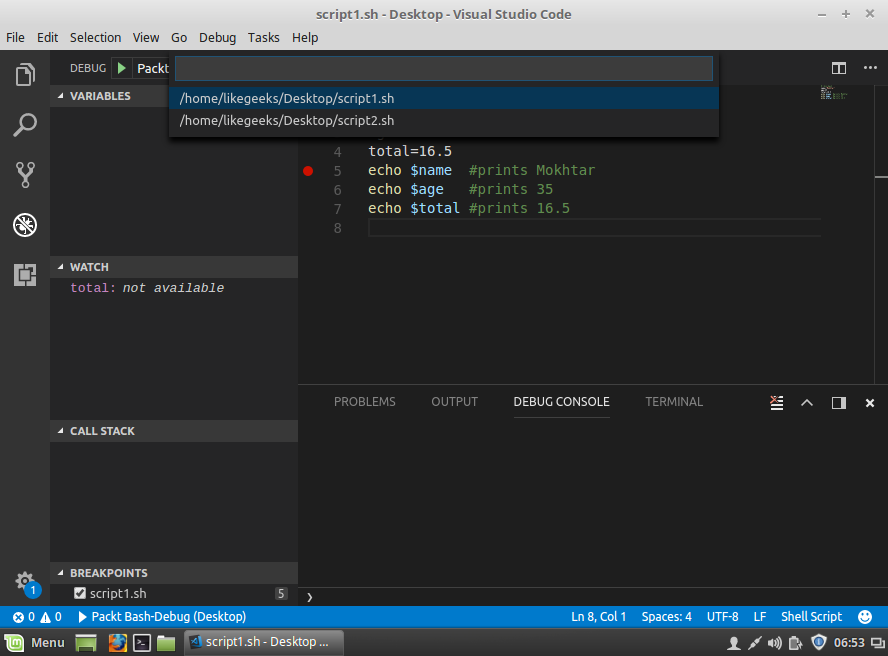
Select the one you want to debug, and set a breakpoint on any line to test it, as shown in the following screenshot:
You can add watches to watch variables' values while stepping over your lines of code:
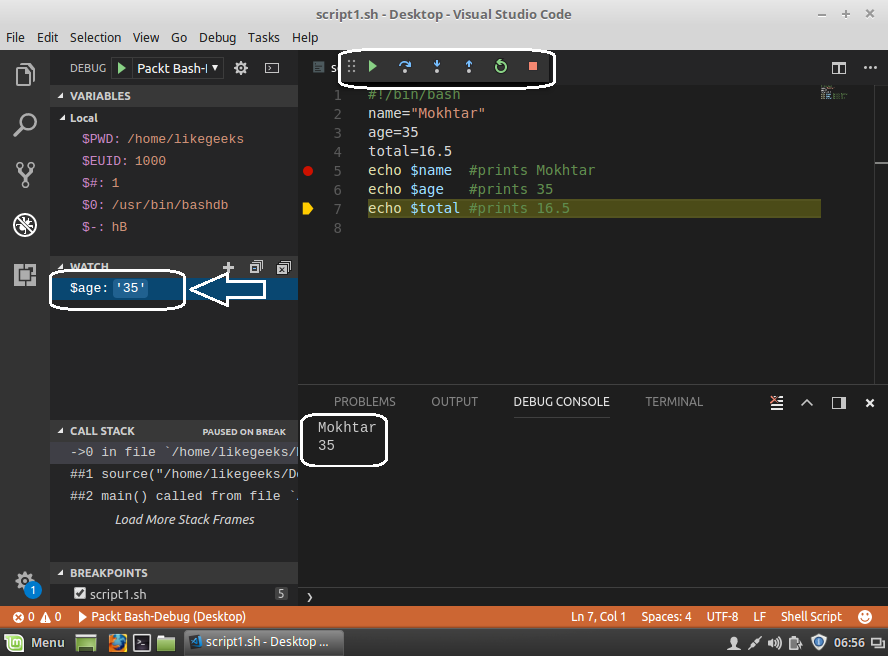
Now you can enjoy the visual method of debugging. Happy coding!