
Azure offers a wide range of services, and learning the fundamentals on how to do basic management on everything can be scary. The Azure portal provides a consistent experience that covers finding an instance of a resource to performing basic management operations. In this section, we will introduce the Azure portal.
Azure portal experience
Signing up for a free Azure subscription
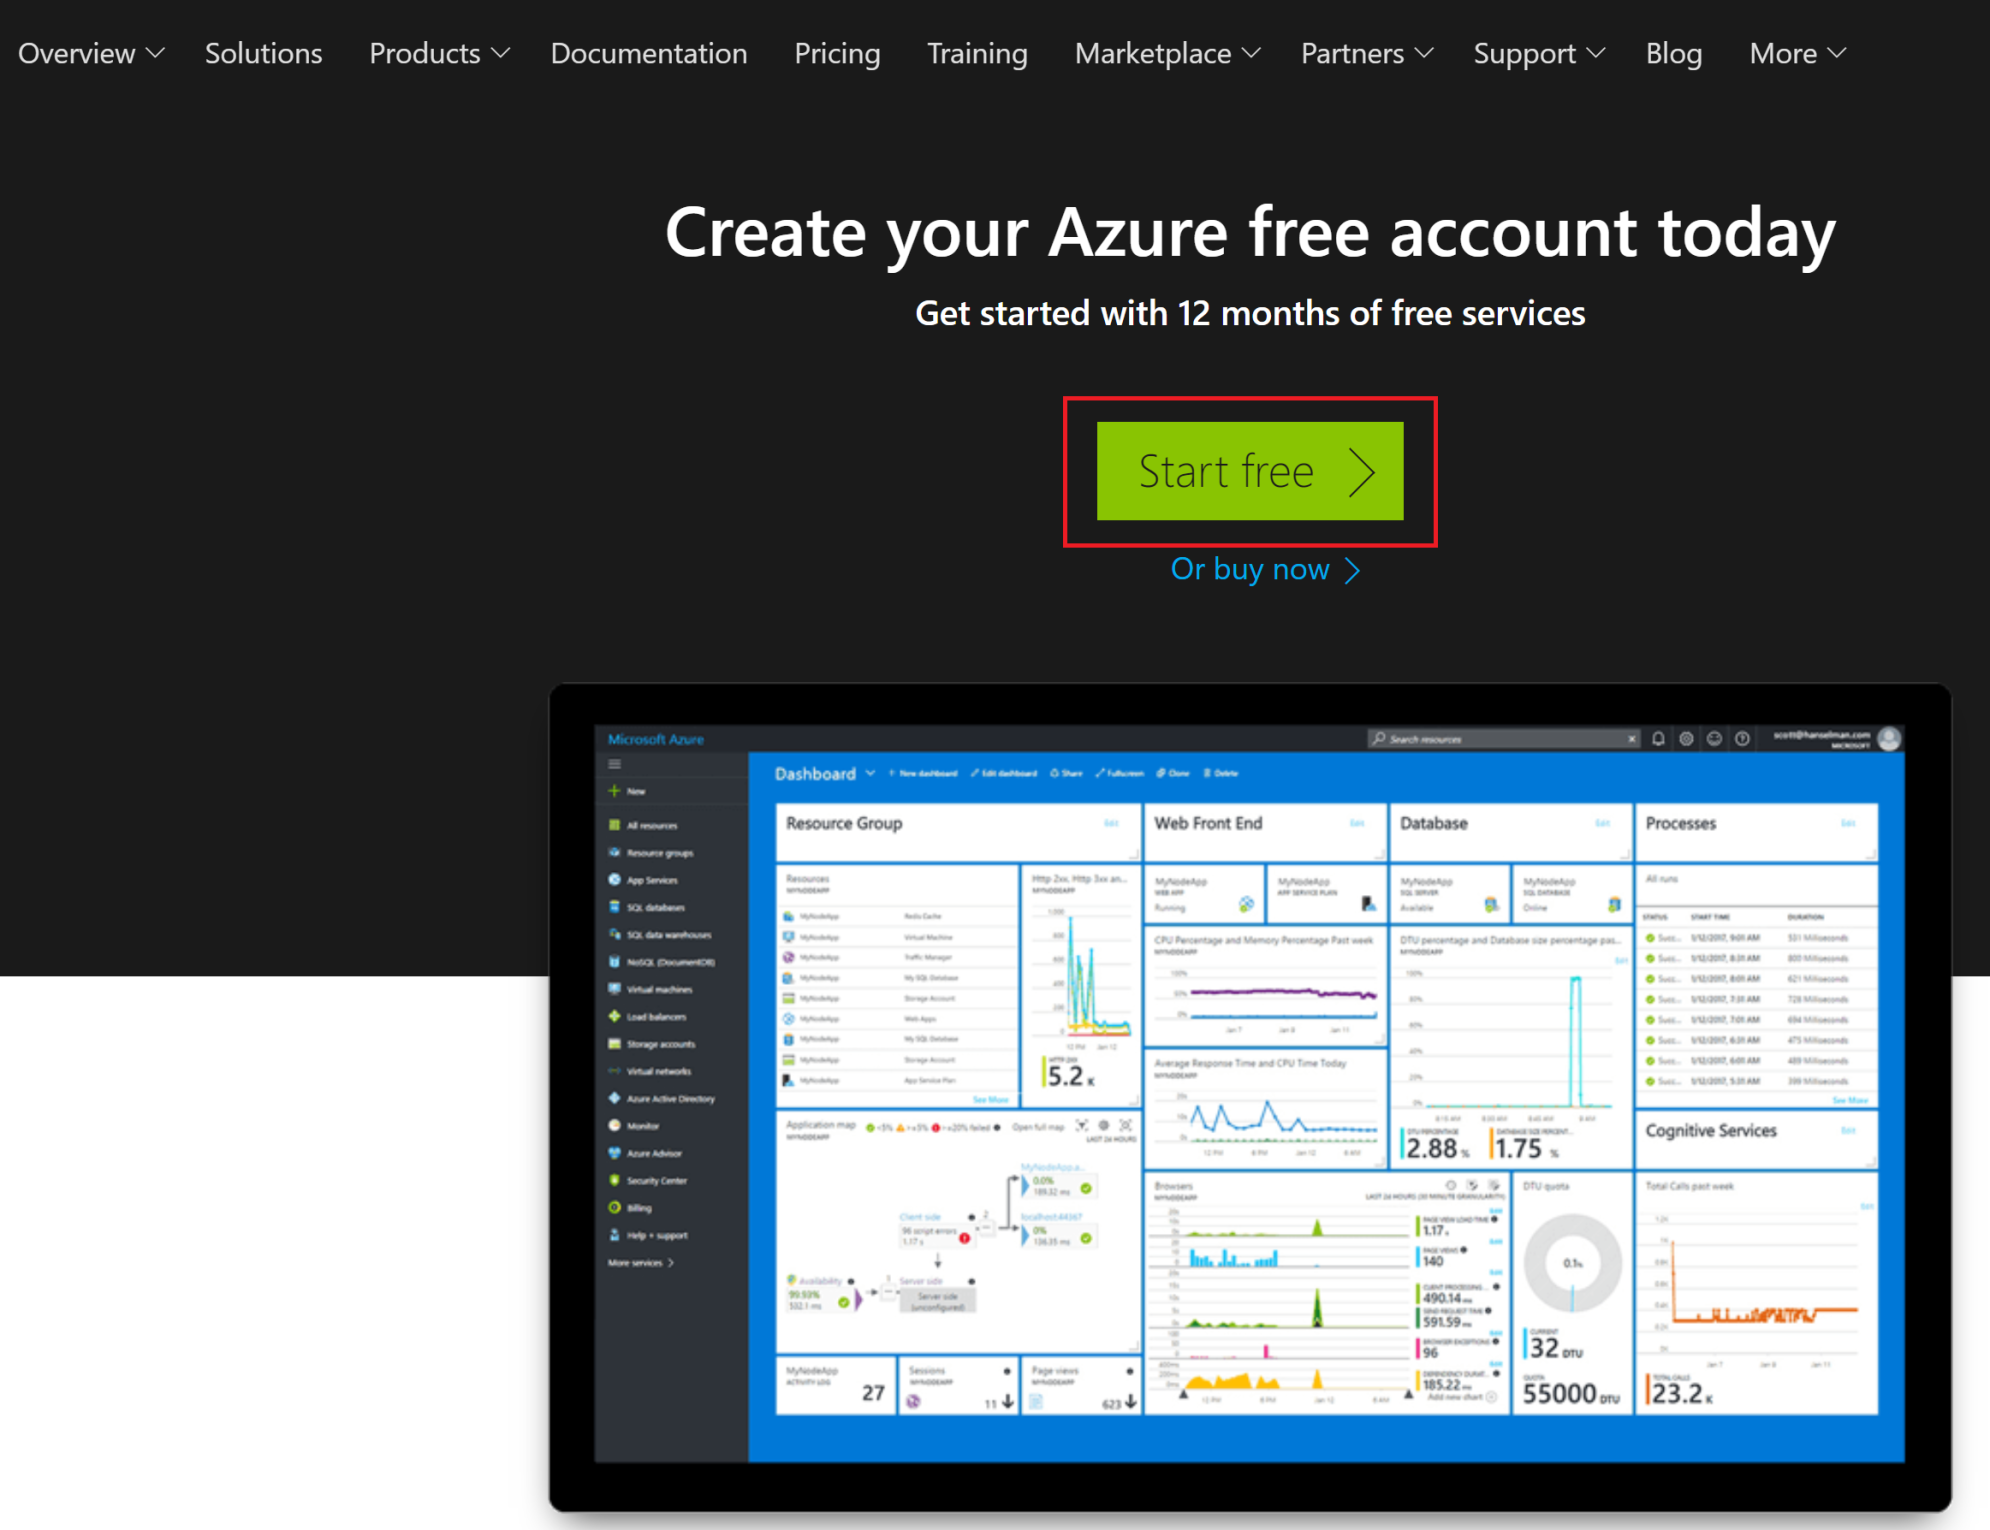
Before getting started with the Azure portal, let's create a free subscription that you can use throughout this book:
- Navigate to https://azure.microsoft.com/.
- Click on Start free.
- You will be navigated to another web page, where you will be asked to start for free or to buy now. We will select Start free for the sake of testing throughout this book:
- After that, you will be redirected to log in using your Microsoft account.
- Then, you will be asked to enter some personal information, such as your name, country, and phone number. Some verification will be done by phone and credit card.
- Within a few moments, your Azure account will be ready.
The portal
Once your account has been created, you can login to the Azure portal. The portal can be accessed at https://portal.azure.com.
The portal is your way to access and manage your resources in Azure, such as VMs, web apps, SQL databases, and so on. This is the easiest way, but it is not the only way. More ways will be discussed later on in this chapter.
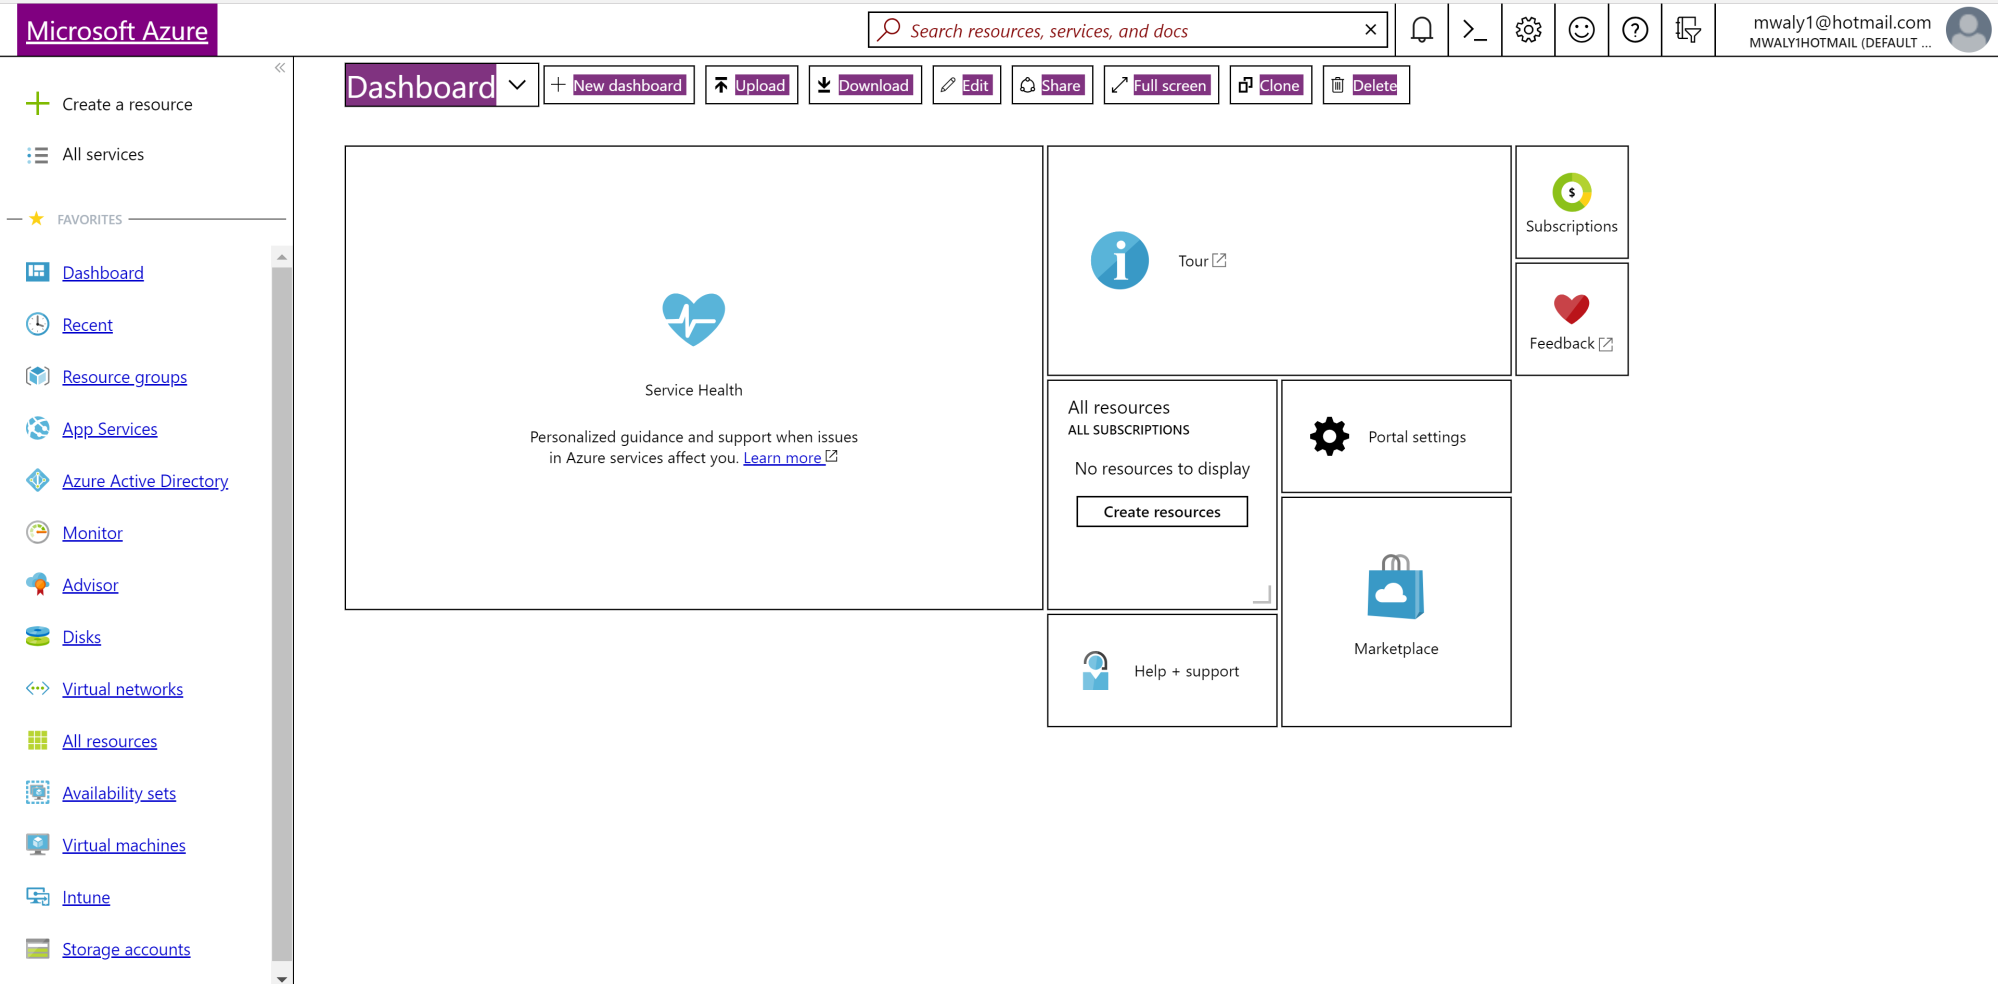
When you first log in the portal, it will look like the following screenshot:
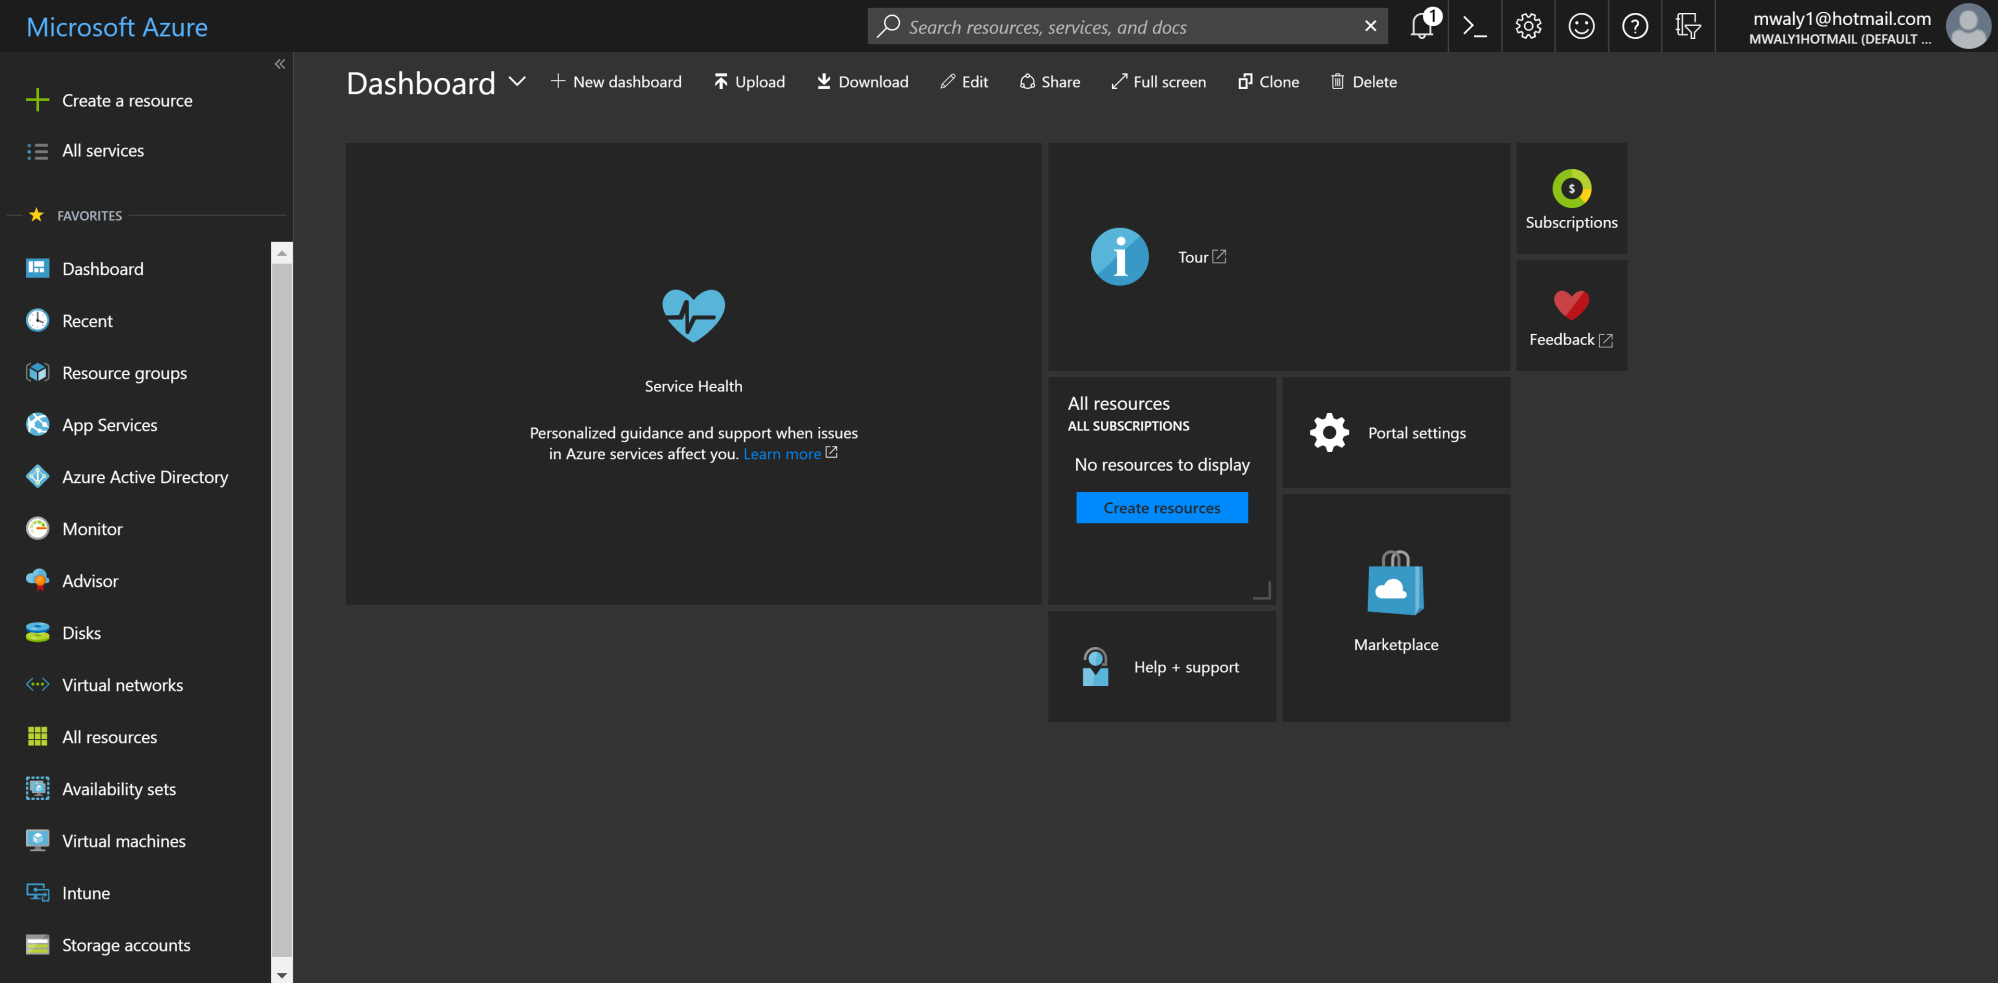
As you can see, this portal consists of many parts. Let's break it down to understand what it consists of.
The dashboard
Every time you open the Azure portal, the first thing you will look at is the dashboard:

That's why you can pin every Azure service, so you can view what is important to you to in the dashboard. You can easily access it from here, instead of opening it from it is original location.
As you can see in the previous screenshot, you can do the following:
- Create a new dashboard by clicking on the New dashboard option.
- You can back up dashboards and reuse them. To back up a dashboard, you need to click on the Download option. This will download a JSON file. You can restore the dashboard by clicking on the Upload option. This will prompt you to specify the JSON file of the dashboard you want to restore.
- To edit the dashboard to resize the tiles, delete it, or change its location, you have to click on the Edit option.
- When you have a dashboard, you might want to share it with someone else. To do so, you need to click on the Share option. This will ask you whether you want to publish it or not, and then you can control who will access it.
- You can also have the dashboard in full screen mode by clicking on Full screen option.
- If you want to have a copy of the dashboard to manipulate or test something new in the meantime, you will want to keep the dashboard intact for people to access it. You can clone it by clicking on the Clone option. This will make a copy of the dashboard.
- If you no longer need a dashboard, you can delete it by clicking on the Delete option. This will ask for a confirmation that you want to delete the dashboard.
- In case you have more than one dashboard and want to navigate between them, you can click on the Dashboard option. This will open a drop-down list with all the existing dashboards, and then you can click on the one you want to navigate to.
The hub
This is the column you can see in the left-hand menu when you log in to the Azure portal. It displays Azure services in a more organized way. For example, if you created some VMs, you can view and manage them by clicking on Virtual machines in the hub, and the same goes for the other services, as shown in the following screenshot:
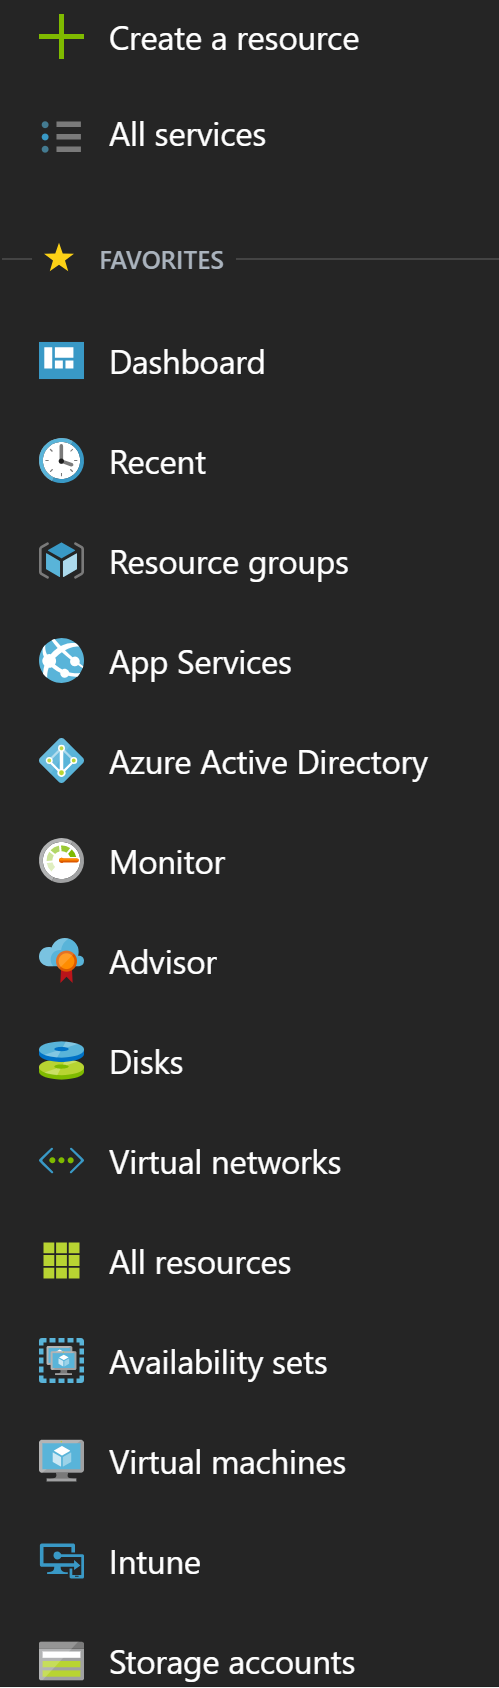
You will note that not all the services are displayed in the left menu. In order to display all of them, click on All services, and you can use the filter to narrow down your search for the service you want:
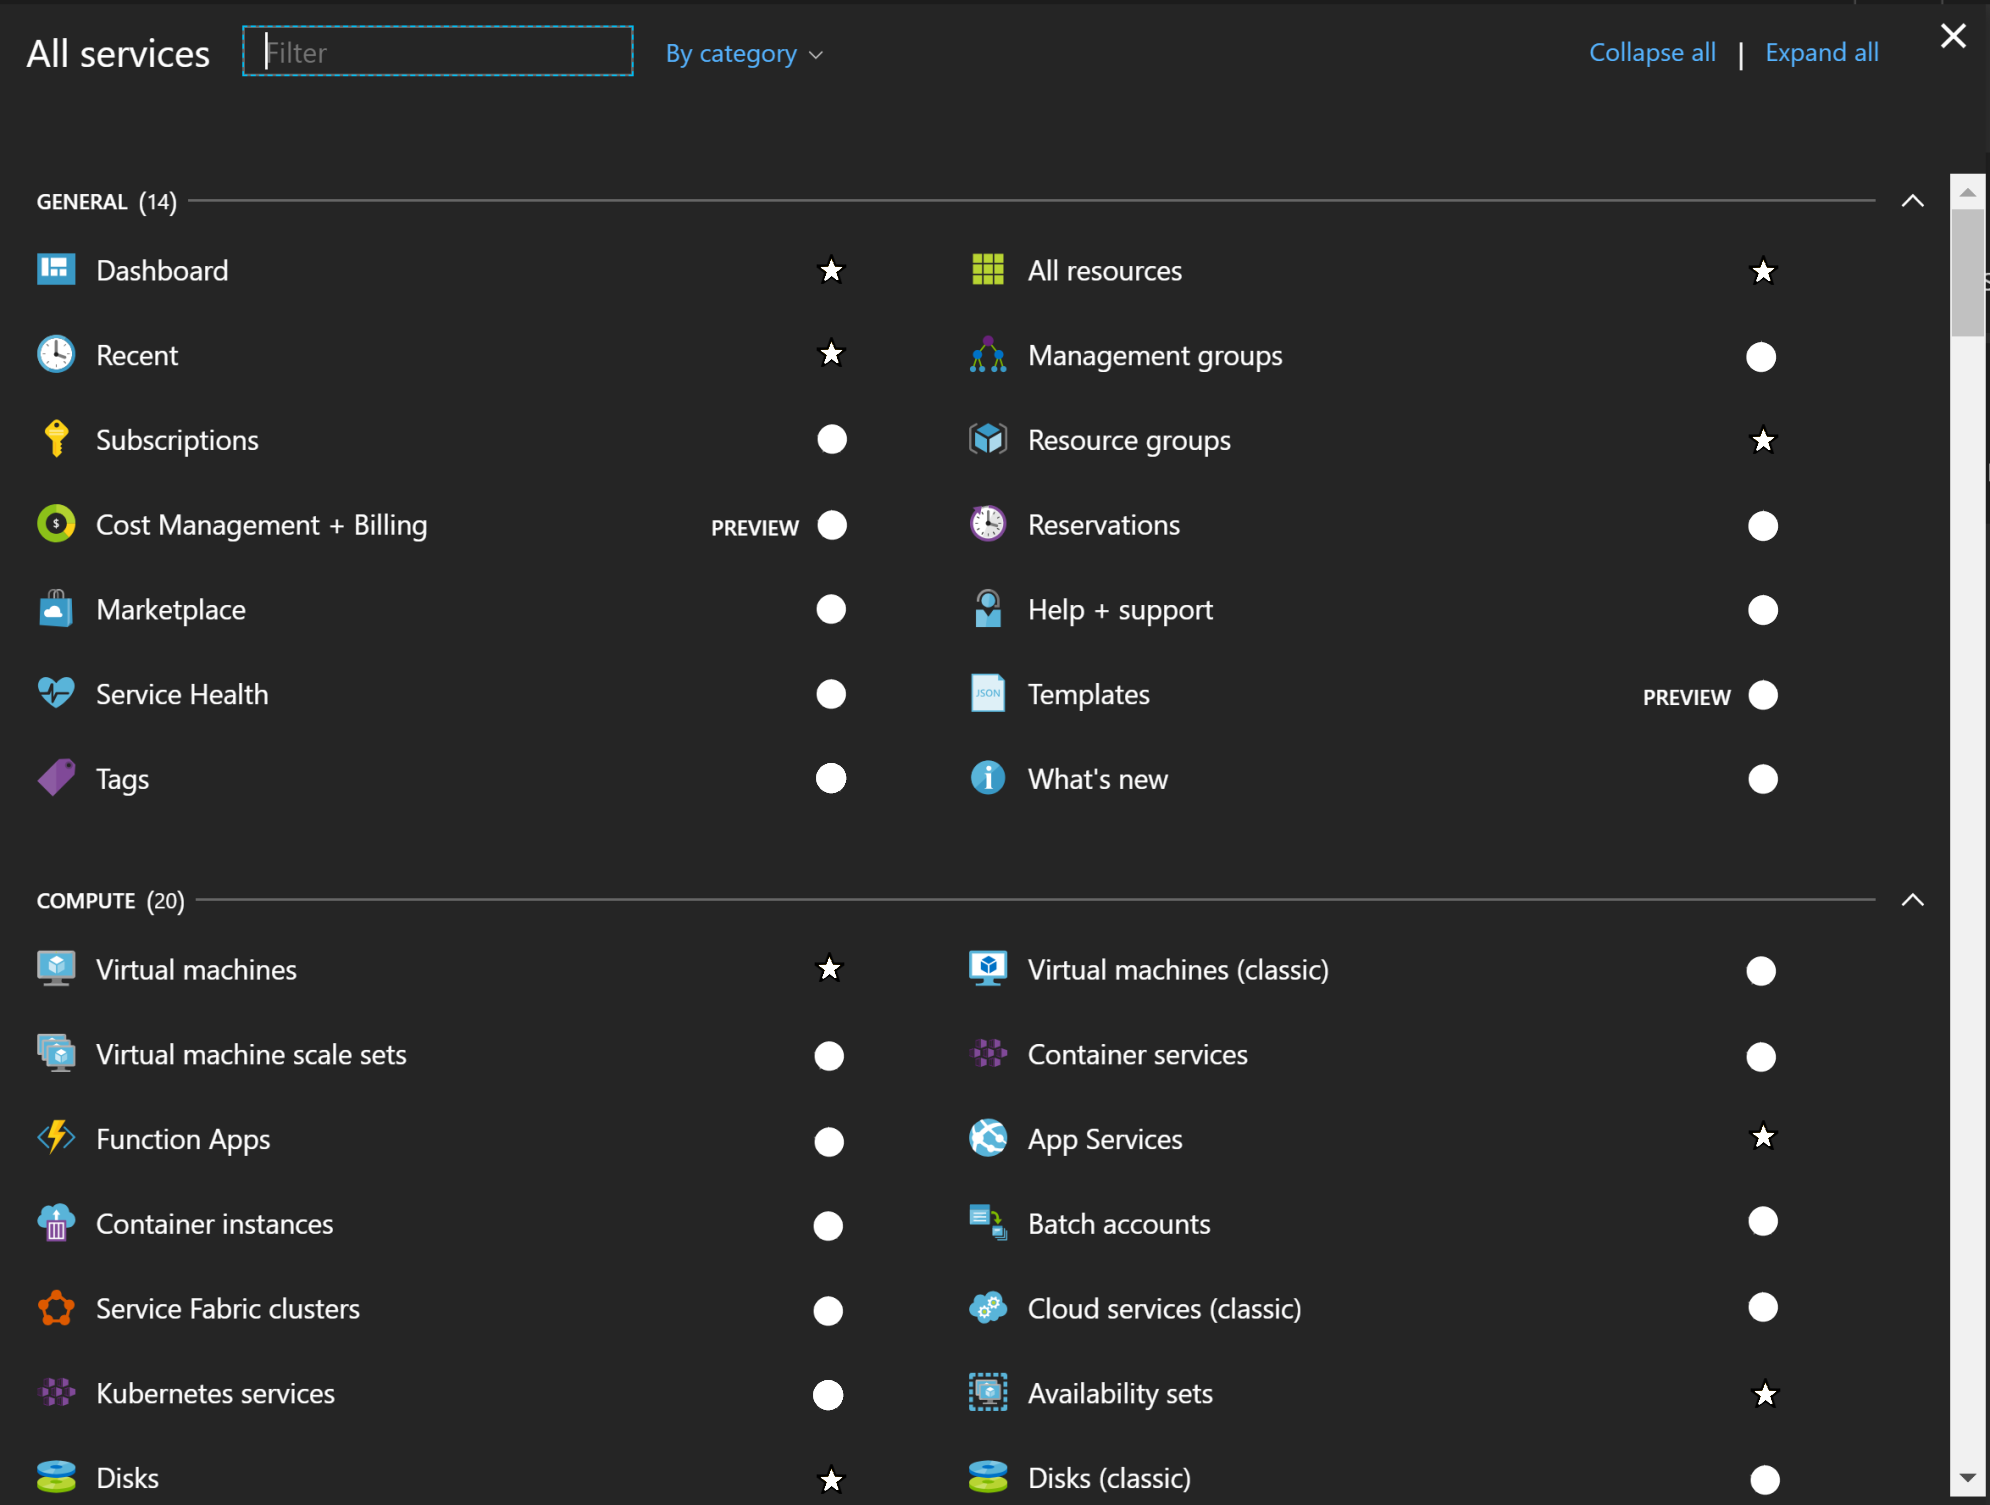
As you can see in the preceding screenshot, there are stars and circles. The stars are pinned to the main hub; the circles are not. So, you can select what is to be displayed to make your access to the services much easier.
The window that pops up when you click on one of the Azure services in the Azure portal, such as Virtual machines is called a blade.
A set of blades or chain of selections is called a journey. For instance, when you select Virtual machines inside the Azure portal, click on an existing virtual machine and then select its settings.

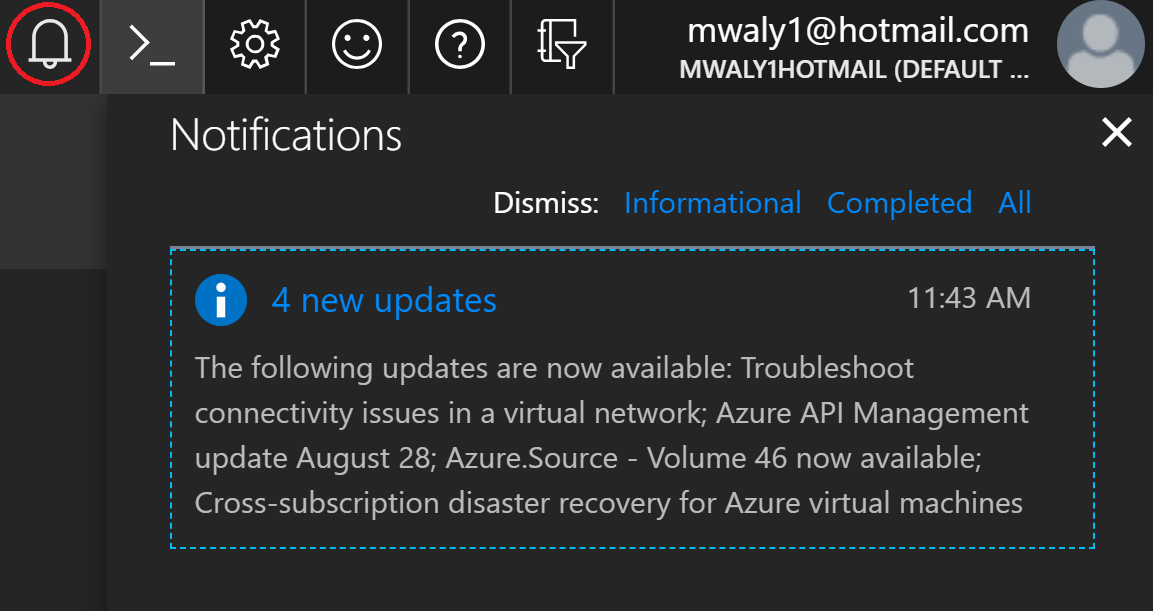
Notifications
If you are creating, modifying, or deleting an Azure resource, or if there's any update from Microsoft related to Azure services, you will note all of that in the Notifications pane. You can open it by clicking on the bell in the top-right side of the portal:
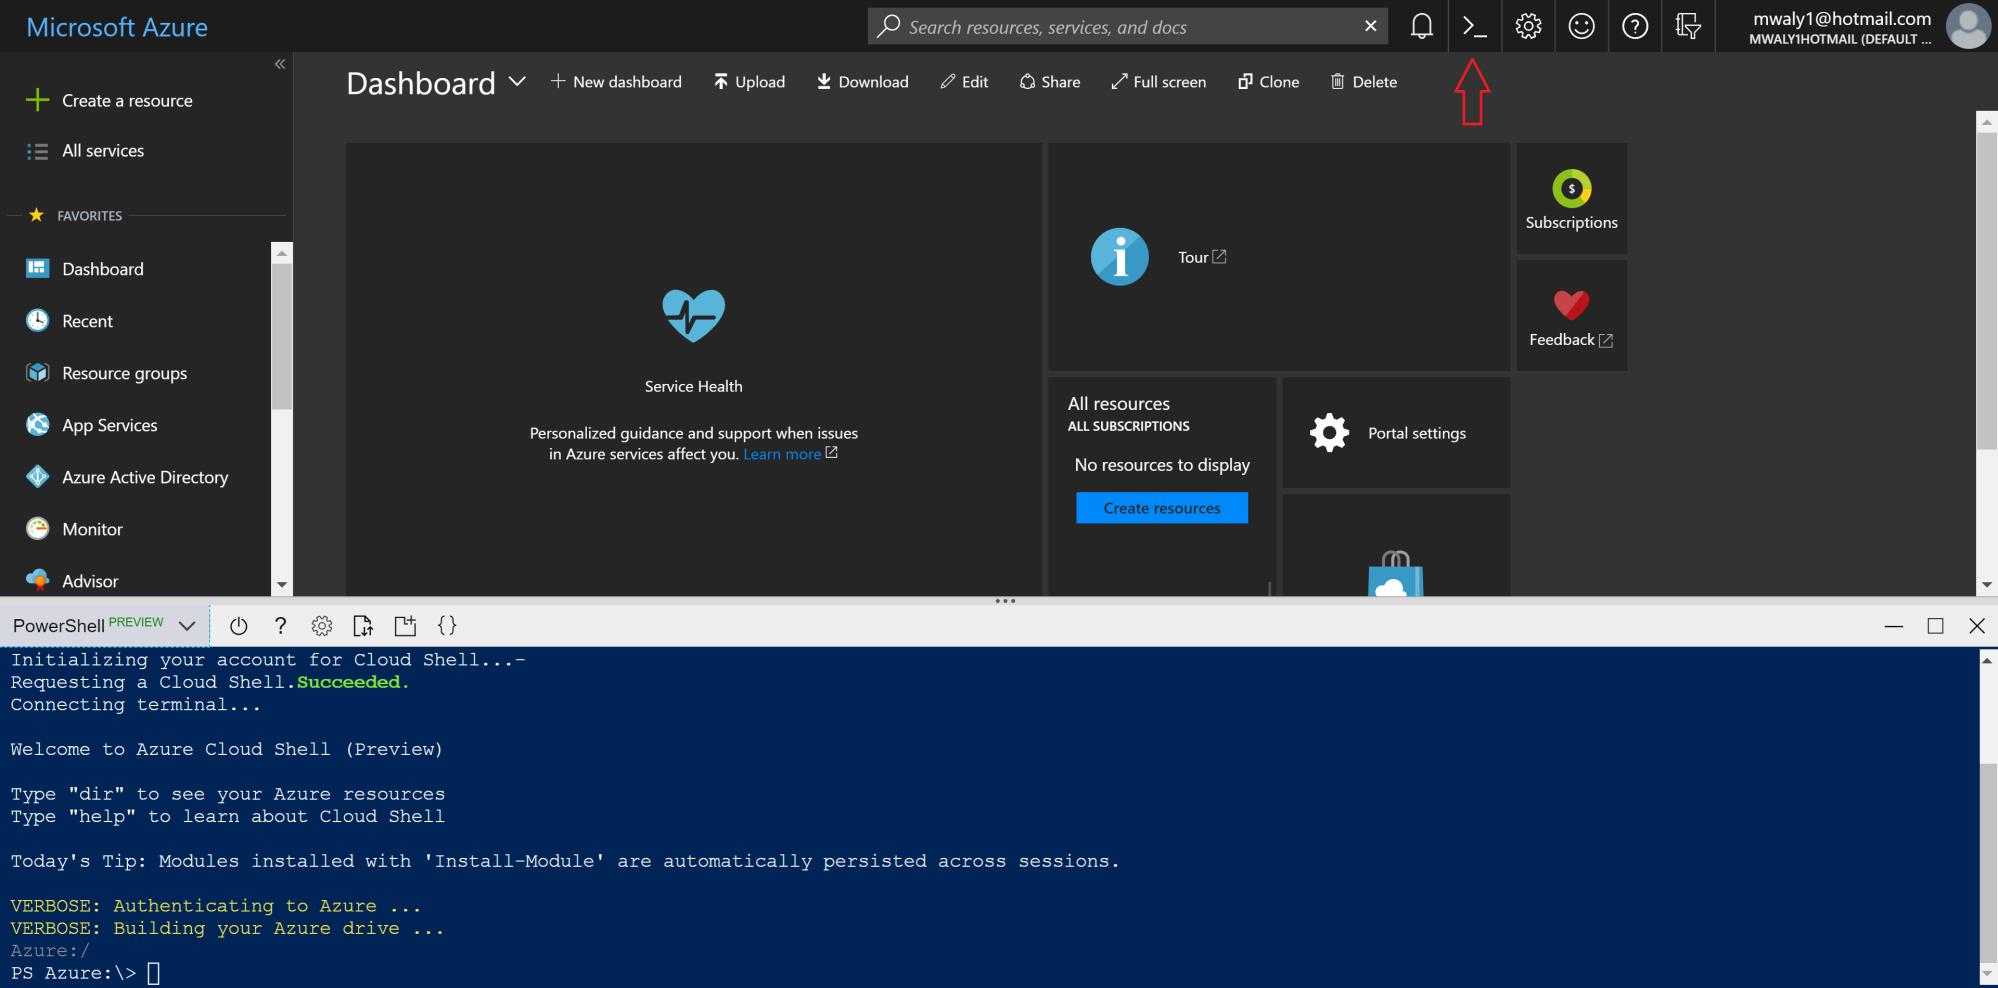
Azure cloud shell
This is an interactive shell that can enable you to manage Azure services either via PowerShell for Windows users or Bash for Linux users.
At the time of writing, using PowerShell in the Azure Cloud Shell was in preview. You can access it from the portal, as shown in the following screenshot:
Azure portal settings
You can manage the settings of the portal by clicking on the gear icon on the top-right of the portal, as shown in the following screenshot:
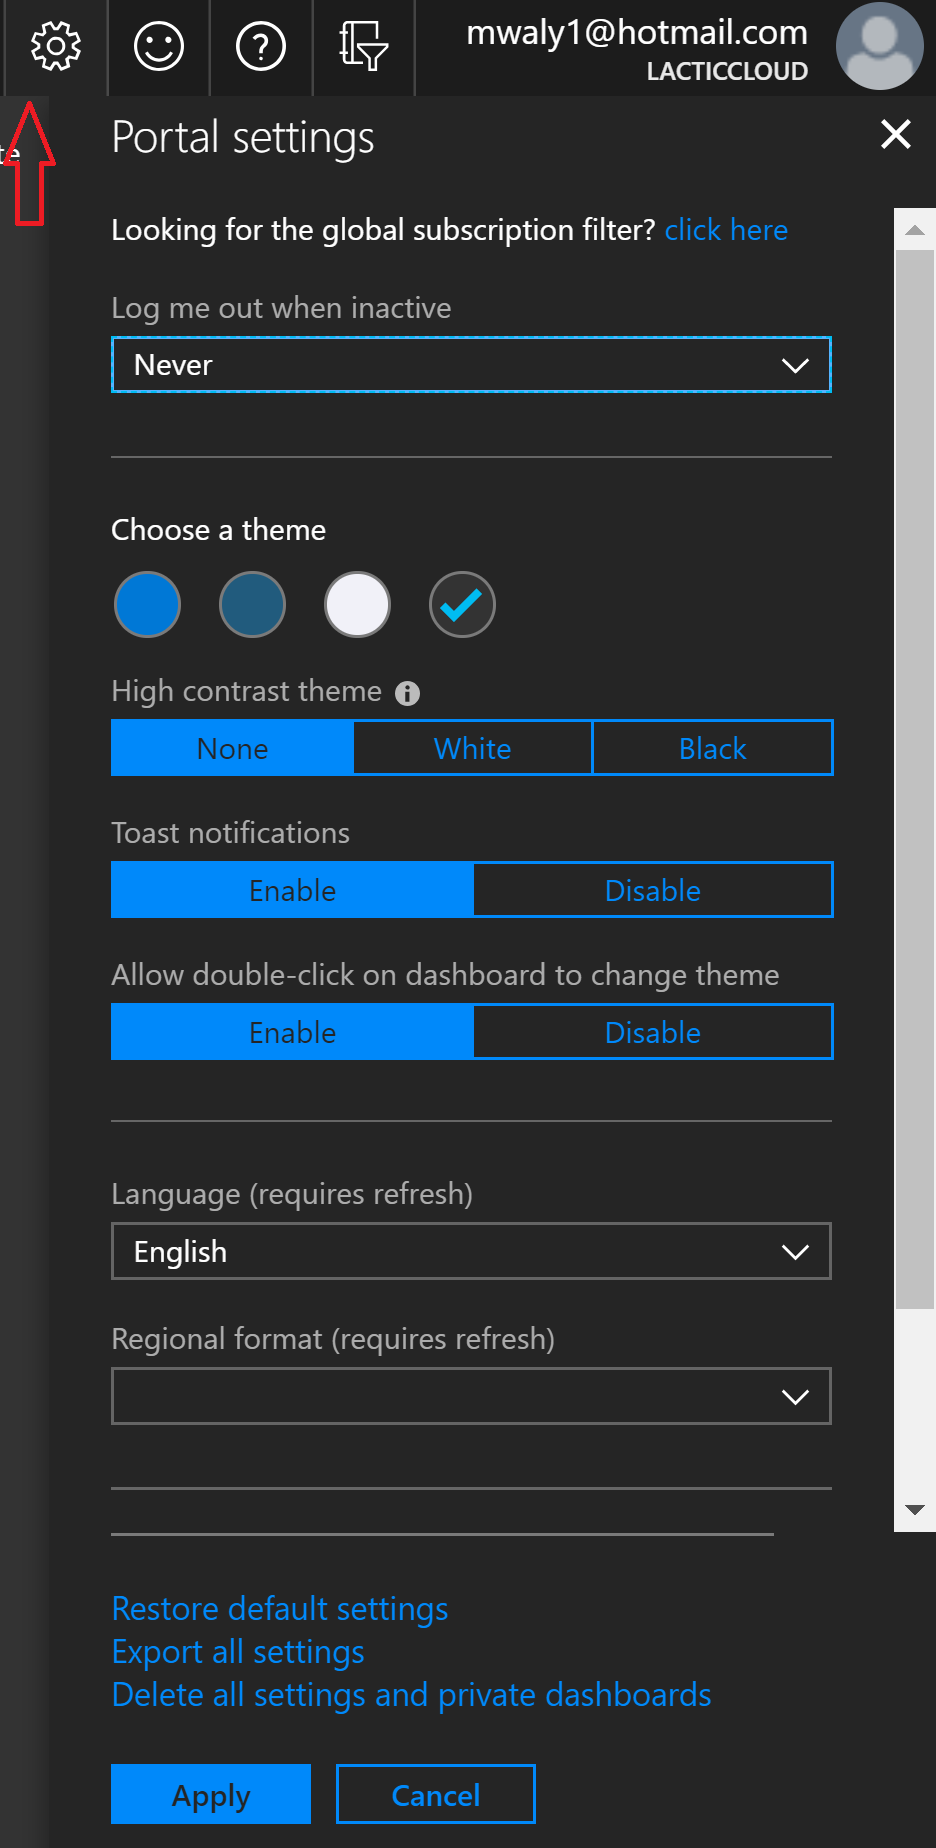
As shown in the previous screenshot, you can control the following:
- Log me out when inactive: You can define how long it will take to sign out from the portal when you are not active in it any more. For security reasons, you need to consider this.
- Choose a theme: You can change the theme of the portal according to the colors displayed in the previous screenshot. You can select a color that will make you comfortable while working in the Azure portal.
- High contrast theme: Using a high contrast theme overrides the theme selection you made in the previous step. You are only allowed to navigate among the following options:
- None: This will not impact the theme selection.
- White: This will make the portal very white, as shown in the following screenshot:
-
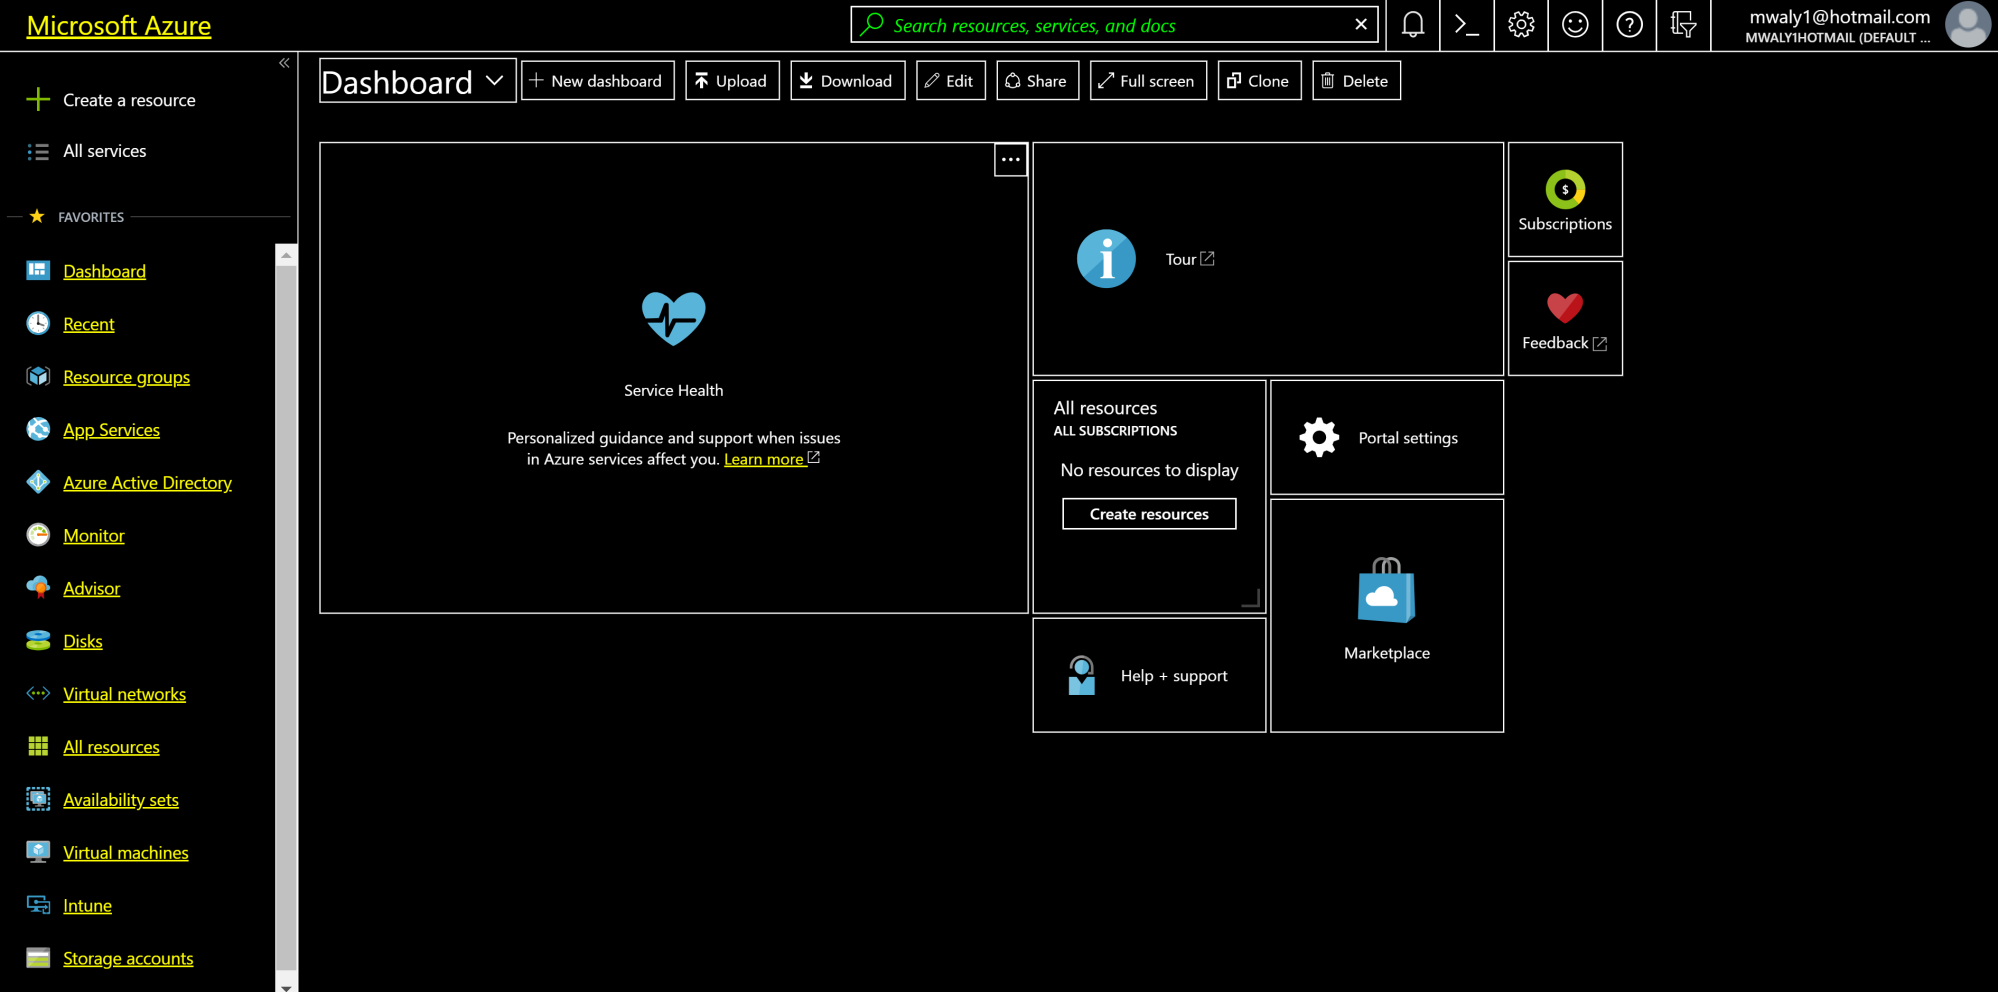
- Black: This will make the portal very black, as shown in the following screenshot:
- Toast notifications: In the notifications section, I've illustrated that when you create, modify, or delete any Azure resource, you will receive notifications. These notifications can be displayed by clicking on the bell, but at the time the process happens you will receive a toast notification, as shown in the following screenshot:

If you disable toast notifications, you will be able to see the notifications under the bell icon, but nothing will pop up during the process to notify you.
- Allow a double-click on dashboard to change the theme: As this setting indicates, you can change the theme of the portal by double-clicking, which is enabled by default. You can disable it if you wish.
- Language: Specify the language of the portal.
- Regional format (requires refresh): You can select a regional format for the language according to the country you are living in. For example, if you are living in Australia, then the language will be English. In this setting, you can select a regional format (English Australia).
More to do in the portal
There are more things to do in the portal, such as the following:
- You can send feedback by clicking on the
 symbol in the top-right.
 - You can request help and support by clicking on the
 symbol.
 - If you have more than one directory or subscription, you can filter them by clicking on the
 symbol.
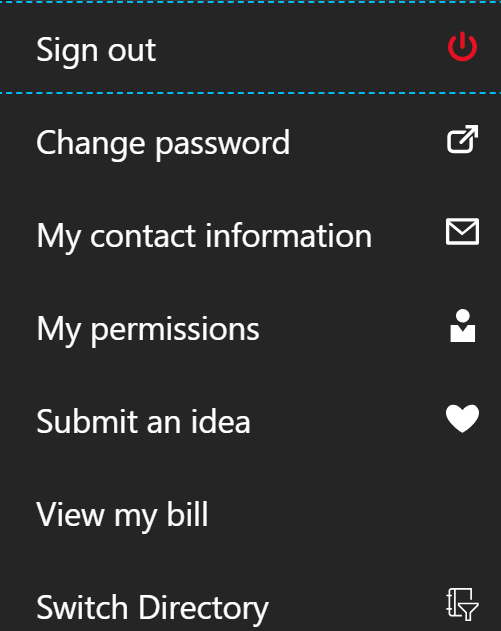
 - By clicking on the account that you are using in the top-right of the portal, you can sign out, change the password, view your contact information, and more, as shown in the following screenshot: