
Public galleries such as PSGallery are great sources of interesting and useful modules. You can also create your own PowerShell repository for either personal or corporate use.
There are several ways to set up an internal repository, for example using a third-party tool such as ProGet from Inedo (see https://inedo.com/ for details on ProGet). The simplest way is to set up an SMB file share and use the Register-PSRepository command to set up the repository. Once set up, you can use the Publish-Module command to upload modules to your new repository and then use the repository to distribute organizational modules.
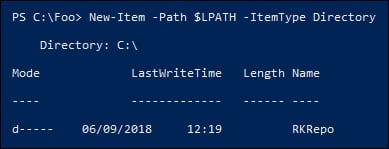
Create the repository folder:
$LPATH = 'C:\RKRepo'
New-Item -Path $LPATH -ItemType Directory
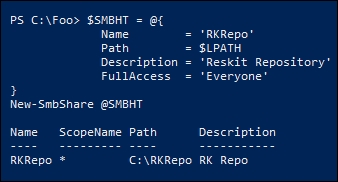
Share the folder:
$SMBHT = @{
  Name        = 'RKRepo'
  Path        = $LPATH
  Description = 'Reskit Repository'
  FullAccess  = 'Everyone'
}
New-SmbShare @SMBHT
Create the repository and configure it as trusted:
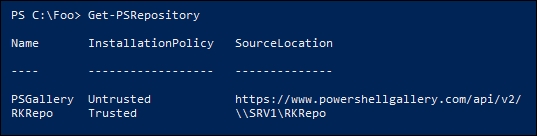
$Path = '\\SRV1\RKRepo'
$REPOHT = @{
  Name               = 'RKRepo'
  SourceLocation     = $Path
  PublishLocation    = $Path
  InstallationPolicy = 'Trusted'
}
Register-PSRepository @REPOHT
View the configured repositories:
Get-PSRepository
Create a Hello World module folder:
New-Item C:\HW -ItemType Directory | Out-Null
Create a very simple module:
$HS = @"
Function Get-HelloWorld {'Hello World'}
Set-Alias GHW Get-HelloWorld
"@
$HS | Out-File C:\HW\HW.psm1
Load and test the module:
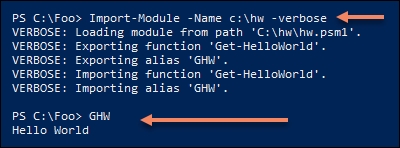
Import-Module -Name c:\hw -verbose
GHW
Create a module manifest for the new module:
$NMHT = @{
  Path              = 'C:\HW\HW.psd1'
  RootModule        = 'HW.psm1'
  Description       = 'Hello World module'
  Author            = '[email protected]'
  FunctionsToExport = 'Get-HelloWorld'
}
Publish the module to the
RKRepo:Publish-Module -Path C:\HW -Repository RKRepo
View the results of publishing the module:
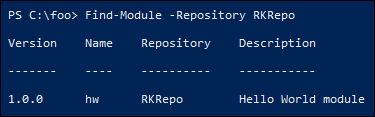
Find-Module -Repository RKRepo
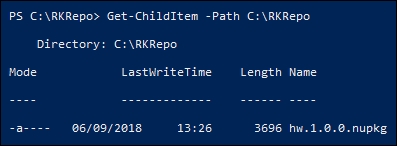
Look at what is in the
C:\RKRepofolder:Get-ChildItem -Path C:\RKRepo
You begin this recipe, in step 1, by creating the folder you are going to use to hold your repository, in this case C:\RKRepo, as follows:
In step 2, you share this folder, like so:
In step 3, you create the repository in the shared folder, which produces no output. In step 4, you view the repositories configured on the system, like this:
You next create a simple module to be published into your repository. You begin, in step 5, by creating a working folder for your module, then in step 6 you create a very simple script module with a single function. Neither step produces any output.
In step 7, you test the module by importing it from the working module folder. By using the -Verbose switch, you can observe how PowerShell imports the module, then you invoke the Get-HelloWorld function via its alias GHW, as follows:
Although the module works as-is, you need a manifest in order to publish the module. In step 8, you create a very simple module manifest and store it in the module folder. In step 9, you publish the module. None of these three steps produce any output.
With the module published, in step 10 you can use Find-Module to discover what is in the repository, like this:
The repository is just a file share holding a set of one or more NuGet packages. As you can see in step 11, our repository has just one item published, as shown here:
In step 2, you create a share that allows everyone full access to the repository. In a corporate environment, you should review the access to the repository. Perhaps you should give authenticated users read access, and grant write access to a smaller group of administrators.
As you can see in step 11, a PowerShellGet repository is just a file share that holds NuGet packages. One approach might be to keep your module source in your source code repository and publish it to the internal PowerShellGet repository as needed.