
This recipe will provide you with the steps required to deploy the required service accounts to the correct servers. It will assist you with your evaluation of Virtual Machine Manager before deploying into a production environment. For the purpose of the Service Accounts, please read Appendix, Planning Virtual Machine Manager.
It is assumed you have access to Active Directory to create and populate Security Groups and to create and link Group Policy Objects.
The following diagram shows you the high-level steps involved in this recipe and the tasks required to complete this recipe:

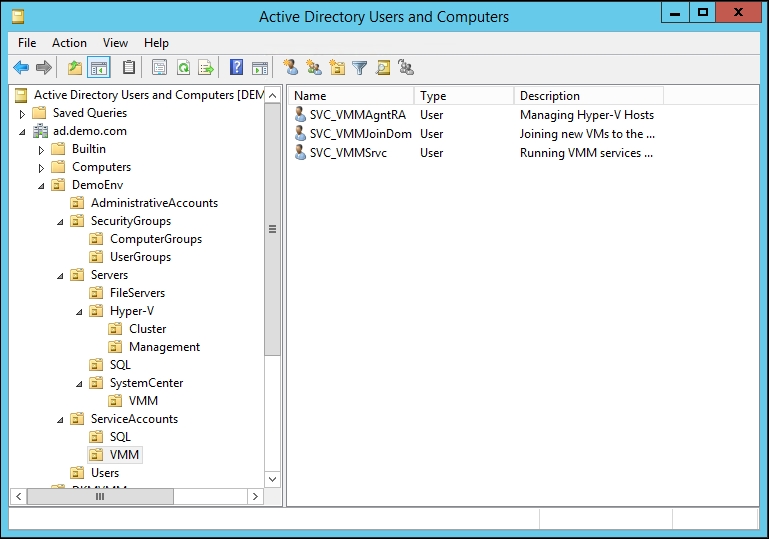
The following screenshot shows how the Active Directory Organization Units (OUs) are structured for this recipe:

The list of accounts that will be used is as follows:
|
Account name |
Use |
Username |
|---|---|---|
|
VMM Service Account |
SVC_VMMSrvc | |
|
VMM Agent Run As Account |
SVC_VMMAgntRA | |
|
VMM SQL Server Account |
SVC_VMMSQLEng | |
|
VMM SQL Server Agent Account |
SVC_VMMSQLAgnt | |
|
VM Domain Join Run As Account |
SVC_VMMJoinDom | |
|
VMM Installation Account |
Install_VMM |
Now perform the following steps:
Create the user accounts for VMM.
The user accounts for SQL are shown in the following screenshot:

The groups for Hyper-V Servers and VMM Servers are shown in the following screenshot:

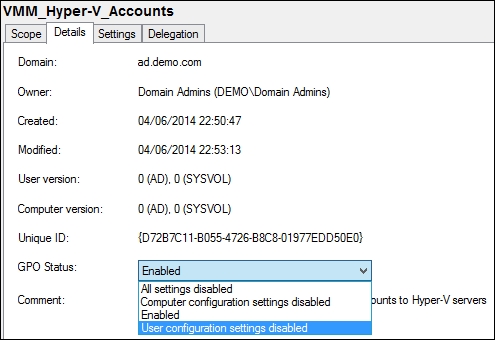
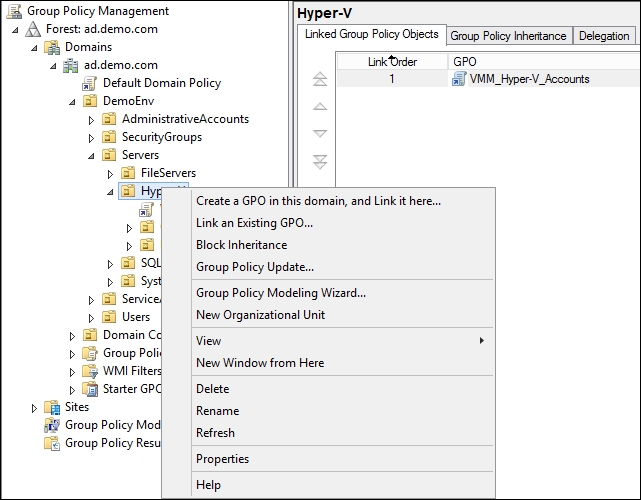
A new Group Policy Object (GPO) needs to be created and linked to the Hyper-V OU.

Click on the Details tab and select User configuration settings disabled from the GPO Status dropdown, as shown in the following screenshot:
Right-click on the GPO name under the Hyper-V OU and click on Edit. Navigate to Computer Configuration | Preferences | Control Panel Settings | Local Users and Groups. Right-click and navigate to New | Local Group.
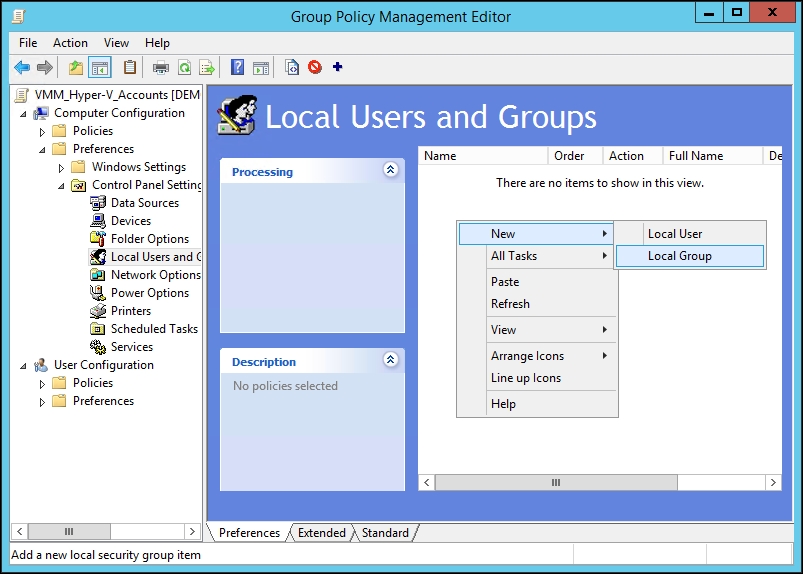
Make sure the Action field is set to Update, Group name is set to Administrators (built-in), and you have added SVC_VMMAgntRA to the Members section.

In the Group Policy Management MMC, right-click on the OU where the GPO has been deployed and click on Group Policy Update. This triggers a remote Group Policy Update on the Hyper-V hosts.
This completes this recipe. The required service accounts with the necessary permissions have been scoped and deployed correctly.