
There are many ways in which you can run a PowerShell script. Most of the time the PowerShell console or ISE is used to run the scripts. There will be instances (and in the daily life of a system administrator, these instances occur frequently) when you would like to schedule the script so that it runs at a particular time on a daily basis or at one time. These processes are described as follows:
Let's see how we use the PowerShell console/ISE.
In the PowerShell console, you get only a command-line console, such as the CMD shell, and the ISE provides a more graphical interface with multiple views. As can be seen from the following screenshot, the PowerShell ISE provides three main views. On the left-hand side of the screen you have an editor and a console, and on the right-hand side you have the command window. Using the editor, you can write your scripts quickly and then run them from this window itself. The output is shown on the console given below the editor. Also, from the command selector window, you can search for the command that you are looking for and simply choose to run the insert or copy command. It also gives you multiple options to run the different aspects of the command.

Due to the flexibility of the ISE and ease with which we can work with it, it is my preferred way of working here, and for the rest of the book, it will be used for examples. Although there are many specific editors available for PowerShell, I am not going to cover them in this chapter. In the last chapter, I will cover this topic a bit and talk about my favorite editor.
So, we've started the ISE. Now let's write our first script that consists of a single line:
Write-Host "Welcome $args !!! Congratulations, you have run your first script!!!"
Now, let's save the preceding line in a file named Welcome.ps1. From the ISE command line, go to the location where the file is saved and run the file with the following command line:
PS C:\Scripts\Welcome.ps1
What happened? Were you able to run the command? In all probability, you will get an error message, as shown in the following code snippet (in case you are running the script for the first time):
PS C:\Scripts> .\Welcome.ps1 Sajal Debnath
.\Welcome.ps1 : File C:\Scripts\Welcome.ps1 cannot be loaded because running scripts is disabled on this system. For more
information, see about_Execution_Policies at http://go.microsoft.com/fwlink/?LinkID=135170.
At line:1 char:1
+ .\Welcome.ps1 Sajal Debnath
+ ~~~~~~~~~~~~~
    + CategoryInfo          : SecurityError: (:) [], PSSecurityException
    + FullyQualifiedErrorId : UnauthorizedAccess
So, what does it say and what does it mean? It says that running scripts is disabled on the system.
Whether you are allowed to run a script or not is determined by the ExecutionPolicy set in the system. You can check the policy by running the following command:
PS C:\Scripts> Get-ExecutionPolicy
Restricted
So, you can see that the execution policy is set to Restricted (which is the default one). Now, let's check what the other options available are:
PS C:\Scripts>Get-Help ExecutionPolicy

Name                              Category  Module                    Synopsis
----                              --------  ------                    --------
Get-ExecutionPolicy               Cmdlet    Microsoft.PowerShell.S... Gets the execution policies for the current session.
Set-ExecutionPolicy               Cmdlet    Microsoft.PowerShell.S... Changes the user preference for the Windows PowerSh...
Note that we have Set-ExecutionPolicy as well, so we can set the policy using this cmdlet. Now, let's check the different policies that can be set:
PS C:\Scripts> Get-Help Set-ExecutionPolicy -Detailed
Tip
Perhaps the most useful friend in the PowerShell cmdlet is the Get-Help cmdlet. As the name suggests, it provides help for the cmdlet in question. To find help for a cmdlet, just type Get-Help <cmdlet>. There are many useful parameters with this cmdlet, especially –Full and –Examples. I strongly suggest that you type Get-Help in PowerShell and read the output.
Part of the output shown is as follows:
Specifies the new execution policy. Valid values are:

        -- Restricted: Does not load configuration files or run scripts. "Restricted" is the default execution policy.

        -- AllSigned: Requires that all scripts and configuration files be signed by a trusted publisher, including scripts that you write on the local computer.

        -- RemoteSigned: Requires that all scripts and configuration files downloaded from the Internet be signed by a trusted publisher.

        -- Unrestricted: Loads all configuration files and runs all scripts. If you run an unsigned script that was downloaded from the Internet, you are prompted for permission before it runs.

        -- Bypass: Nothing is blocked and there are no warnings or prompts.

        -- Undefined: Removes the currently assigned execution policy from the current scope. This parameter will not remove an execution policy that is set in a Group Policy scope
For the purpose of running our script and for the rest of the examples, we will set the policy to Unrestricted. We can do this by running the following command:
PS C:\ Set-ExecutionPolicy Unrestricted
Tip
Although I have set the policy as Unrestricted, it is not at all secure. From the security perspective, and for all other practical purposes, I suggest that you set the policy to RemoteSigned.
Now, if we try to run the earlier script, it runs successfully and gives the desired result:
PS C:\Scripts> .\Welcome.ps1 Sajal Debnath
Welcome Sajal Debnath !!! Congratulations you have run your first script!!!
So, we are all set to run our scripts.
Now, let's take a look at how we can schedule a PowerShell script using Windows Task Scheduler.
Before we go ahead and schedule a task, we need to finalize the command which, when run from the task scheduler, will run the script and give you the desired result. The best way to check this is to run the same command from Start → Run.
For example, if I have a script in C:\ by the name Report.ps1, I can run the script from the command line by running the following command:
powershell –file "C:\Report.ps1"
Another point to note here is that once the preceding command is run, the PowerShell window will close. So, if you want the PowerShell window to be opened so that you can see any error messages, then add the –NoExit switch. So, the command becomes:
Powershell-NoExit –file "C:\Report.ps1"
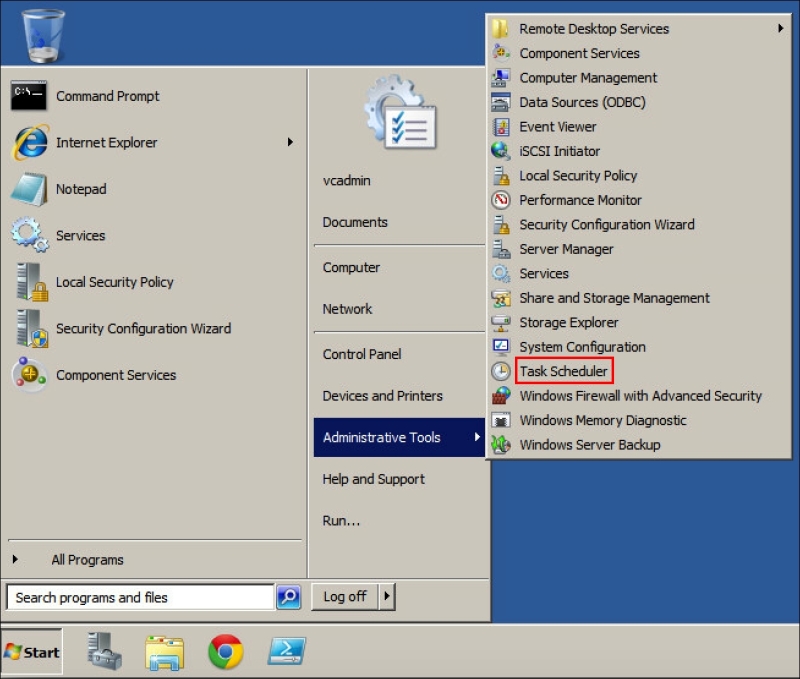
Depending on the version of Windows installed, Windows Task Scheduler is generally found in either Control Panel → System and Security → Administrative Tools → Task Scheduler or Control Panel → Administrative Tools → Task Scheduler, or you can go to Task Scheduler from the Start menu, as shown in the following screenshot:
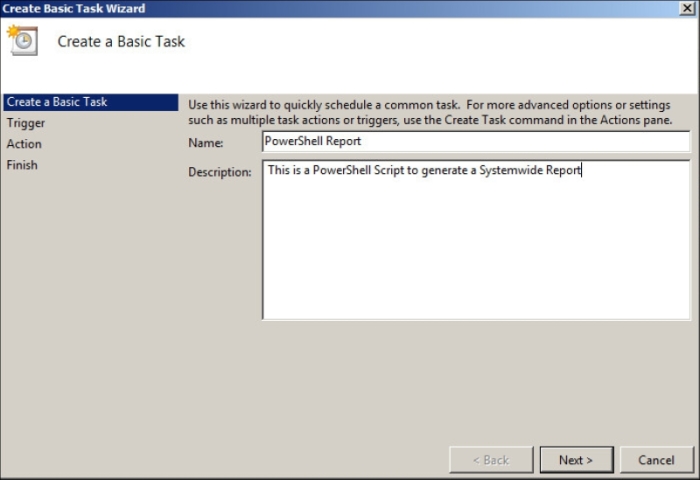
On the right-hand side pane, under Actions, click on Create Basic Task. A new window opens. In this window, provide a task name and description:
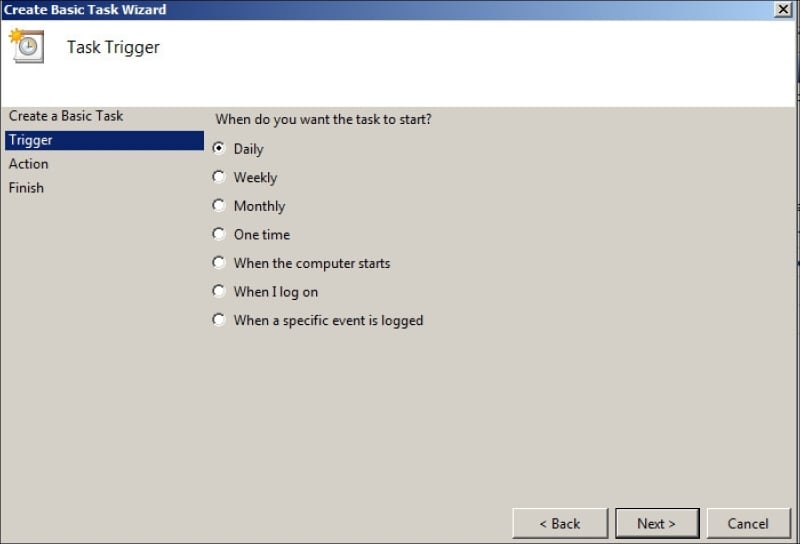
The next window provides you with the trigger details, which will trigger the action. Select the trigger according to your requirements (how frequently you want to run the script).
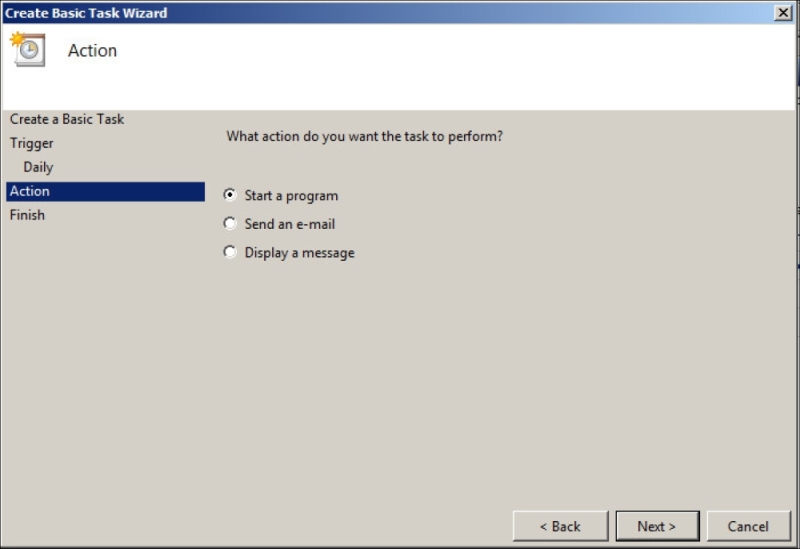
Select a type of action that you want to perform. For our purpose, we will choose Start a program.
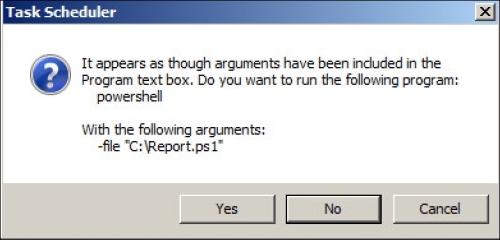
In the next window, provide the command that you want to execute (the command that we checked by running it in Start → Run). In our example, it is as follows:
Powershell –file "C:\Report.ps1"

In the next confirmatory window, select Yes.
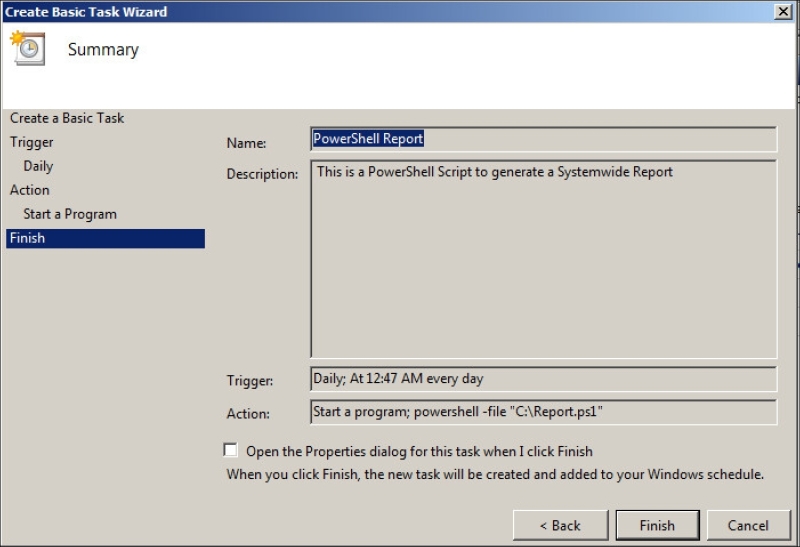
The last window will provide you an overview of all the options. Select Finish to complete the creation of the scheduled task. Now, the script will run automatically at your predefined time and interval.
Instead of using the GUI interface, you can create, modify, and control scheduled tasks from the PowerShell command line as well. For a detailed list of the commands, you can run the following command:
PS C:\> Get-Command *ScheduledTask

From the list of the available cmdlets, you can select the one you need and run it. For more details on the command, you can use the Get-Help cmdlet.