Book Image

Learning OpenStack Networking (Neutron)

By : James Denton
Book Image

Learning OpenStack Networking (Neutron)

By: James Denton

Overview of this book

OpenStack Neutron is an OpenStack component that provides networking as a service for other OpenStack services to architect networks and create virtual machines through its API. This API lets you define network connectivity in order to leverage network capabilities to cloud deployments. Through this practical book, you will build a strong foundational knowledge of Neutron, and will architect and build an OpenStack cloud using advanced networking features. We start with an introduction to OpenStack Neutron and its various components, including virtual switching, routing, FWaaS, VPNaaS, and LBaaS. You’ll also get hands-on by installing OpenStack and Neutron and its components, and use agents and plugins to orchestrate network connectivity and build a virtual switching infrastructure. Moving on, you’ll get to grips with the HA routing capabilities utilizing VRRP and distributed virtual routers in Neutron. You’ll also discover load balancing fundamentals, including the difference between nodes, pools, pool members, and virtual IPs. You’ll discover the purpose of security groups and learn how to apply the security concept to your cloud/tenant/instance. Finally, you' ll configure virtual private networks that will allow you to avoid the use of SNAT and floating IPs when connecting to remote networks.
Table of Contents (21 chapters)
Learning OpenStack Networking (Neutron) Second Edition
Credits
About the Author
About the Reviewers
www.PacktPub.com
Preface
Index

Load balancer management in the dashboard


In the Horizon dashboard, load balancers can be managed from the Project panel by clicking on Load Balancers in the menu on the left-hand side of the screen:
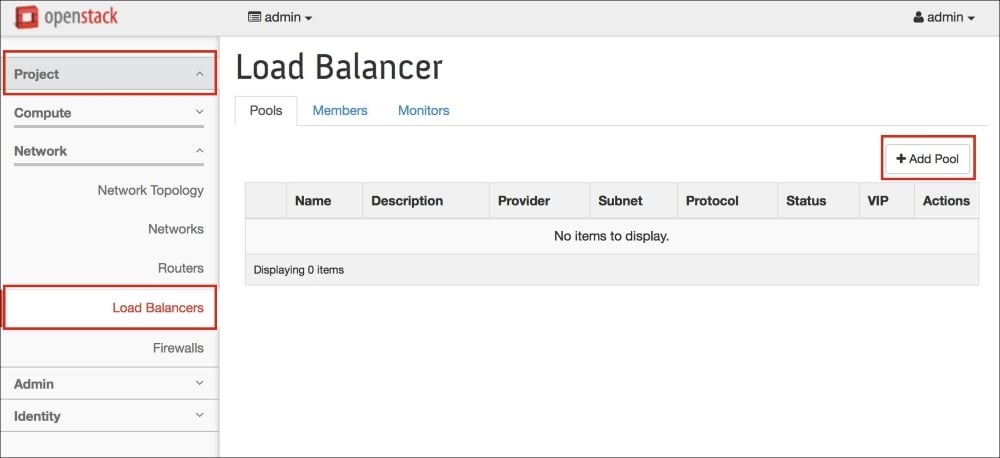
Figure 10.24

From the Load Balancers screen, pools, members, and monitors can be managed from their respective tab.

Creating a pool in the dashboard

To create a pool, perform the following steps:

  1. Click on the Add Pool button within the Pools section. A window will pop up that resembles the one shown in the following screenshot:

    Figure 10.25

  2. From the Add Pool window, you can specify a name for the pool and choose the subnet, protocol, and load balancing method. To create the pool, click on the blue button labeled Add. Once created, the pool will be listed in the Pools section, as follows:

    Figure 10.26

Creating pool members in the dashboard

To create a pool member, perform the following steps:

  1. Click on the Add Member button within the Members section. A window will pop up that resembles the one shown in...