Book Image

OpenStack Essentials - Second Edition

By : Dan Radez
Book Image

OpenStack Essentials - Second Edition

By: Dan Radez

Overview of this book

OpenStack is a widely popular platform for cloud computing. Applications that are built for this platform are resilient to failure and convenient to scale. This book, an update to our extremely popular OpenStack Essentials (published in May 2015) will help you master not only the essential bits, but will also examine the new features of the latest OpenStack release - Mitaka; showcasing how to put them to work straight away. This book begins with the installation and demonstration of the architecture. This book will tech you the core 8 topics of OpenStack. They are Keystone for Identity Management, Glance for Image management, Neutron for network management, Nova for instance management, Cinder for Block storage, Swift for Object storage, Ceilometer for Telemetry and Heat for Orchestration. Further more you will learn about launching and configuring Docker containers and also about scaling them horizontally. You will also learn about monitoring and Troubleshooting OpenStack.
Table of Contents (20 chapters)
OpenStack Essentials Second Edition
Credits
About the Author
About the Reviewer
www.PacktPub.com
Preface
Index

Using the web interface


Next, let's use the web interface to add an image to the Glance image registry. Images can be managed by administrators and non-privileged users. On the command line, an image was added as the administrator. In the web interface, we will use the non-privileged user you have created. The following are the steps to add an image to the Glance image registry:

  1. Log in to your web interface using the user you created in Chapter 2, Identity Management. Then, select Images from the menu. The following screenshot shows the Images page:

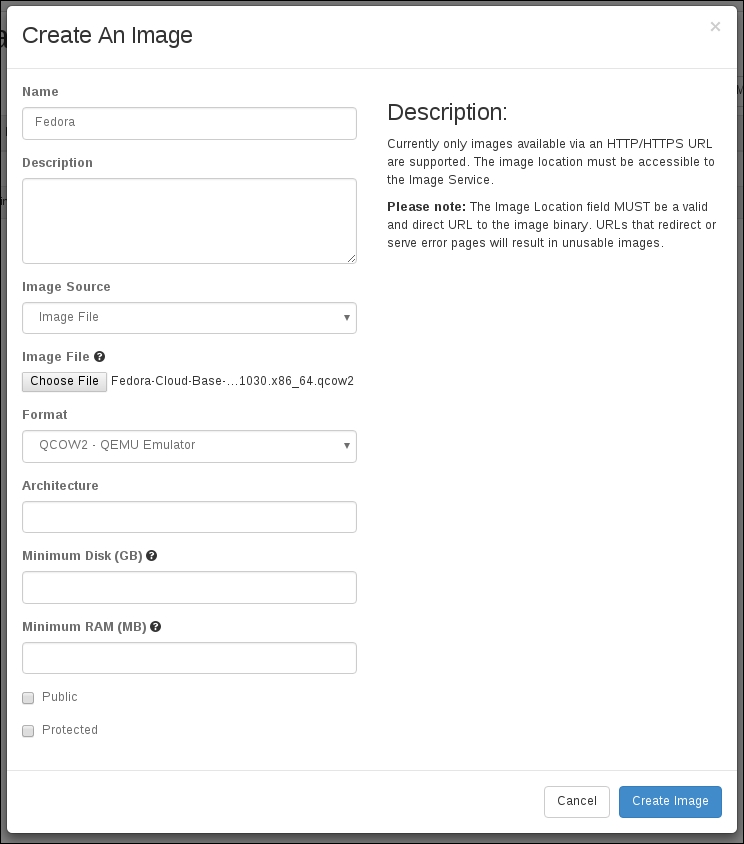
  2. Once you are logged in, click on the Create Image button and fill out the form that appears (as shown in the following screenshot). All the options that were available on the command line are available in the web form:

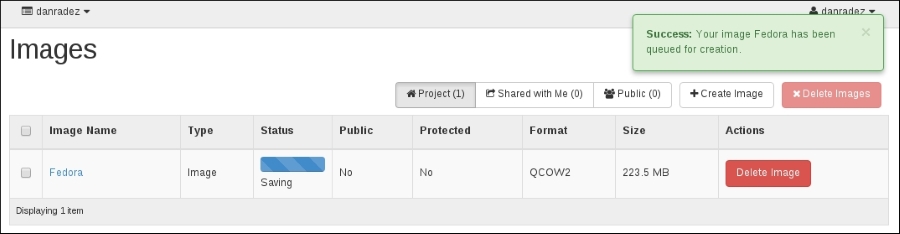
  3. Once the file has been uploaded, it will go through the status queued, saving and then will be registered when it is in state active, it will show up in the list of images, as shown in the following screenshot:

  4. If you log back in as...