

In the previous section, we installed the framework on our machine, and we even created our first application. The next natural step for any developer would be to open the project in our preferred IDE.
It is good for us that Play! has already configured everything in order to generate the project and module files required by the most popular IDEs.
Let's see how to configure Eclipse and IntelliJ IDEA, and then we'll see how to deal with another editor: Sublime Text 2. But first of all, you will have to enter your application in the terminal:
$> cd play-jbook
$> play

While executing, you might see checks for a lot of things (dependencies), but nothing is failing and nothing has been downloaded (if you're disconnected). That's because everything has already been packaged in the Play! 2 .zip file—especially all of the dependency JARs are provided in Play! 2's dedicated repository.
Being in the console, you now have access to plenty of commands related to your project (this should sound like déjà vu for those who've used Maven plugins); for example, version, name, and dependencies. Just try them, or hit the Tab key twice.
Commands have been created to execute tasks such as generating files based on the project. Among them is the generation of the IDE settings.
Eclipse is probably the most commonly used editor by the Java community, the advantages being: it's free, has a strong community, and provides a powerful extension framework.
That's why this section will have two sections: one for the classical Eclipse Juno and one for the Scala version named Scala IDE (http://scala-ide.org/).
While in the play! console, you can ask it to generate the Eclipse project configuration by simply invoking the eclipse:

This will generate all the specific files necessary to configure an Eclipse project. Now we can open Eclipse and import the project into it. For that, let's perform the following steps:

The following screenshot is what you should see now:
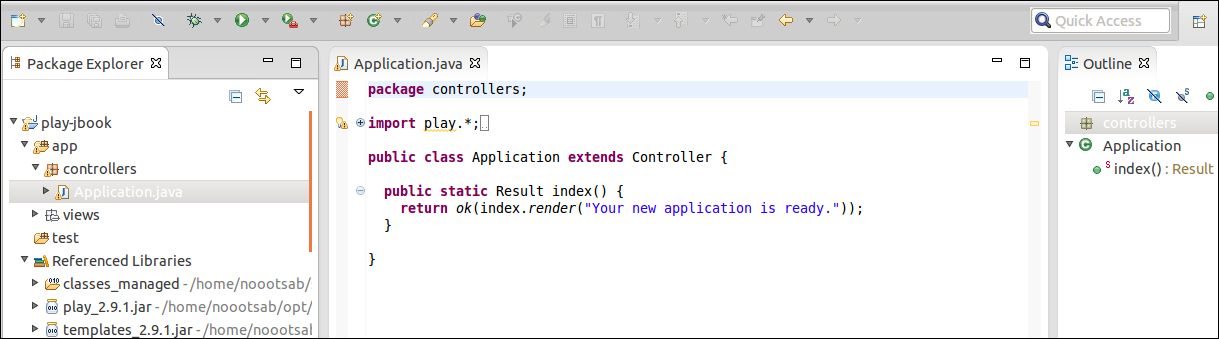
Looking at the screenshot, we should notice the following points:
Some folders have been marked as sources and test files (
appandtest)A bunch of libraries have been mounted on the project (including the Play! library)
The Play! API is recognized along with the generated template sources (
index.render)
For projects that involve the Scala source code, even though a Play! project can contain both Scala and Java source code, the Scala IDE is probably the best choice. The Scala IDE is actually a customized Eclipse version, which has Scala as the main focus. To set up a Scala project in the Scala IDE, we'll first need to create the project using the play! console in a similar way to how the Java version was created. This is shown as follows:

The very next step is to install the Scala IDE. As it's an Eclipse plugin, all we have to do is to start an Indigo version of Eclipse. Then go to Help | Install New Software....
In the Work with field, we'll enter the path from which the Scala IDE team is distributing their plugin (http://scala-ide.org/download/current.html).
In order to import our project, we can just repeat the same steps that we performed earlier in the Eclipse Juno section. At the end, we will have the following screenshot:
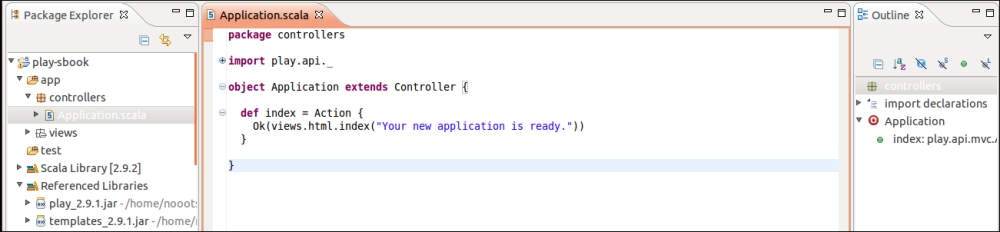
As expected, the features brought by Eclipse for the Java version still remain in this version. So do the features including syntax coloring for the Scala code, code browsing, contextual documentation, and so on.
IDEA is a great and well-known IDE despite the fact that it isn't open source or totally free. At least, we can choose between the free version (Community)—which has less features—and the other one (Ultimate).
Note
At the time of writing this book, a Play! 2 plugin is on its way for the paid version, however we will try to stick with the free only IDE. But for those interested in this plugin, check the link at http://plugins.jetbrains.com/plugin/index?pr=&pluginId=7080.
Let's go back to the play! console. We can now invoke a new task called idea:
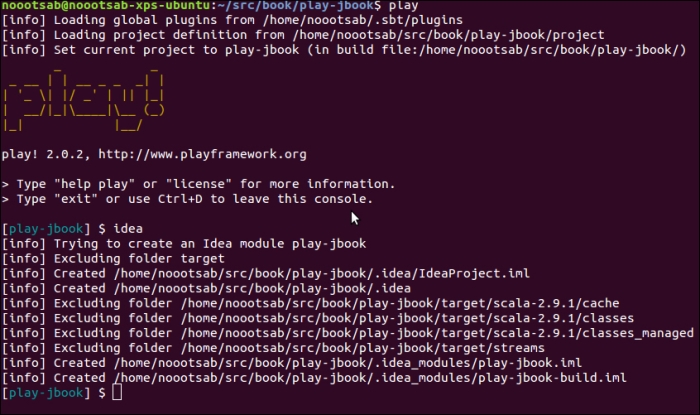
This will create a fully configured project with the related modules for our project.
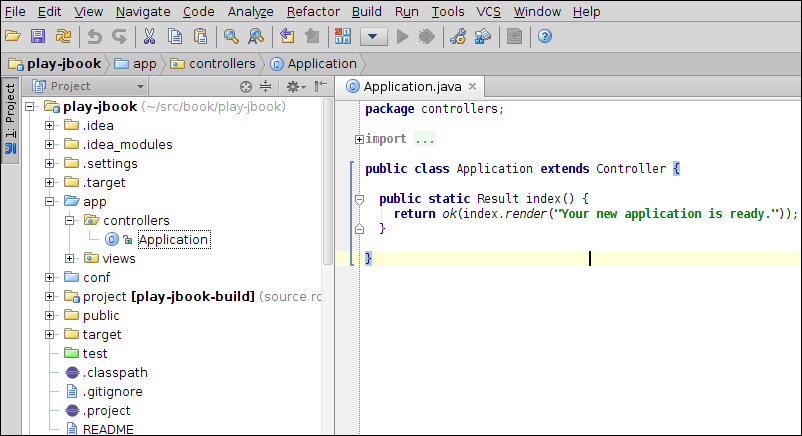
Now we can simply open the folder itself as a project in IDEA. For that, we need to go to File | Open Project and navigate to the project folder:
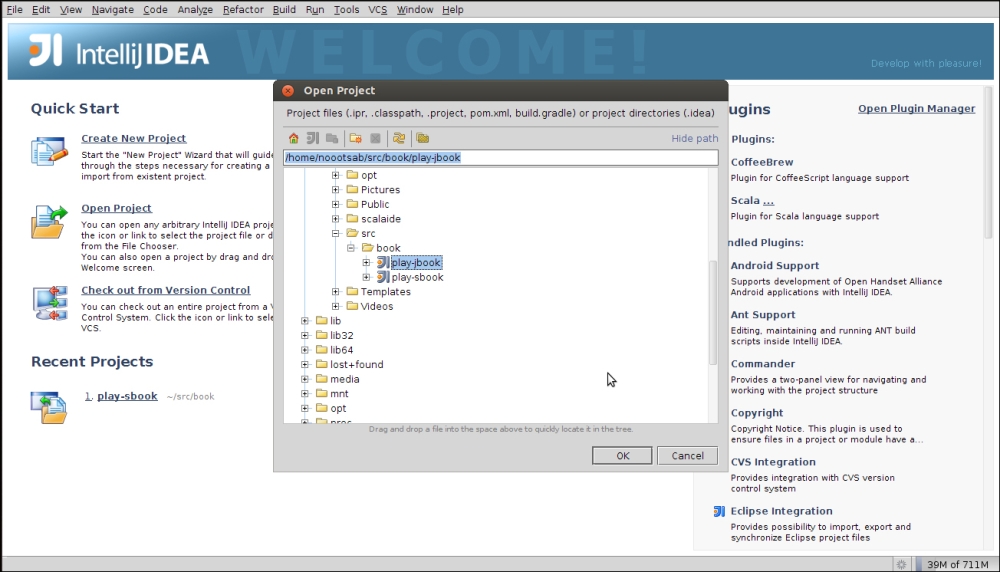
The following screenshot shows what we should get after having confirmed our project folder. Hopefully, we will get the same kind of features that we get with Eclipse.
As Play! is fully integrated, we can sometimes feel an IDE to be overkill because of two things:
IDEs support of Play! is very young (obviously) and limited
Play! is so easy that for most of the time we only need the documentation and the Javadoc (or Scaladoc) of the provided API
Having said, that an IDE is helpful for code completion/navigation and maybe sometimes in debugging sessions, but I think their need decreases slightly when used with a simple framework like Play!.
Sublime Text 2 comes with features than an IDE. Actually, it comes with pure editing features, such as multiple selects for batch edition, quick find, embedded console, and macros. Moreover it takes fewer resources (thankfully, when we develop without any power slots available). Another feature is that it has the best support of the Scala template used by Play! 2 including syntax coloration, snippets, and more.
To install it, we can download the installer related to our operating system from http://www.sublimetext.com/2 and execute it. Now that Sublime Text 2 is installed, we can also enable two packages:
The package manager can add and search a package repository directly from the Sublime Text 2 console. See http://wbond.net/sublime_packages/package_control for more details.
The Play! 2 support package installation is very easy and is well explained at https://github.com/guillaumebort/play2-sublimetext2#installation-instructions.
Now with everything set up and a Sublime Text 2 window opened, what we could do is simply add our project folder to it using the console. So press Ctrl + Shift + P and type Add Folder, and then browse to our project. The following screenshot is what we should have:

Now, we can very often save a few lines of code by simply using the snippets that are available for all components of a Play! 2 application (code, configuration, templates, and so on). Let me introduce some of the most useful ones:
pforeach: This creates a loop over sequence in a templatebindform: This binds data from a form using the request contentok/redirect: They create the related HTTP resultsessionget/sessionset: They retrieve or set a value to the session
Check the following page for an exhaustive list: https://github.com/guillaumebort/play2-sublimetext2#code-snippets