

Throughout the following recipes, we will install the latest MySQL 5.7.x version on Apache and NGINX. The current MySQL version is a milestone in the open source world. Its new performance and scalability features will be a great benefit for every Magento website. This recipe will show you how to do it.
Tip
MySQL 5.7 is an extremely exciting new version of the world's most popular open source database, which is two times faster than MySQL 5.6 while also improving usability, manageability, and security.
For this recipe, you will need a preinstalled Apache or NGINX and PHP-FPM or HHVM setup. No other prerequisites are required.
Before we can install the latest MySQL version, we need to download the software in our local system. The official MySQL APT repository provides you with a simple and convenient way to install and update MySQL products. Always use the latest software package using apt-get.
We will now install MySQL using the official vendor package. Run the following command from your root or home directory:
wget http://dev.mysql.com/get/mysql-apt-config_0.5.3-1_all.debTo download the rest of the latest MySQL package, we first install the
mysql-apt-configpackage. Run the following command:dpkg -i mysql-apt-config_0.5.3-1_all.debDuring installation, it will ask which MySQL product you wish to configure. Select Server:

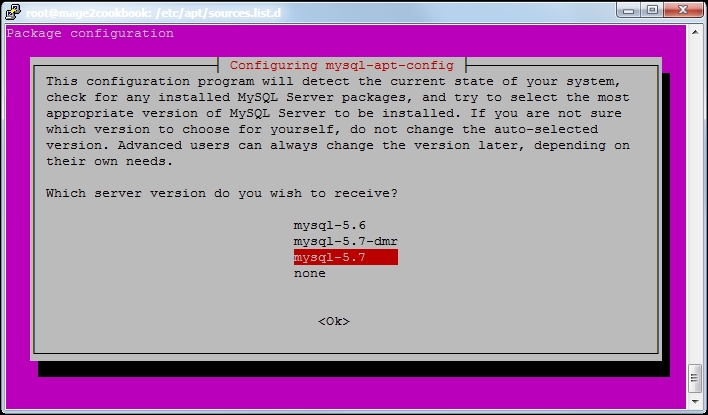
Next, it will ask which Server version you wish to receive. Select mysql-5.7:
In the next screen, click on Apply:

Now, we will update our Ubuntu system using the latest MySQL packages:
apt-get update && apt-get -y install mysql-serverDuring installation, it will ask you several questions. The first one will be to choose a new password for the MySQL root user. Always make sure to create a new dedicated user only for a database; using
rootis just an example and not advised on production.Once every MySQL package is installed, we can check whether everything is in order by running the following command on the shell:
mysql --versionThe output of this command is as follows:
root@mage2cookbook:~# mysql --version
mysql  Ver 14.14 Distrib 5.7.9, for Linux (x86_64)
Let's recap and find out what we did throughout this recipe. In steps 1 through 3, we download the official MySQL package and use a graphical interface to install the latest version. The whole process is pretty straightforward. Remember to use a dedicated user that has all the privileges instead of the root user.