-
Book Overview & Buying
-
Table Of Contents

-
Feedback & Rating

Python Web Development with Sanic
By :
Python Web Development with Sanic
By:
Overview of this book
Today’s developers need something more powerful and customizable when it comes to web app development. They require effective tools to build something unique to meet their specific needs, and not simply glue a bunch of things together built by others. This is where Sanic comes into the picture. Built to be unopinionated and scalable, Sanic is a next-generation Python framework and server tuned for high performance.
This Sanic guide starts by helping you understand Sanic’s purpose, significance, and use cases. You’ll learn how to spot different issues when building web applications, and how to choose, create, and adapt the right solution to meet your requirements. As you progress, you’ll understand how to use listeners, middleware, and background tasks to customize your application. The book will also take you through real-world examples, so you will walk away with practical knowledge and not just code snippets.
By the end of this web development book, you’ll have gained the knowledge you need to design, build, and deploy high-performance, scalable, and maintainable web applications with the Sanic framework.
Table of Contents (21 chapters)
Preface

Chapter 1: Introduction to Networking
 Free Chapter
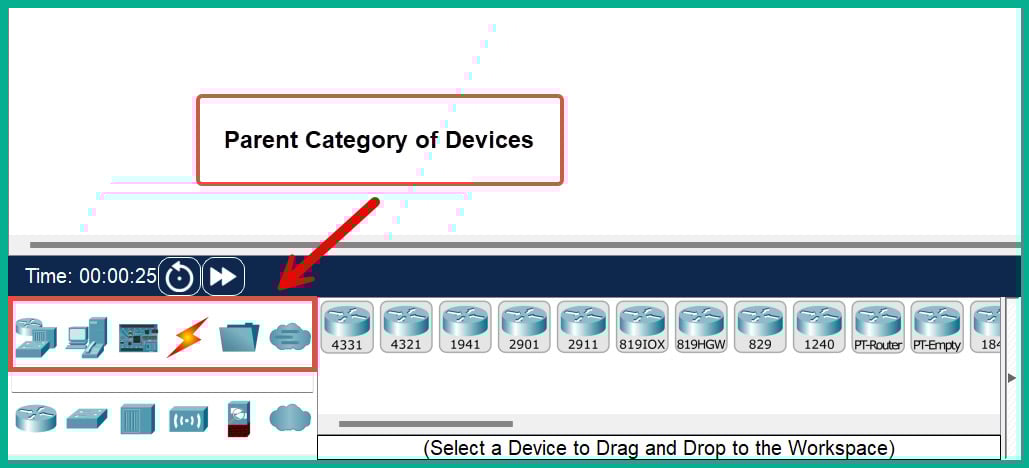
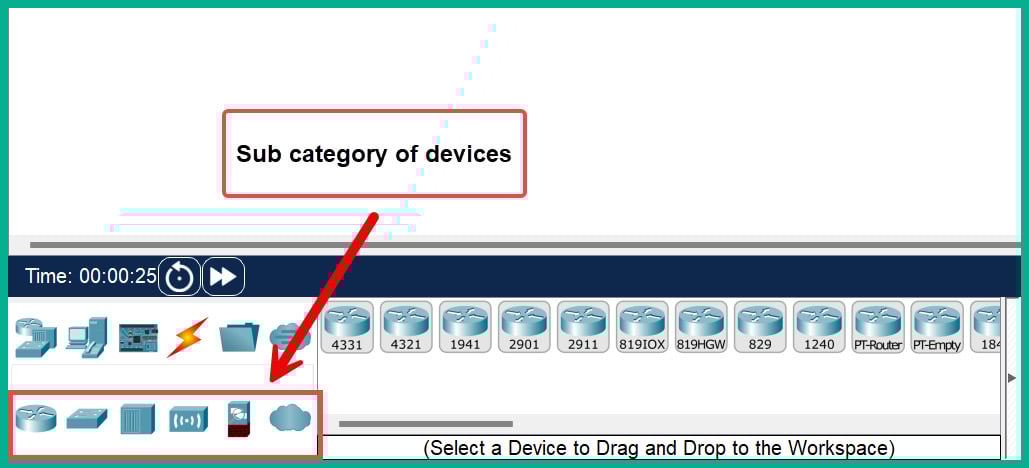
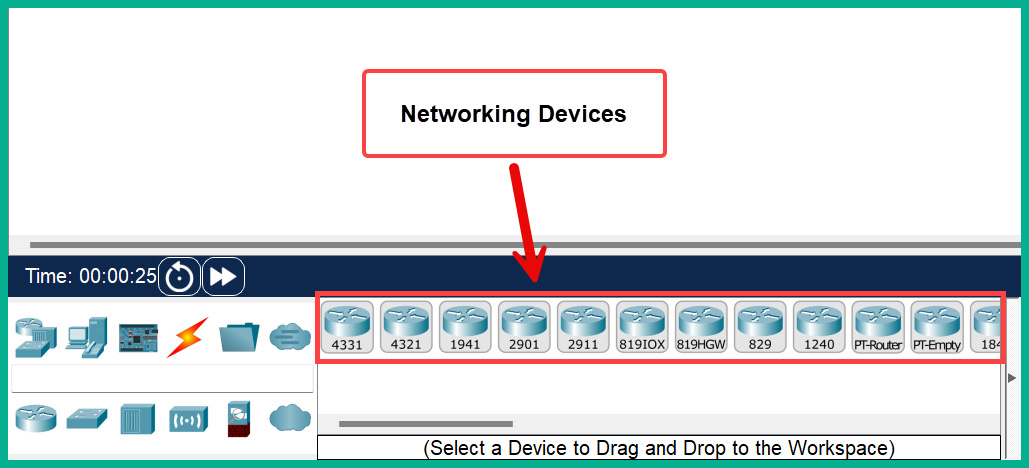
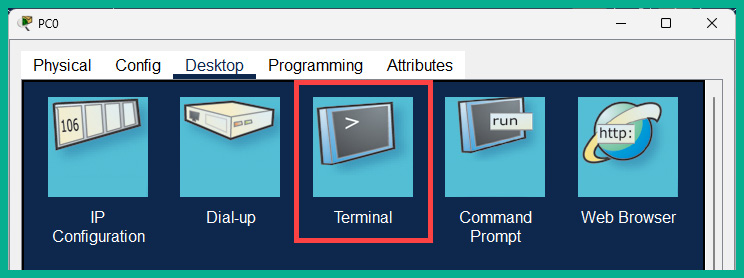
Chapter 2: Getting Started with Cisco IOS Devices
Chapter 3: Network Architectures and Physical Infrastructure
Chapter 4: IPv4 and IPv6 Addresses
Chapter 5: Practical Subnetting
Chapter 6: Wireless Architectures and Virtualization
Chapter 7: Implementing VLANs and Interswitch Connectivity
Chapter 8: EtherChannels and Layer 2 Discovery Protocols
Chapter 9: Understanding and Configuring Spanning Tree
Chapter 10: Interpreting Routing Components
Chapter 11: Understanding Static and Dynamic Routing
Chapter 12: Network Address Translation
Chapter 13: Network Services and IP Operations
Chapter 14: Exploring Network Security
Chapter 15: Device Access Controls and VPNs
Chapter 16: Implementing Access Controls Lists (ACLs)
Chapter 17: Implementing Layer 2 and Wireless Security
Chapter 18: Network Automation and Programmability Techniques
Chapter 19: Accessing the Online Practice Resources
Other Books You May Enjoy
Customer Reviews