
Among other tools, WordPress features the Theme Editor, which allows you to edit your theme files without downloading or uploading the files. Chapter 3 covers WordPress themes in detail.
To access the Theme Editor, log in to your WordPress Dashboard, and go to Appearance | Editor located at the top of the screen. To select a theme for editing, use the drop-down list located at the top right of the screen. By default, you'll be editing the theme being used currently by your blog.
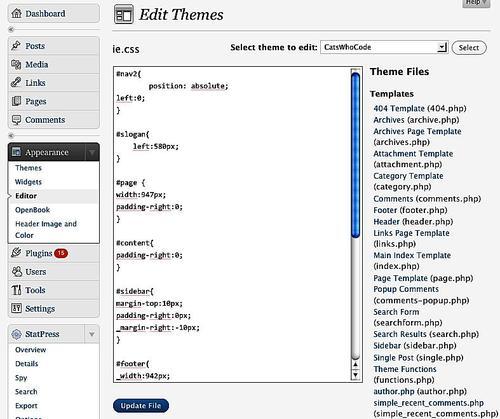
While editing a theme file in WordPress theme editor, you're actually editing the real file on the server. Once you press the Update File button, the file is saved and the previous version is erased.
Although the Theme Editor is probably my favorite built-in tool from WordPress, you have to be careful with it.
It is safe to always have a backup of your theme before editing. The Theme Editor does not save revisions. If you have made a modification and later would like to undo the modification, you need to have a backup of the previous version of the file.
Use the Theme Editor only if you're sure about what you're doing. If you're editing your current theme and make a programming error (for example, a PHP syntax error), it is possible that your blog will stop functioning.
Sometimes, a programming mistake can result in you losing access over the Theme Editor. While this is quite a rare case (it mostly happens when you make a code mistake in the
functions.phpfile), the problem can be important enough for you to always be sure to have a proper backup of your theme, as well as a valid FTP connection to your blog server, before editing any files.In case you are not able to access the editor after editing a file on it, use a FTP program to transfer a backup version of the file you've just edited to your WordPress server.