

Now, let's move to the weather forecasting application. The weather forecasting application is a Java web application that allows the users to check the current weather in different cities in the world. The weather forecasting application contains both synchronous and asynchronous (Ajax) JavaScript code, which we will test in the later chapters of the book using the different JavaScript unit testing frameworks.
The weather forecasting application mainly contains three use cases:
Log in to the application
Register a user in the application
Check the current weather in a specific city
The weather forecasting application is a Java web application. The server-side part of the application is written using Java servlets (http://docs.oracle.com/javaee/6/tutorial/doc/bnafd.html). If you are not familiar with Java servlets, do not worry. This book focuses only on JavaScript unit testing; all you need to know about these servlets is the functionality of each one of them, not the code behind it. The functionality of each application servlet will be explained during when the JavaScript code is explained, to show you the complete Ajax request life cycle with the server.
Another thing that needs to be mentioned is that the weather application pages are .jsp files; however, 99 percent of their code is pure HTML code that is easy to understand (the application pages code will be explained in detail in the next section).
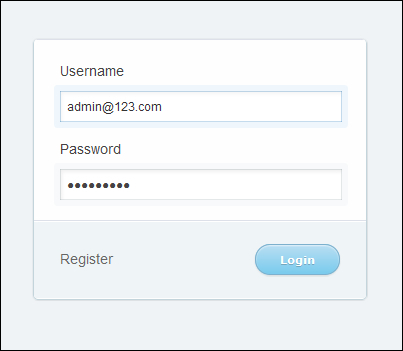
The first screen of the application is the login screen in which the user enters his username and password, as shown in the following screenshot:
When the user clicks on the Login button, there is a JavaScript login client that ensures that the username and the password are entered correctly. If the username and the password are correct, they are submitted to the server, which validates them if the user is registered in the application. If the user is registered in the application then the user is redirected to the weather checking page; otherwise an error message appears to the user.
The username field must not be empty and has to be in a valid e-mail address format. The password field also must not be empty and has to contain at least one digit, one capital, one small character, and at least one special character. The password length has to be six characters or more.
In the weather checking page, the user can select one of the available cities from the combobox, then click on the Get weather condition button to get the current weather information of the selected city, as shown in the following screenshot:

In the user registration page, the user can register in the application by entering his username and confirmed password, as shown in the following screenshot:

When the user clicks on the Register button, the registration client's JavaScript object ensures that the username and the passwords are entered correctly. The registration client uses the same rules of the login client in username and password validations. It also ensures that the confirmed password is the same as the entered password.
If the user's registration information is correct, the username and passwords are submitted to the server. The user information is registered in the system after performing server-side validations and checking that the user has not already registered in the application. If the user is already registered in the system then an error message appears to the user.
The following
code snippet shows the HTML code of the login form in the login.jsp file. It is a simple form that has username and password fields with their labels, messages, a registration link, and a login button.
<form class="box login" action="/weatherApplication/LoginServlet" method="post">
  <fieldset class="boxBody">
    <label for="username">Username  <span id="usernameMessage" class="error"></span></label>
    <input type="text" id="username" name="username"/>

    <label for="password">Password  <span id="passwordMessage" class="error"></span></label>
    <input type="password" id="password" name="password"/>
  </fieldset>
  <div id="footer">
    <label><a href="register.jsp">Register</a></label>
    <input id="btnLogin" class="btnLogin" type="submit" value="Login" onclick="return validateLoginForm();"/>
  </div>
</form>
When the Login button is clicked, the validateLoginForm JavaScript function is called. The following code snippet shows the validateLoginForm function in the login.jsp file:
function validateLoginForm() {
  var loginClient = new weatherapp.LoginClient();

  var loginForm = {
    "userNameField" : "username",
    "passwordField" : "password",
    "userNameMessage" : "usernameMessage",
    "passwordMessage" : "passwordMessage"
  };

  return loginClient.validateLoginForm(loginForm);
}
The validateLoginForm function calls the LoginClient JavaScript object that is responsible for validating the
login form. It constructs a JavaScript Object Notation (JSON) object that includes the username, password, username message, and password message IDs, and then passes the constructed JSON object to the validateLoginForm function of the LoginClient object.
Note
The weather application customizes a CSS3 based style from the blog CSS Junction:
http://www.cssjunction.com/freebies/simple-login-from-html5css3-template-free/
The following code snippet shows the validateLoginForm method of the LoginClient object in the LoginClient.js file. It validates that the username and the password fields are not empty and are compliant with the validation rules.
if (typeof weatherapp == "undefined" || !weatherapp) {
  weatherapp = {};
}

weatherapp.LoginClient = function() {};

weatherapp.LoginClient.prototype.validateLoginForm =  function(loginForm) {

  if (this.validateEmptyFields(loginForm) &&
      this.validateUserName(loginForm) &&
        this.validatePassword(loginForm)) {

    return true;
  }

  return false;
};
Tip
One of the recommended JavaScript's best practices is to use namespaces; the application defines a JavaScript namespace in order to avoid collisions with other JavaScript objects of similar names. The following code defines a weatherapp namespace if it is not already defined:
if (typeof weatherapp == "undefined" || !weatherapp) {
  weatherapp = {};
}
The following code snippet shows the validateEmptyFields method of the LoginClient object in the LoginClient.js file. It validates that the username and the password fields are not empty and if any of these fields are empty, an error message appears:
weatherapp.LoginClient.prototype.validateEmptyFields =  function(loginForm) {
  var passwordMessageID = loginForm.passwordMessage;
  var userNameMessageID = loginForm.userNameMessage;

  var passwordFieldID = loginForm.passwordField;
  var userNameFieldID = loginForm.userNameField;

  document.getElementById(passwordMessageID).innerHTML = "";
  document.getElementById(userNameMessageID).innerHTML = "";

  if (! document.getElementById(userNameFieldID).value) {
    document.getElementById(userNameMessageID).innerHTML = "(field is required)";

    return false;
  }

  if (! document.getElementById(passwordFieldID).value) {
    document.getElementById(passwordMessageID).innerHTML = "(field is required)";

  return false;
  }

  return true;
};
The following code snippet shows the validateUserName method of the LoginClient object in the LoginClient.js file. It validates that the username is in the form of a valid e-mail:
weatherapp.LoginClient.prototype.validateUserName = function(loginForm) {

  // the username must be an email...
  var userNameMessageID = loginForm.userNameMessage;
  var userNameFieldID = loginForm.userNameField;

var userNameRegex = /^[_A-Za-z0-9-]+(\.[_A-Za-z0-9-]+)*@[A-Za-z0-9]+(\.[A-Za-z0-9]+)*(\.[A-Za-z]{2,})$/;
  var userName = document.getElementById(userNameFieldID).value;

if(! userNameRegex.test(userName)) {
    document.getElementById(userNameMessageID).innerHTML = "(format is invalid)";

return false;
}

    return true;
};
Using the regular expression /^[_A-Za-z0-9-]+(\.[_A-Za-z0-9-]+)*@[A-Za-z0-9]+(\.[A-Za-z0-9]+)*(\.[A-Za-z]{2,})$/, the username is validated against a valid e-mail form. If the username is not in a valid e-mail form then an error message appears in the username message span.
The following code snippet shows the validatePassword method of the LoginClient object in the LoginClient.js file. It validates if the password has at least one digit, one capital character, one small character, at least one special character, and also if it contains six characters or more:
weatherapp.LoginClient.prototype.validatePassword = function(loginForm) {

  // the password contains at least one digit, one capital and small character
  // and at least one special character, and 6 characters or more...
  var passwordMessageID = loginForm.passwordMessage;
  var passwordFieldID = loginForm.passwordField;

  var passwordRegex = /((?=.*\d)(?=.*[a-z])(?=.*[A-Z])(?=.*[@#$%]).{6,20})/;
  var password = document.getElementById(passwordFieldID).value;

  if (! (passwordRegex.test(password) && password.length >= 6)) {
    document.getElementById(passwordMessageID).innerHTML = "(format is invalid)";

    return false;
  }

  return true;
};
If the password is not compliant with the mentioned rules then an error message appears in the password message span.
If the username and the password fields pass the JavaScript validation rules, the login form submits its content to LoginServlet, which makes another server-side validation and then redirects the user to the weather checking page if the validation goes OK.
Tip
It is very important not to rely on the JavaScript client-side validation only, because JavaScript can be disabled from the browser. So it is a must to always make a server-side validation besides the client-side validation.
The following code snippet shows the weather checking form of the weather application located in the welcome.jsp file. It contains a combobox filled with the Yahoo! Weather Where On Earth IDs (the WOEID is a unique reference identifier assigned by Yahoo! to identify any place on Earth) of different cities in the world.
<h1>Welcome to the weather application</h1>
<FORM method="post">
  <label class="label" for="postalCode">Select the Location: </label>
  <select id="w" class="selectField">
    <option value="1521894">Cairo, Egypt</option>
    <option value="906057">Stockholm, Sweden</option>
    <option value="551801">Vienna, Austria</option>
    <option value="766273">Madrid, Spain</option>
    <option value="615702">Paris, France</option>
    <option value="2459115">New York, USA</option>
    <option value="418440">Lima, Peru</option>
  </select>

  <input type="button" class="button" onclick="invokeWeatherClient();"
             value="Get weather condition"/>
  <br/><br/>

  <div id="weatherInformation" class="weatherPanel">
  </div>
</FORM>
When the Get weather condition button is clicked, the invokeWeatherClient function is called. The
following code snippet shows the invokeWeatherClient function code in the welcome.jsp file:
function invokeWeatherClient() {
  var weatherClient = new weatherapp.WeatherClient();
  var location = document.getElementById("w").value;

  weatherClient.getWeatherCondition({
    'location': location,
    'resultDivID': 'weatherInformation'
  },
weatherClient.displayWeatherInformation,
weatherClient.handleWeatherInfoError);
}
The invokeWeatherClient function calls the getWeatherCondition method of the WeatherClient object. The first parameter of the getWeatherCondition method is the weatherForm object, which is a JSON object containing the location WOEID and the ID of the DIV element that receives the weather information HTML result of the Yahoo! Weather Representational State Transfer (REST) service. The second parameter represents the first callback, which is the displayWeatherInformation method that is called if the getWeatherCondition call succeeds. The last parameter represents the second callback, which is the handleWeatherInfoError
method that is called if the getWeatherCondition call fails.
The following code snippet shows getWeatherCondition of the WeatherClient object in the WeatherClient.js file that sends an Ajax request to WeatherProxyServlet
with the w parameter that represents the WOEID. WeatherProxyServlet interacts
with the Yahoo! Weather REST service in order to fetch the current weather information:
if (typeof weatherapp == "undefined" || !weatherapp) {
  weatherapp = {};
}

weatherapp.WeatherClient = function() {};
weatherapp.WeatherClient.xmlhttp;
weatherapp.WeatherClient.weatherForm;
weatherapp.WeatherClient.endpointURL = "";

weatherapp.WeatherClient.prototype.getWeatherCondition =  function(weatherForm, successCallBack, failureCallBack) {

  if (window.XMLHttpRequest) {
    this.xmlhttp = new XMLHttpRequest();
  } else {
    this.xmlhttp = new ActiveXObject("Microsoft.XMLHTTP");
  }

  var successCallBackLocal = successCallBack;
  var failureCallBackLocal = failureCallBack;
  var weatherClientLocal = this;

  this.xmlhttp.onreadystatechange = function() {
weatherClientLocal.weatherInformationReady(successCallBackLocal, failureCallBackLocal);
  };

  this.weatherForm = weatherForm;

  if (typeof this.endpointURL == "undefined") {
    this.endpointURL = "";
  }

  this.xmlhttp.open("GET",
          this.endpointURL +
          "/weatherApplication/WeatherProxyServlet?w=" + weatherForm.location + "&preventCache=" + new Date().getTime(),
          true);

  this.xmlhttp.send();
};

weatherapp.WeatherClient.prototype.weatherInformationReady =  function(successCallBack, failureCallBack) {
  if (this.xmlhttp.readyState != 4) {
    return;
  }

  if (this.xmlhttp.status != 200)  {
    failureCallBack(this);

return;
      }

  if (this.xmlhttp.readyState == 4 && this.xmlhttp.status == 200) {
    successCallBack(this);
      }
};

weatherapp.WeatherClient.prototype.displayWeatherInformation =  function(weatherClient) {
  var resultDivID = weatherClient.weatherForm.resultDivID;

document.getElementById(resultDivID).innerHTML = weatherClient.xmlhttp.responseText;
};

weatherapp.WeatherClient.prototype.handleWeatherInfoError =  function(weatherClient) {
  var resultDivID = weatherClient.weatherForm.resultDivID;

  alert ("Error: " + weatherClient.xmlhttp.responseText);
document.getElementById(resultDivID).innerHTML = "Error: " + weatherClient.xmlhttp.responseText;
};
The getWeatherCondition method first creates an XML HTTP request object using new XMLHttpRequest() in
case of IE7+, Firefox, Chrome, and Opera. In the case of IE5 and IE6, the XML HTTP request object is created using an ActiveX object new ActiveXObject("Microsoft.XMLHTTP").
The getWeatherCondition method then registers both, the success callback (successCallBack) and the failure callback (failureCallBack) using the weatherInformationReady method that is called for every Ajax readyState change.
Finally, the getWeatherCondition method sends an asynchronous Ajax request to WeatherProxyServlet. When the Ajax response comes from the server and the operation is done successfully then the success callback is called, which is the displayWeatherInformation method. In the case of operation failure (which can happen, for example, if the passed WOEID is invalid or the Yahoo! Weather service is down), the failure callback is called, which is the handleWeatherInfoError method.
The displayWeatherInformation method displays the returned weather information HTML result from WeatherProxyServlet (which fetches the weather information from the Yahoo! Weather REST service) in the weatherInformation div element while the handleWeatherInfoError method displays the error message in the same div element and also displays an alert with the error message.
Tip
It is assumed that you are familiar with Ajax programming. If you are not familiar with Ajax programming, it is recommended to check the following introductory Ajax tutorial on w3schools:
In order to prevent IE from caching Ajax GET requests, a random parameter is appended using new Date().getTime(). In many JavaScript libraries, this can be handled through the framework APIs. For example, in Dojo the preventCache attribute of the dojo.xhrGet API can be used to prevent the IE Ajax GET caching.
The following code snippet shows the HTML code of the registration form in the register.jsp file. It consists of a username and two password fields with their corresponding labels, messages, login link, and a register button:
<form class="box register" method="post">
  <fieldset class="boxBody">

<label for="username">Username (Email)  <span id="usernameMessage" class="error"></span></label>
    <input type="text" id="username" name="username"/>

<label for="password1">Password  <span id="passwordMessage1" class="error"></span></label>
    <input type="password" id="password1" name="password1"/>

    <label for="password2">Confirm your password</label>
    <input type="password" id="password2" name="password2"/>

  </fieldset>
  <div id="footer">
    <label><a href="login.jsp">Login</a></label>
<input id="btnRegister" class="btnLogin" type="button" value="Register" onclick="registerUser();" />
  </div>

</form>
When the Register button
is clicked, the registerUser JavaScript function is called. The following code snippet shows the code of the registerUser function in the register.jsp file:
function registerUser() {
  var registrationClient = new weatherapp.RegistrationClient();

  var registrationForm = {
    "userNameField" : "username",
    "passwordField1" : "password1",
    "passwordField2" : "password2",
    "userNameMessage" : "usernameMessage",
    "passwordMessage1" : "passwordMessage1"
  };

  if (registrationClient.validateRegistrationForm(registrationForm)) {

    registrationClient.registerUser(registrationForm,
                     registrationClient.displaySuccessMessage,
                          registrationClient.handleRegistrationError);
  }
}
The registerUser function is calling the RegistrationClient JavaScript object that is responsible for validating and submitting the registration form using Ajax to RegistrationServlet. registerUser constructs the registrationForm JSON object, which includes the username, password1, password2, username message, and password1 message IDs, and then passes the object to the validateRegistrationForm method of the RegistrationClient object.
If the validation passes, it calls the registerUser method of the RegistrationClient object. The first parameter of the registerUser method is the registrationForm JSON object. The second parameter is the success callback, which is the displaySuccessMessage method, while the last parameter is the failure callback, which is the handleRegistrationError method.
The following code
snippet shows the code of the validateRegistrationForm method of the RegistrationClient object in the RegistrationClient.js file. It uses the validation methods of LoginClient in order to validate the empty username and password fields, and to validate if the username and the password fields conform to the validation rules. In addition to this, the validateRegistrationForm method validates if the two entered passwords are identical:
if (typeof weatherapp == "undefined" || !weatherapp) {
  weatherapp = {};
}

weatherapp.RegistrationClient = function() {};
weatherapp.RegistrationClient.xmlhttp;
weatherapp.RegistrationClient.endpointURL = "";

weatherapp.RegistrationClient.prototype.validateRegistrationForm =  function(registrationForm) {
  var userNameMessage = registrationForm.userNameMessage;
  var passwordMessage1 = registrationForm.passwordMessage1;

  var userNameField = registrationForm.userNameField;
  var passwordField1 = registrationForm.passwordField1;
  var passwordField2 = registrationForm.passwordField2;

  var password1 = document.getElementById(passwordField1).value;
  var password2 = document.getElementById(passwordField2).value;

  // Empty messages ...
  document.getElementById(userNameMessage).innerHTML = "";
  document.getElementById(passwordMessage1).innerHTML = "";

  // create the loginClient object in order to validate fields ...
  var loginClient = new weatherapp.LoginClient();

  var loginForm = {};

  loginForm.userNameField = userNameField;
  loginForm.userNameMessage = userNameMessage;
  loginForm.passwordField = passwordField1;
  loginForm.passwordMessage = passwordMessage1;

  // validate empty username and password fields.
  if (! loginClient.validateEmptyFields(loginForm)) {
    return false;
  }

  // validate that password fields have the same value...
  if (password1 != password2) {
document.getElementById(passwordMessage1).innerHTML = "(Passwords must be identical)";

    return false;
  }

  // check if the username is correct...
  if (! loginClient.validateUserName(loginForm) ) {
document.getElementById(userNameMessage).innerHTML = "(format is invalid)";

    return false;
  }

  // check if the password is correct...
  if (! loginClient.validatePassword(loginForm) ) {
document.getElementById(passwordMessage1).innerHTML = "(format is invalid)";

    return false;
  }

  return true;
};
The following
code snippet shows the registerUser method code of the RegistrationClient object in the RegistrationClient.js file. It creates an Ajax POST request with the username and the passwords' (original password and confirmed password) data and sends them asynchronously to RegistrationServlet.
weatherapp.RegistrationClient.prototype.registerUser =  function(registrationForm, successCallBack, failureCallBack) {
  var userNameField = registrationForm.userNameField;
  var passwordField1 = registrationForm.passwordField1;
  var passwordField2 = registrationForm.passwordField2;

  var userName = document.getElementById(userNameField).value;
  var password1 = document.getElementById(passwordField1).value;
  var password2 = document.getElementById(passwordField2).value;

  if (window.XMLHttpRequest) {
    this.xmlhttp = new XMLHttpRequest();
  } else {
    this.xmlhttp = new ActiveXObject("Microsoft.XMLHTTP");
  }

  var successCallBackLocal = successCallBack;
  var failureCallBackLocal = failureCallBack;
  var registrationClientLocal = this;

  this.xmlhttp.onreadystatechange = function() {
registrationClientLocal.registrationReady(successCallBackLocal, failureCallBackLocal);
  };

  if (typeof this.endpointURL == "undefined") {
    this.endpointURL = "";
  }

  this.xmlhttp.open("POST",
            this.endpointURL +
            "/weatherApplication/RegistrationServlet",
             true);

this.xmlhttp.setRequestHeader("Content-type","application/x-www-form-urlencoded");

  this.xmlhttp.send(userNameField + "=" + userName + "&" +
            passwordField1 + "=" + password1 + "&" +
            passwordField2 + "=" + password2);
};

weatherapp.RegistrationClient.prototype.registrationReady =  function(successCallBack, failureCallBack) {
  if (this.xmlhttp.readyState != 4) {
    return;
  }

  if (this.xmlhttp.status != 200)  {
    failureCallBack(this);
return;
}

  if (this.xmlhttp.readyState == 4 && this.xmlhttp.status == 200) {
    successCallBack(this);
      }
};

weatherapp.RegistrationClient.prototype.displaySuccessMessage =  function(registrationClient) {
  alert("User registration went successfully ...");
};

weatherapp.RegistrationClient.prototype.handleRegistrationError =  function(registrationClient) {
  alert(registrationClient.xmlhttp.responseText);
};
RegistrationServlet validates the user data and ensures that the user did not already register in the application. When the Ajax response comes from the server, and the registration
operation is completed successfully, the displaySuccessMessage method is called. If the registration operation failed (for example, if the user ID is already registered in the application), the handleRegistrationError method is called. Both the displaySuccessMessage
and the
handleRegistrationError methods display alerts to show the success and the failure registration messages.
In order to run the weather application, you first need to download the weatherApplication.war file from the book's website (www.packtpub.com). Then you need to deploy the WAR file on Apache Tomcat 6. In order to install Apache Tomcat 6, you need to download it from http://tomcat.apache.org/download-60.cgi. Apache Tomcat 6.0 requires the Java 2 Standard Edition Runtime Environment (JRE) Version 5.0 or later.
In order to install JRE, you need to download and install the J2SE Runtime Environment as follows:
Download the JRE, release Version 5.0 or later, from http://www.oracle.com/technetwork/java/javase/downloads/index.html.
Install the JRE according to the instructions included with the release.
Set an environment variable named
JRE_HOMEto the pathname of the directory in which you installed the JRE, for example,c:\jre5.0or/usr/local/java/jre5.0.
After you download the binary distribution of Apache Tomcat 6, you need to unpack the distribution in a suitable location on the hard disk. After this, you need to define the CATALINA_HOME environment variable, which refers to the location of the Tomcat distribution.
Now, you can start Apache Tomcat 6 by executing the following command on Windows:
$CATALINA_HOME\bin\startup.bat
Start as while in Unix, you can execute the following command:
$CATALINA_HOME/bin/startup.sh
In order to make sure that the Apache Tomcat 6 starts correctly, you need to type the following URL in the browser:
http://localhost:8080/
After making sure that the Apache Tomcat 6 is running correctly, you can stop it by executing the following command on Windows:
$CATALINA_HOME\bin\shutdown.bat
Start as while in Unix, you can execute the following command:
$CATALINA_HOME/bin/shutdown.sh
Now, we come to the step of the weather application deployment where you need to get the weatherApplication.war file from the book resources. After getting the file, copy the WAR file to the $CATALINA_HOME\webapps
folder, then start the Apache Tomcat 6 again.
In order to access the weather application, you can access it using the following URL:
http://localhost:8080/weatherApplication/login.jsp
Tip
For the sake of simplicity, there is a predefined username and password that can be used to access the weather application; the username is [email protected] and the password is Admin@123. Another thing that has to be mentioned is that the registered users are not stored in a database; they are stored in the application scope, which means they will be available as long as the application is not restarted.