LAMP (Linux, Apache, MySQL, and PHP) is a solution stack of open source technologies, which is used for building a web server and is also the current standard for running Magento.
For a more detailed list of requirements, please visit www.magentocommerce.com/system-requirements.
Note
Although Nginx has seen a wider range of adoption among Magento developers at the time of writing this book, Apache2 is still the community-accepted standard. We will focus on working with it.
As developers, there are multiple challenges and nuances of setting and maintaining our development environment, such as:
Matching your development and production environments
Keeping a consistent environment between different platforms and team members
Setting up a new environment that takes several hours
Not all developers have the knowledge or experience for setting up a LAMP server on their own
We can resolve the first two points with the help of Oracle's VirtualBox (www.virtualbox.org). VirtualBox is a powerful and widely popular virtualization engine that will allow us to create virtual machines (VMs). VMs can also be shared between developers and across all major operating systems.
VirtualBox is open source, and it is supported across all platforms. It can be downloaded directly from www.virtualbox.org/wiki/Downloads.
Now, we will proceed to setting up a Linux virtual machine. We have selected Ubuntu Server 12.04.2 LTS for its ease of use and widely available support. First, download the ISO file from www.ubuntu.com/download/server; both 64-bit and 32-bit versions will work.
To create a new Linux virtual machine, perform the following steps:
Start VirtualBox Manager and click on the New button in the upper-left corner, as shown in the following screenshot:

A wizard dialog will pop up and will guide us through the steps for creating a bare virtual machine. The wizard will ask us for the basic information for setting up the virtual machine:
VM Name: How shall we name our virtual machine? Let's name it
Magento_dev 01.Memory: This is the value of system memory that will be assigned to the guest operating system when our VM starts; for running a full LAMP server, 1 GB or more is recommended.
Operating System Type: This is the type of OS that we will be installing later; in our case, we want to select Linux/Ubuntu, and depending on our selection, VirtualBox will enable or disable certain VM options.
Next, we need to specify a virtual hard disk. Select Create a virtual hard drive now, as shown in the following screenshot:

There are many hard disk options available, but for most purposes, selecting VirtualBox Disk Image (VDI) will suffice. This will create a single file on our host operating system.
We now need to select the type of storage on the physical drive. We are provided with the following two options:
Dynamically Allocated: The disk image will grow automatically as the number of files and usage on our guest operating system grows
Fixed Size: This option will limit the size of the virtual disk from the start
Next, we will need to specify the size of our virtual hard disk. We want to adjust the size depending on how many Magento installations we plan to use.
Note
In general, we want to keep at least 2 GB per Magento installation, and another 3 GB if we are running the database server on the same installation. This is not to say that all that space will be used at once or even at all, but Magento installations can use a lot of disk space once product images and cache files are factored in.
Finally, we just need to click on the Create button.
Tip
The main difference is that the fixed-size hard disk will reserve the space on the physical hard drive right from the start, whereas the dynamically allocated hard disk will grow incrementally until it acquires the specified size.
The newly created box will appear on the left-hand side navigation menu, but before starting our recently created VM, we need to make some changes, as follows:
i. Select our newly created VM and click on the Settings button at the top.
ii. Open the Network menu and select Adapter 2. We will set Attached to to Bridged Adapter as we want to set this up as a bridged adapter to our main network interface. This will allow us to connect remotely using SSH.

iii. Go to the System menu and change the boot order so that the CD/DVD-ROM boots first.
iv. On the Storage menu, select one of the empty IDE controllers and mount our previously downloaded Ubuntu ISO image.

At this point, we have successfully installed and configured our VirtualBox instance, and we are now ready to boot our new virtual machine for the first time. To do this, just select the VM in the left sidebar and click on the Start button at the top.
A new window will pop up with an interface to the VM. Ubuntu will take a few minutes to boot up.
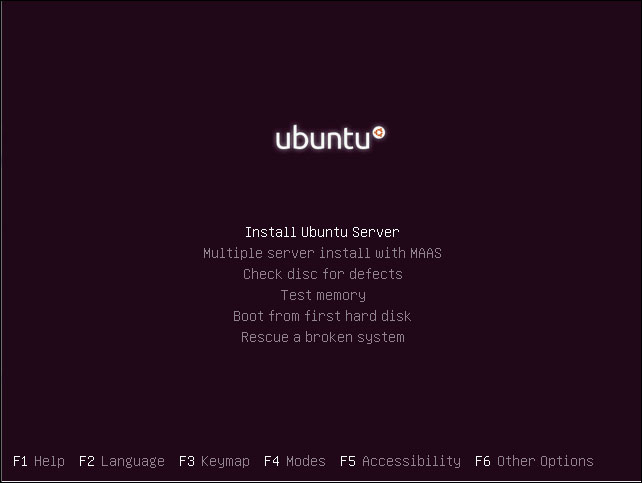
Once Ubuntu has finished booting up, we will see two menus. The first menu will allow us to select the language, and the second one is the main menu, which provides several options. In our case, we just want to proceed with the Install Ubuntu Server option.
We should now see the Ubuntu installation wizard, which will ask for our language and keyboard settings; after selecting the appropriate settings for our country and language, the installer will proceed to load all the necessary packages in memory. This can take up a few minutes.
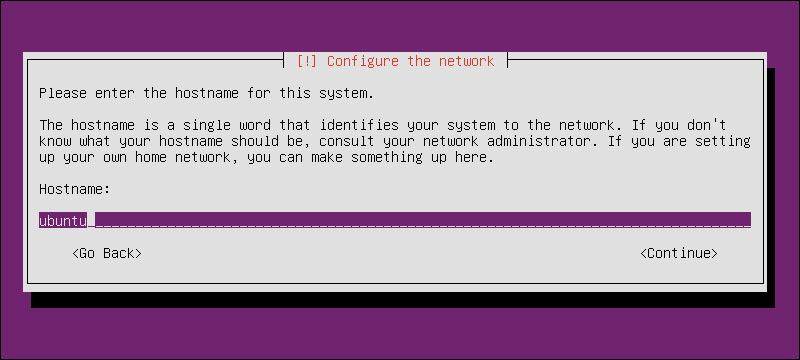
Ubuntu will proceed to configure our main network adapter, and once the automatic configuration is done, we will be asked to set up the hostname for the virtual machine. We can leave the hostname to default settings.
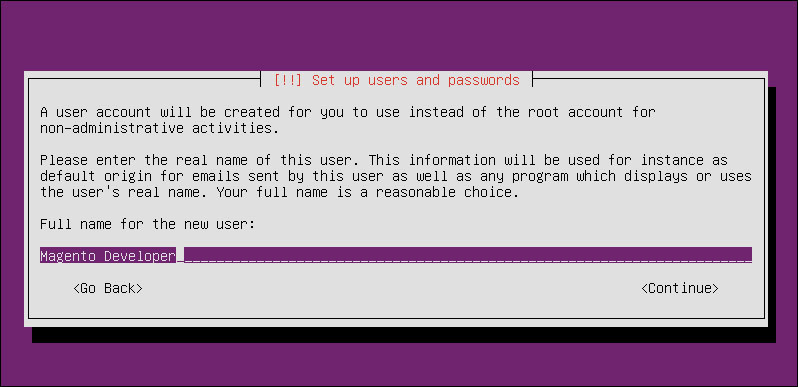
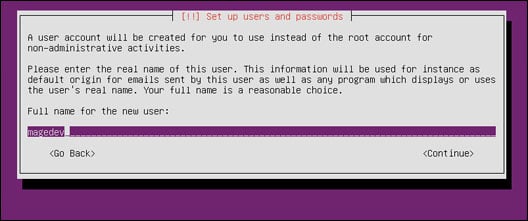
The next screen will request us to enter the full name of our user; for this example, let's use Magento Developer:
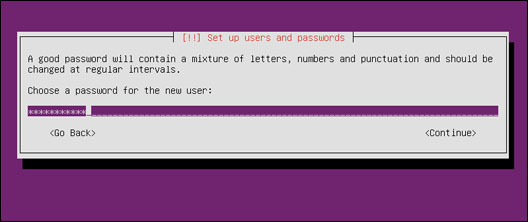
Next, we will be asked to create a username and password. Let's use magedev as our username:
And let's use magento2013 as our password:
On the next screens, we will be asked to confirm our password and set up the correct time zone; after entering the right values, the installation wizard will show the following screen asking about our partition settings:
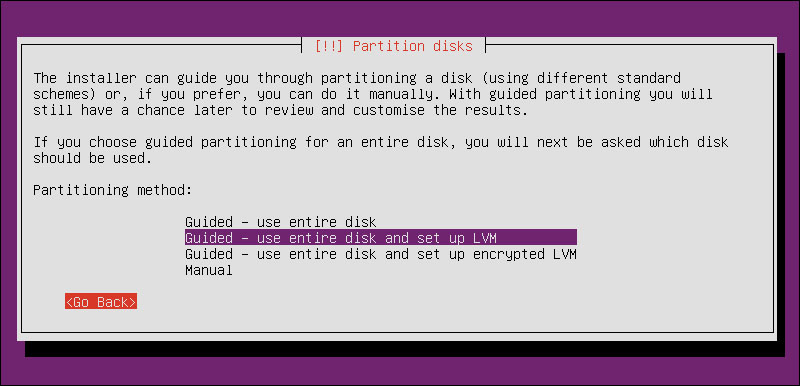
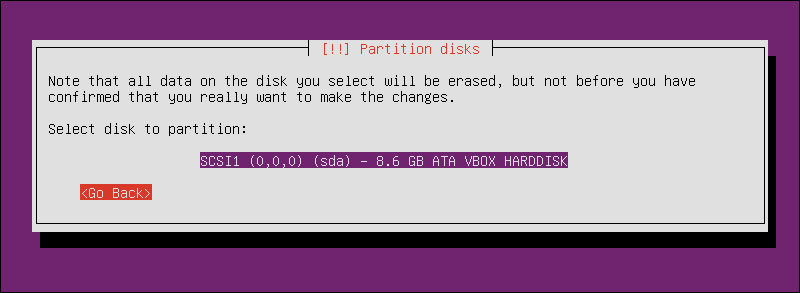
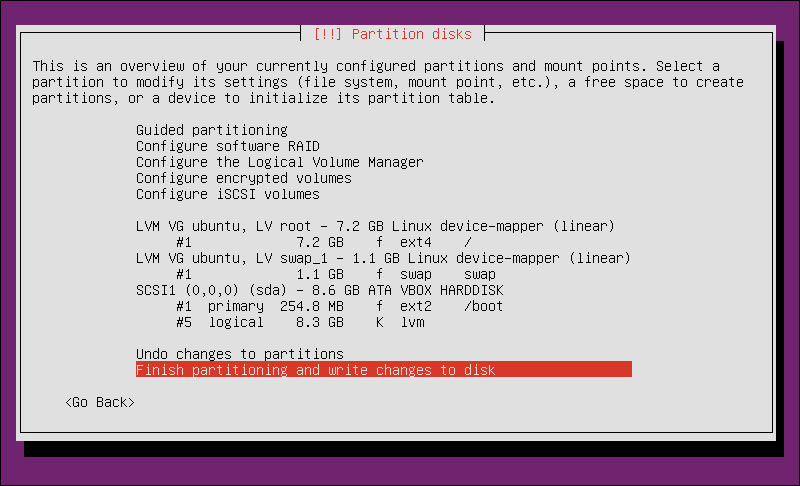
In our case, we select Guided – use entire disk and set up LVM; let's now confirm that we are partitioning our virtual disk:
We will be asked to confirm our changes a final time; select Finish partitioning and write changes to disk, as shown in the following screenshot:
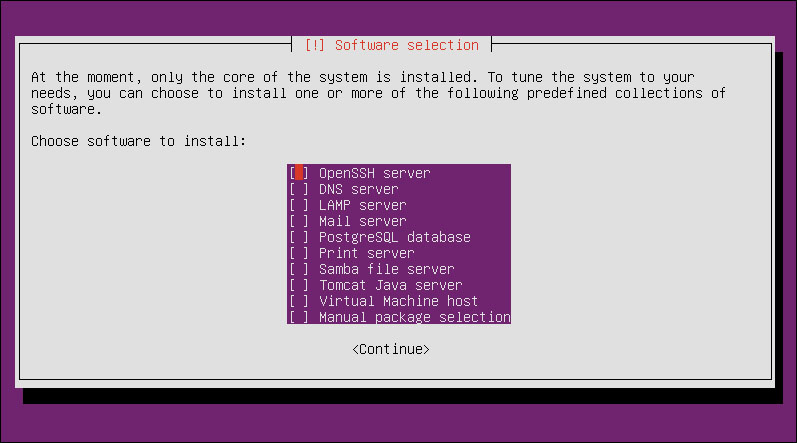
The installation wizard will ask us to select predefined packages to install; one of the options available is LAMP server.
Although this is highly convenient, we don't want to install the LAMP server that comes pre-packaged with our Ubuntu CD; we will be installing all the LAMP components manually to guarantee that they are set up according to specific needs and are up to date with the latest patches.
Next, for this, we will need an SSH server; select OpenSSH server from the list and click on Continue:
Now, installation of Ubuntu is complete and it will reboot into our newly installed virtual box.
We are almost ready to proceed with the installation of the rest of our environment, but first we need to update our package manager repository definitions, log in to the console and run the following command:
$ sudo apt-get update
APT
stands for Advanced Packaging Tool and is one of the core libraries included with most Debian GNU/Linux distributions; apt greatly simplifies the process of installing and maintaining software on our systems.
Once apt-get has finished updating all the repository sources, we can proceed with the installation of the other components of our LAMP server.
Apache is an HTTP server. Currently, it is used to host over 60 percent of the websites on the Web and is the accepted standard for running Magento stores. There are many guides and tutorials available online for fine-tuning and tweaking Apache2 for increasing Magento performance.
Installing Apache is as simple as running the following command:
$ sudo apt-get install apache2 -y
This will take care of installing Apache2 and all the required dependencies for us. If everything has been installed correctly, we can now test by opening our browser and entering http://192.168.36.1/.
Apache by default runs as a service and can be controlled with the following commands:
$ sudo apache2ctl stop
$ sudo apache2ctl start
$ sudo apache2ctl restart
You should now see Apache's default web page with the message It Works!.
PHP is a server-side scripting language and stands for PHP Hypertext Processor. Magento is implemented on PHP5 and Zend Framework, and we would need to install PHP and some additional libraries in order to run it.
Let's use apt-get again and run the following commands to get php5 and all the necessary libraries installed:
$ sudo apt-get install php5 php5-curl php5-gd php5-imagick php5-imap php5-mcrypt php5-mysql -y
$ sudo apt-get install php-pear php5-memcache -y
$ sudo apt-get install libapache2-mod-php5 -y
The first command installed, not only php5, but also additional packages required by Magento to connect with our database and manipulate images.
The second command will install PEAR, a PHP package manager and a PHP memcached adapter.
Note
Memcached is a high-performance, distributed memory caching system; this is an optional caching system for Magento.
The third command installs and sets up the php5 module for Apache.
We can finally test that our PHP installation is working by running the following command:
$ php -v
MySQL is a popular choice of database for many web applications, and Magento is no exception. We will need to install and set up MySQL as part of development stack using the following command:
$ sudo apt-get install mysql-server mysql-client -y
During installation, we will be asked to enter a root password; use magento2013. Once the installer has finished, we should have a mysql service instance running in the background. We can test it by trying to connect to the mysql server using the following command:
$ sudo mysql -uroot -pmagento2013
If everything has been installed correctly, we should see the following mysql server prompt:
mysql>
At this point, we have a fully functional LAMP environment that can be used not only for developing and working on Magento websites but also for any other kind of PHP development.
At this point, we have a basic LAMP set up and running. However, for working with Magento, we would need to do some configuration changes and additional setup.
The first thing that we will need to do is to create a location to store our development site's files, so we will run the following commands:
$ sudo mkdir -p /srv/www/magento_dev/public_html/
$ sudo mkdir /srv/www/magento_dev/logs/
$ sudo mkdir /srv/www/magento_dev/ssl/
This will create the necessary folder structure for our first Magento site. Now we need to check out the latest version of Magento. We can quickly get the files by using SVN.
We would first need to install SVN on our server with the following command:
$ sudo apt-get install subversion -y
Once the installer has finished, open the magento_dev directory and run the svn command to get the latest version files:
$ cd /srv/www/magento_dev
$ sudo svn export --force http://svn.magentocommerce.com/source/branches/1.7 public_html/
We will also need to fix some of the permissions on our new Magento copy:
$ sudo chown -R www-data:www-data public_html/
$ sudo chmod -R 755 public_html/var/
$ sudo chmod -R 755 public_html/media/
$ sudo chmod -R 755 public_html/app/etc/
Next, we need to create a new database for our Magento installation. Let's open our mysql shell:
$ sudo mysql -uroot -pmagento2013
Once in the mysql shell, we can use the create command, which should be followed by the type of entity (database, table) we want to create and the database name to create a new database:
mysql> create database magento_dev;
Although we could use the root credentials for accessing our development database, this is not a recommended practice to follow because it could compromise not only a single site but also the full database server. MySQL accounts are restricted based on privileges. We want to create a new set of credentials that has limited privileges to only our working database:
mysql> GRANT ALL PRIVILEGES ON magento_dev.* TO 'mage'@'localhost' IDENTIFIED BY 'dev2013$#';
Now, we need to properly set up Apache2 and enable some additional modules; fortunately, this version of Apache comes with a set of useful commands:
a2ensite: This creates symlinks between the vhost files in thesites-availableand thesites-enabledfolders to allow the Apache Server to read those files.a2dissite: This removes the symlinks created by thea2ensitecommand. This effectively disables the site.a2enmod: This is used to create symlinks between themods-enableddirectory and the module configuration files.a2dismod: This will remove the symlinks frommods-enableddirectory. This command will prevent the module from being loaded by Apache.
Magento uses the mod_rewrite module for generating the URLs. mod_rewrite uses a rule-based rewriting engine to rewrite request URLs on the fly.
We can enable mod_rewrite with the a2enmod command:
$ sudo a2enmod rewrite
The next step will require that we create a new virtual host file under the sites-available directory:
$ sudo nano /etc/apache2/sites-available/magento.localhost.com
The nano command will open a shell text editor where we can set up the configuration for our virtual domain:
<VirtualHost *:80>
  ServerAdmin [email protected]
  ServerName magento.localhost.com
  DocumentRoot /srv/www/magento_dev/public_html

  <Directory /srv/www/magento_dev/public_html/>
    Options Indexes FollowSymlinks MultiViews
    AllowOverride All
    Order allow,deny
    allow from all
  </Directory>
  ErrorLog /srv/www/magento_dev/logs/error.log
  LogLevel warn
</VirtualHost>
To save the new virtual host file, press Ctrl + O and then Ctrl + X. The virtual host file will tell Apache where it can find the site files and what permissions to give them. In order for the new configuration changes to take effect, we need to enable the new site and restart Apache. We can use the following commands to do so:
$ sudo a2ensite magento.localhost.com
$ sudo apache2ctl restart
We are nearly ready to install Magento. We just need to set up a local mapping into our host system host file by using any of the following:
Windows
i. Open
C:\system32\drivers\etc\hostsin notepadii. Add the following line at the end of the file:
192.168.36.1 magento.localhost.com
Unix/Linux/OSX
i. Open
/etc/hostsusingnano:$ sudo nano /etc/hostsii. Add the following line at the end of the file:
192.168.36.1 magento.localhost.com
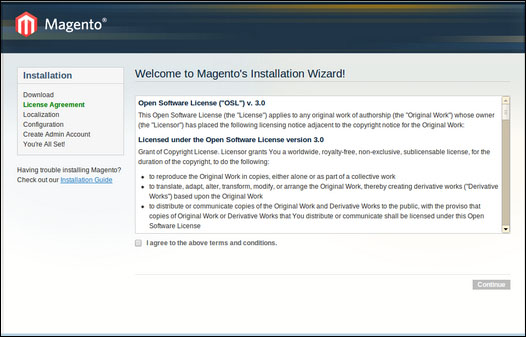
We can now install Magento by opening http://magento.localhost.com in our browser. At last, we should see the installation wizard. Follow the steps as indicated by the wizard, and you will be set to go!