

We often use images when building websites, so it's no surprise that we would like to use them in conjunction with Masonry. To avoid the common issue of the Masonry elements not aligning correctly when the dimensions of the images are not available when Masonry initially runs, we need to wait until the images have finished loading before applying Masonry. Luckily, Masonry comes shipped with a plugin called imagesLoaded for image support. We use imagesLoaded to wait for the images to finish loading, after which we need to let Masonry measure the images properly.
In the code bundle for this book, open the 3-images-loaded.html file in your preferred text editor to follow along.
In this example, we are only working with images, so we only need to set our gutters in CSS.
<style>
  .masonry-item {
    margin: 5px;
    float: left;
  }
</style>
Tip
Downloading the example code
You can download the example code files for all Packt books you have purchased from your account at http://www.packtpub.com. If you purchased this book elsewhere, you can visit http://www.packtpub.com/support and register to have the files e-mailed directly to you.
We need to set up some images, so I'm going to use an image placeholder service called LoremPixel. This allows us to dynamically insert dummy images of whatever size and proportion we need. The images I will be using have three arguments after the base URL. The first argument is the width of the image, the second is the height of the image, and the third is the category of the image. The category is optional.
<div id="masonry-container">
  <div class="masonry-item">
    <img src="http://lorempixel.com/250/250/technics" alt="random" />
  </div>
  <div class="masonry-item">
    <img src="http://lorempixel.com/250/350/technics" alt="random" />
  </div>
  <div class="masonry-item">
    <img src="http://lorempixel.com/250/450/technics" alt="random" />
  </div>
</div>
Note
The images used above are loaded in by an image placeholder service called LoremPixel (http://www.lorempixel.com). This allows us to insert test data without needing any actual files in our directory. All images used are licensed under the Creative Commons license (CC BY-SA).
To use
imagesLoaded, we need to first wrap the Masonry container in a jQuery object, after which we can applyimagesLoadedand Masonry actions to the container object.<script> $container = $('#masonry-container'); $container.imagesLoaded(function() { $container.masonry({ itemSelector : '.masonry-item' }); }); </script>
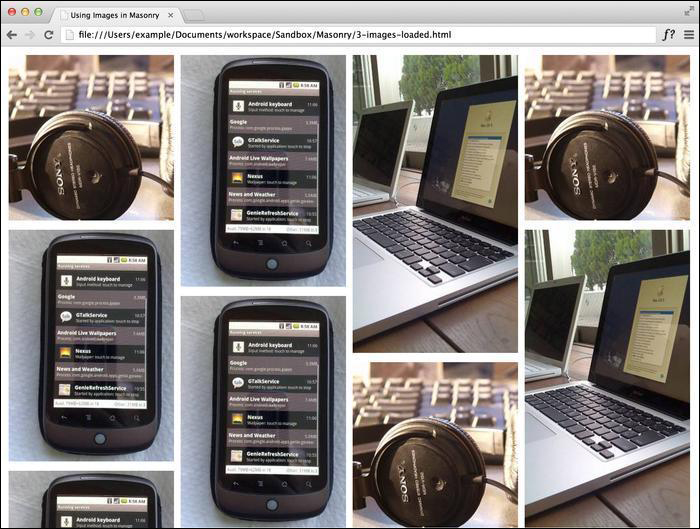
The imagesLoaded plugin works by waiting until all the images have been loaded by the browser and then triggering Masonry. The result should look like the following screenshot:
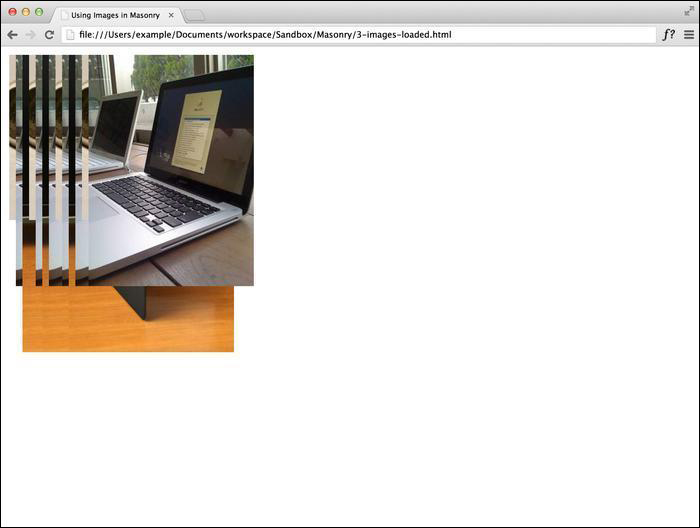
If you do not use the imagesLoaded plugin, you will notice that the images load on top of each other in the same corner in the browser, as shown in the next screenshot. This is because Masonry was running before the images loaded completely, so it tries to organize a set of empty elements it doesn't know the size of. When imagesLoaded is used with Masonry, the script waits until all of the images have been loaded before triggering Masonry.
There are some other alternatives to using the imagesLoaded plugin. For instance, we can assign each image a width and height property using the inline dimensions. Once these values are assigned to the elements, Masonry determines their spacing. Depending on how the site is being built, it might be tedious to ensure that all those image elements have height and width properties assigned.
The last alternative is to use $(window).load(). While this method isn't particularly efficient, as it can result in a potentially longer wait time, it does work; it waits until all the assets (such as images and media) are loaded into the window before triggering Masonry.
<script>
  $(window).load(function() {
    $('#masonry-container').masonry({
      itemSelector : '.masonry-item',
    });
  });
</script>