
When working on specialized projects, sometimes you need to build a feature that may involve adding additional content to a page, either through AJAX or through manual processes like comments and submissions. Fortunately for us, not only can we add new content to the Masonry container, we can also trigger Masonry to reload all the items to realign all Masonry elements back into a proper grid.
In the code bundle for this book, open the 5-add-reload.html file in your preferred text editor to follow along. For this exercise, we will be using a small jQuery plugin called Placeholder.js to generate random text when adding new elements. Placeholder.js can be found at the following URL:
https://github.com/decabear/placeholderjs/blob/master/placeholder.min.js
We will start off with the existing CSS properties that we have already defined for the Masonry elements. In this recipe, we will stick to single columns of width 150 px. Also, just for fun, let's make the dynamically generated items a different color for visual effect.
<style>
   .masonry-item {
      background: #FFA500;
      float: left;
      margin: 5px;
      padding: 5px;
      width: 130px;
   }
   .placeholder {
      background: #0BB5FF;
   }
</style>
Build the standard Masonry HTML structure; add as many Masonry items as necessary. We will also add a button above and outside the Masonry container because later in the recipe we will be dynamically generating additional Masonry items by clicking on it.
<div>
   <button id="add-html">Add HTML</button>
</div>
<div id='masonry-container'>
   <div class='masonry-item '>
      Maecenas faucibus mollis interdum.
   </div>
   <div class='masonry-item '>
      Maecenas faucibus mollis interdum. Donec sed odio dui. Nullam quis risus eget urna mollis ornare vel eu leo. Vestibulum id ligula porta felis euismod semper.
   </div>
   <div class='masonry-item '>
      Nullam quis risus eget urna mollis ornare vel eu leo. Cras justo odio, dapibus ac facilisis in, egestas eget quam. Aenean eu leo quam. Pellentesque ornare sem lacinia quam venenatis vestibulum.
   </div>
</div>
Include Placeholder.js after Masonry, making sure to put in the correct relative path, and insert the following script:
<script src="js/placeholder.min.js"></script>
<script>
   $(function(){

      $container = $('#masonry-container');
      $container.masonry({
         itemSelector : '.masonry-item',
         isAnimated: true
      });

      //dynamically add Masonry items to the page
      $('#add-html').click(function(){
         $add = $("<div/>", {"class": "masonry-item placeholder"}).placeholder({"min": 15, "max": 50});
         $container.append($add).masonry('reload');
      });
   });
</script>
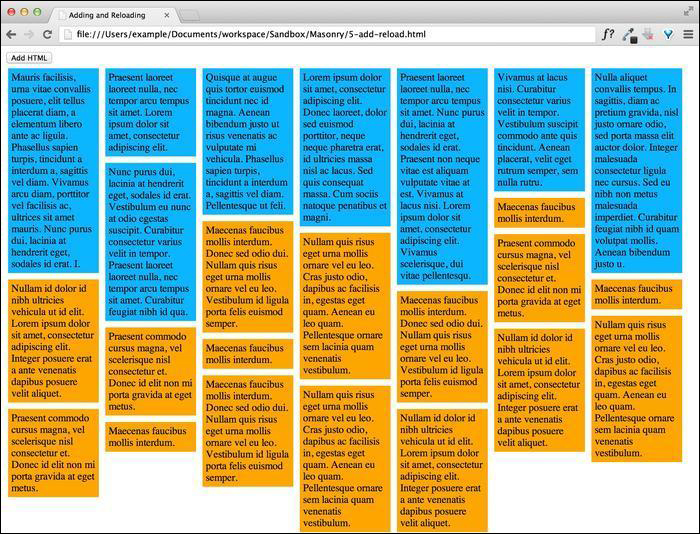
For the first section, you can see that we're just running the ordinary Masonry script to set the Masonry items into the grid. We then assign a click event to the button we created and next bind an event handler that creates a new <div> class with the masonry-item placeholder class that get loaded with a random amount of text using Placeholder.js. Once the Masonry item is created, we use the jQuery append event to add the element to the end of the Masonry container; we then use the Masonry append method to apply the proper position to the appended item, which can be seen in the following screenshot:
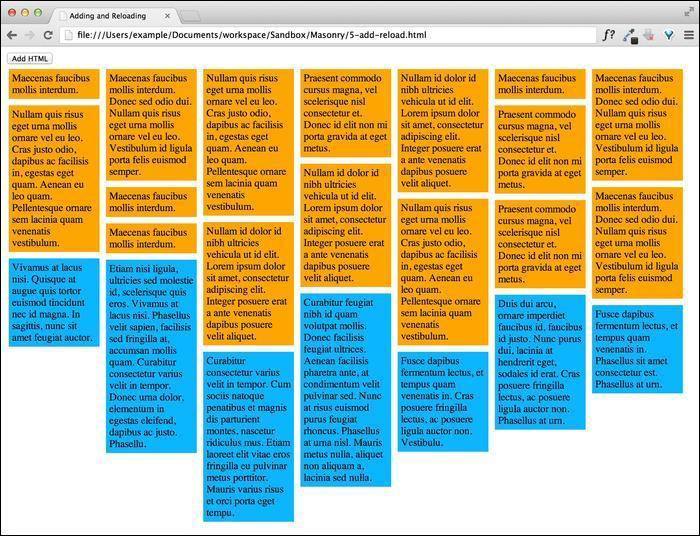
Appending is great for adding content such as comments to the bottom of a page, but sometimes we need to add content to the top of the page. It is more than likely that this is a blog post or some other kind of time-sensitive material. We can easily switch the jQuery append method with the prepend method, which will insert our created content before all the other Masonry items. Note that we used the Masonry append method when appending an item (adding it to the end). If we use the jQuery prepend method instead of the Masonry append method, we need to use reload. This is because we don't know beforehand the size of the element that is being loaded in; so we reload all the elements to recalculate the alignment of the elements in the Masonry grid correctly. The result will look like the following screenshot: