

Being the owner of a Magento store and receiving orders is one thing, but converting our Magento store into a successful business relies on being able to manage the orders we receive effectively and being able to distinguish between the different stages of an order's lifespan within Magento.
Every order that comes into Magento will appear within our Sales | Orders section inside the administration panel.
Within this section we will be shown a complete list of all orders, the associated customer, price, and most importantly their status.
When we are editing an order, we simply select the order by clicking on it. This will take us to the view order page.
So, we have received an order through Magento, the customer's money has been collected by our payment gateway, we have invoiced the customer, and we have done all the hard work behind the scenes picking, packaging, and having our order collected by our chosen carrier. Now we need to mark our order as complete in order to distinguish it from all our other unshipped orders.
To ship our order, when on our order view page, we can simply click on the button marked as Ship. This will take us to the New Shipment page where we will save our shipment for this order.
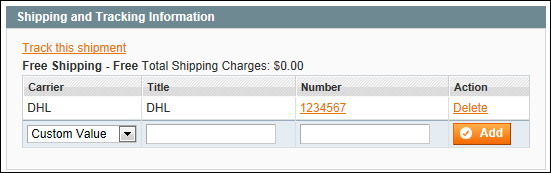
To add a tracking number to our order we need to navigate to the Shipping Information section of our new shipment.
Within this section we'll set Carrier to DHL, and within the Title field enter
DHL.For the Number option we need to enter our tracking number obtained from DHL. Once entered we can then click on Add Tracking Number. The following screenshot shows the shipping information area:

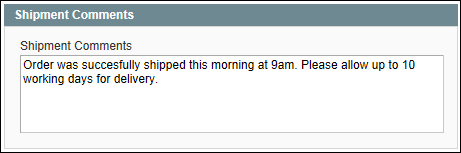
Now that we have added our tracking number we can then choose to add a comment to our shipment. Let's navigate down to the comments box and add one as shown in the following screenshot:
Once we are happy with our comments we can submit our shipment, navigate to the bottom-right of the page within the yellow box, and then check Append Comments, Email Copy of Shipment, and finally click on Submit Shipment to save our new shipment.
Magento's order system heavily relies on order statuses. Whenever we change an order, whether that is invoicing or shipping, the order status should change. By default, once we have invoiced and shipped our order, the order status will change from Pending to Processing (depending on payment method used).
When we create a new shipment, we are changing the status of our order as well as automatically e-mailing the customer with their tracking code (plus any comments that we decided to add).
It is important to conform to the order processes that Magento provides for us as it makes running our business so much easier, such as generating financial reports and keeping customers up to date throughout the order process.
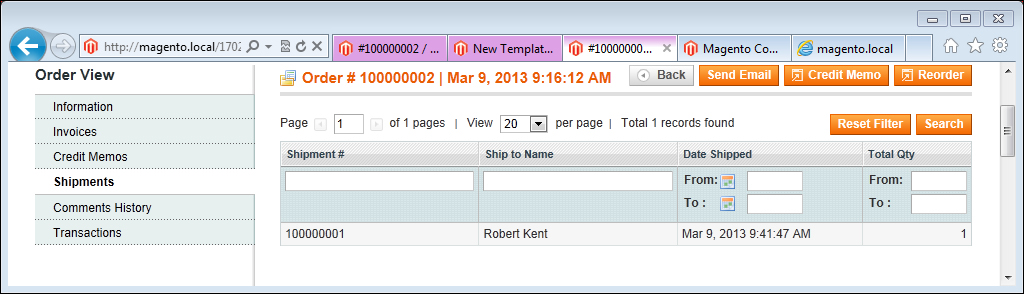
Now that a new shipment has been created for our order we can always refer back to it by navigating to Sales | Shipments (for a complete list of all our shipments) or alternatively, by navigating back through our order to the Shipments tab and clicking on the shipment we find there.
Upon returning to the shipment page for our order we will be able to add more comments or send additional tracking information to the customer as required.
If we are using a carrier such as DHL, they should provide us with a tracking number once they have received our order notification. If we are not using a courier that provides a tracking code or one that isn't supported in Magento, we can choose to not supply one at all.
In the Shipping Information section there are a number of pre-configured carriers available, each one provides a different link for the customer to click on to track their parcel. Some third-party extensions for other carriers also populate this area with a link for their own tracking number.
Once we have entered our tracking number and saved our shipment, we will be able to track our order by clicking on the Track this shipment link on our shipment page as shown in the following screenshot:
Shipment comments can be viewed by the customer within their account section as long the Visible on Frontend checkbox is ticked before submitting a comment.
For this example we will enter a comment in the administration panel communicating to the customer that we have confirmed with the carrier that their parcel will be with them in the afternoon. On our view shipment page let's submit a comment similar to that in the following screenshot (making sure that Visible on Frontend is checked):

If we could then log in as that customer, we would notice that inside their My Account section and within My Orders is a tab for shipments that contains our new comment as shown in the following screenshot:

Similarly, we can submit a comment for our whole order by visiting the view order page (Sales | Orders and clicking on our order) and entering our comment there—the customer will then pick this up in their My Orders section of My Account.
This would be useful if for example, we wanted to let the customer know that their entire order has been delayed for some reason.