
Allow ten minutes for this activity:
Add categories to the Moodle gradebook expand and collapse columns in the gradebook.
The Moodle gradebook is often a last thought, which is a shame because it is one of the most powerful ways of showing progress on a learning journey. It takes ten minutes to set up the gradebook to tally weekly scores of XP and/or reputation points. You will need access to a test Moodle site and your own test course, as discussed in the introduction, to follow these steps.
Go to Administration | Course administration | Edit settings.
Choose Weekly format, if you don't have the time to set individual dates on each activity. You can reuse this next semester without changing the dates.
Choose four (or more) weeks to follow this step-by-step guide.
Change the Course layout to Show one section per page to keep a minimal design:

Figure 1.4: Weekly format is great for busy teachers who want to re-use this course next year without changing dates
Take a few minutes to set up categories in your gradebook as the first step to keep scores throughout your course:
In the ADMINISTRATION block of your course, select Grades.
By default, you will see Grader report. Use the drop-down box (or possibly tabs in your site) to select Categories and items. See the following screenshot:
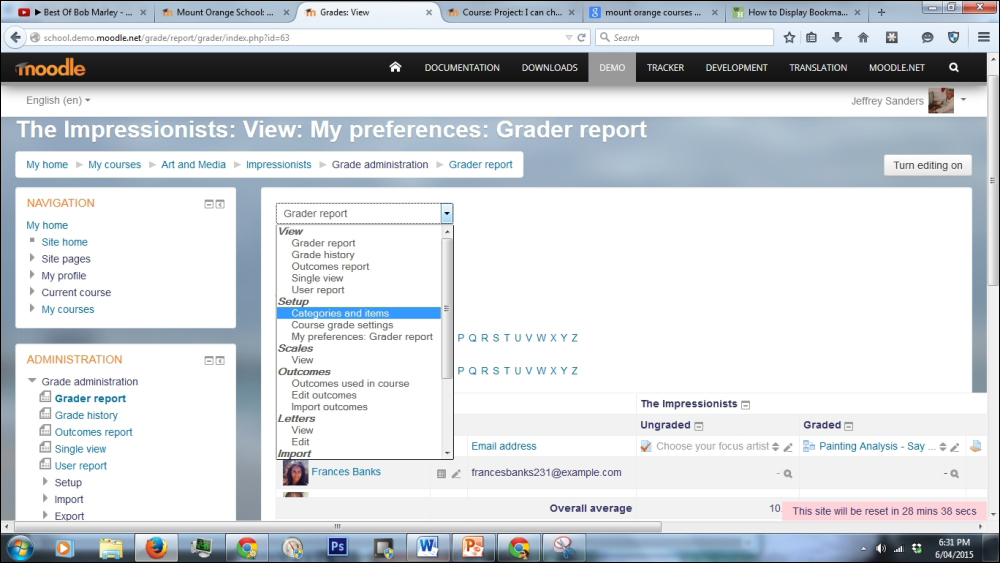
Figure 1.5: Select the 'Categories and items' to add and mange categories
The demo course shown in the following screenshots has two categories set up: Graded and Ungraded, which is a great start that any course should use as a minimum requirement. In your own test course, add these two top level categories of Graded and Ungraded. Use the button at the bottom of the page to Add category.
We are going to go a few steps further and add subcategories under Graded for at least four weeks. Use the button at the bottom of the page to Add category. Ensure you select a parent category for Graded.
The parent category will calculate the total in a variety of ways. At first, you should keep it as simple as possible with the Natural default option (older versions of Moodle call this Sum of Grade). Moodle 2.8 hides advanced options. Even so, the options are endless and can be overwhelming. For now, keep with the simplest approach until you face a need for a different calculation.
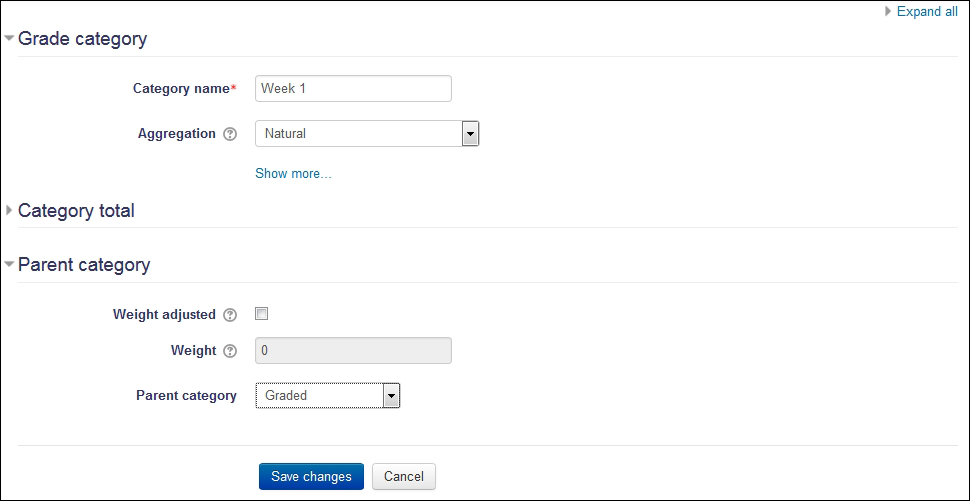
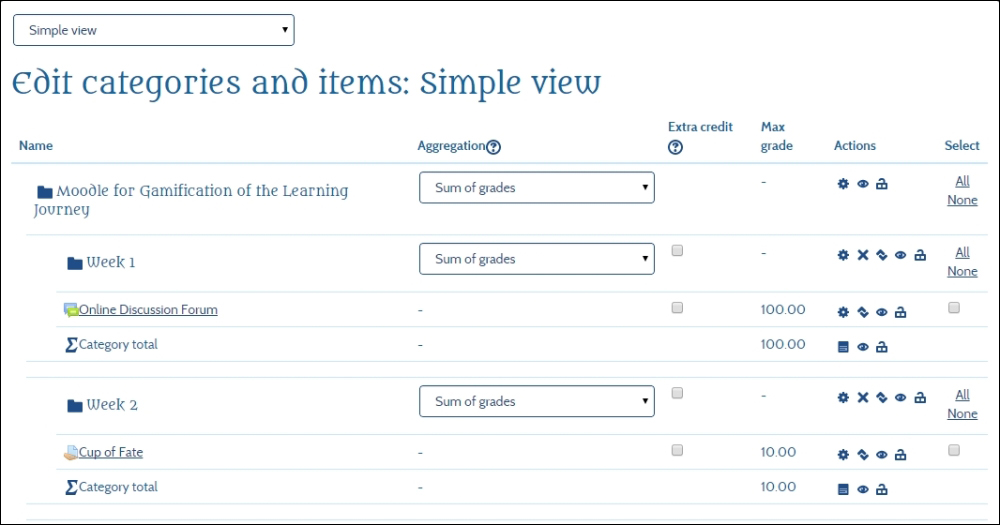
Figure 1.6: Set up a category for Week 1 and another for Week 2 and so on
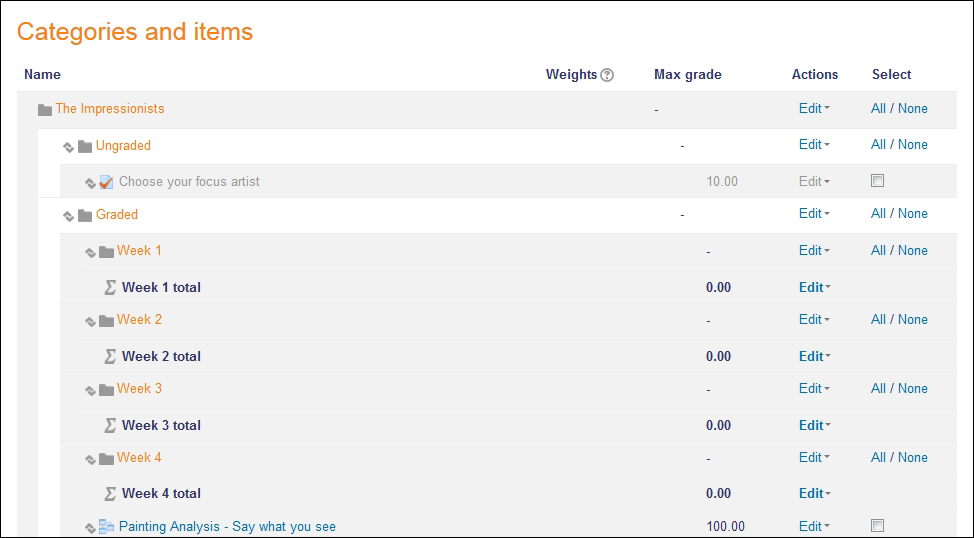
Switch views back to your Grader report using the drop-down menu. Notice that each week can be collapsed or expanded to see weekly tallies of points earned, for example, Week 4 total (see the following screenshot):
From now on when you create an activity, you can place it in these pre-defined categories:

When you create new activities, you will be able to choose which grading subcategory they should be placed in. At the very least, having activities in the two categories of Graded and Ungraded makes the gradebook more accurate for learners. We will place a few activities within each week. This is a flexible approach because you can have any number of activities within a week and use the gradebook as a calculator. It also allows you to back up the whole course and reuse it next year with a weekly session plan starting from your chosen date. Also, this way you don't have to change due dates on assignments and quizzes each term.
The first time you attempt this in your class, you may prefer to use paper or a simple spreadsheet over a three-week test run to build your own confidence in the process.
Tip
When starting to use these calculations, choose percentages in the gradebook view to help in seeing how the calculations are being made. For example, Grade display type default (percentage), so you will see results such as 45 (90%).

Figure 1.10: Show both the real value and percentage in the gradebook while you are planning your course scoring system
Tip
Read more about the Gradebook on Moodle Docs at https://docs.moodle.org/28/en/Grader_report
In this chapter, we used the Moodle gradebook to organize groups of activities into categories. Earlier versions of Moodle offered many options to cater to the different needs of schools around the globe. Moodle 2.8 offers a much simpler interface and layout. From now on, every activity can be placed in the correct category on creation. This will save you time and make your gradebook more accurate.
Keeping the gradebook accurate makes it easier for your learners to get a clear feedback on progress. Hide any elements you don't need by clicking on the little eye icon. You can hide the course total completely, if it is misleading in the final result. Students can access course grades by a link in the ADMINISTRATION block. If you don't need to use the gradebook, then use the Moodle course settings page and change the gradebook to be not displayed.
The next chapter will inspire you to start thinking like a game designer when you start adding activities in your Moodle course. There are simple and quick changes you can make that will have a powerful effect on learner engagement.
