
Organizing your project is a necessary evil. Surely there is someone out there who loves this process, but for others who just want to develop all day and all night, there may be a smaller emphasis placed on organization. However, you can take some simple steps to organize your project that can be reused for future projects.
Within Storyline, the organizational emphasis of this chapter will be placed on using Story View and optimizing the use of scenes. These are two elements of Storyline that, depending on the size of your project, can make a world of difference when it comes to making sense of all the content you've authored and in terms of making the structure of your content more palatable.
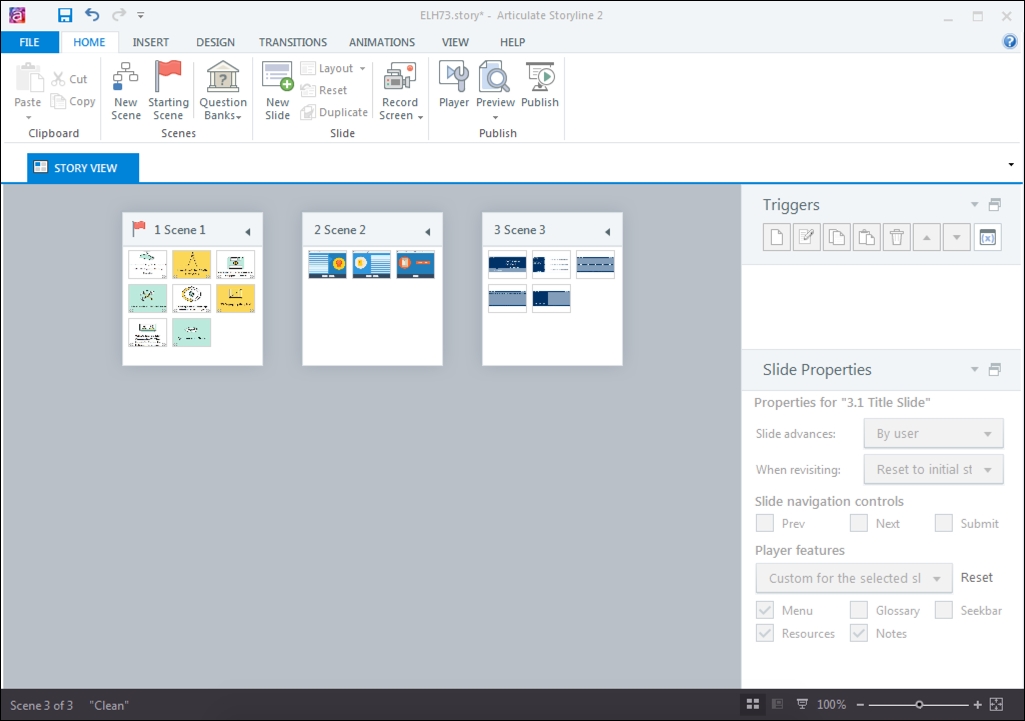
Story View is such a great feature of Storyline! It provides you with a bird's eye view of your project or story and essentially shows you a visual blueprint of all the scenes and slides. This is particularly helpful in projects that involve a lot of branching. Instead of seeing the individual parts, you're seeing the parts as they represent the whole–the Gestalt psychology would be proud! You can also use Story View to plan out the movement of existing scenes or slides if content isn't lining up quite the way you want it to:
Scenes play a very big role in maintaining organization within your story. They serve to group slides into smaller segments of the entire story and are typically defined using logical breaks. However, it's all up to you how you decide to group your slides. If the story you're working on consists of multiple topics or modules, each topic or module would logically become a new scene.
Visually, scenes work in tandem with Story View in that, while you're in Story View, you can clearly see the various scenes and move things around appropriately. Functionally, scenes serve to create submenus in the main Storyline menu, but you can change this if you don't want to see each scene delineated in the menu.
From an organization and control perspective, scenes can help you reel in unwieldy and overwhelming content. This particularly comes in handy with large courses, where you can easily lose your place when trying to track down a specific slide of a scene, for example, in a sea of 150 slides. In this sense, scenes allow you to chunk content into more manageable scenes within your story and will likely allow you to save on development and revision time.
Using scenes will also help when it comes to previewing your story. Instead of having to wait to load 150 slides each time you preview, you can choose to preview a scene and will only have to wait for the slides in that scene to load–perhaps 15 slides of the entire course instead of 150. Scenes really are a magical thing!
Asset management is just what it sounds like–managing your assets. Now, your assets may come in many forms, for example, media assets (your draft and/or completed images/video/audio), customer furnished assets (files provided by the client, which could be raw images/video/audio/PowerPoint/Word documents, and so on), or content output (outputs from whichever authoring tool you're using). If you've worked on large projects, you will likely relate to how unwieldy these assets can become if you don't have a system in place for keeping everything organized.
This is where the management element comes into play.
Setting up a consistent folder structure is really important when it comes to managing your assets. Structuring your folders may seem like a daunting administrative task, but, once you determine a structure that works well for you and your projects, you can copy the structure for each project. So yeah, there is a little bit of up front effort, but the headache it will save you in the long run when it comes to tracking down assets for reuse is worth the effort! Again, this folder structure is in no way prescribed, but it is a recommendation and one that has worked well. It looks something like the following:

It may look overwhelming, but it's really not that bad. There are likely more elements accounted for here than you may need for your project, but all the main elements are included and you can customize it as you see fit. This is how the folder structure breaks down:

Within these folders, there may be other sub-folders, but this is the general structure that has proven effective for me. When it comes to file names, you may wish to follow a file naming convention dictated by the client or follow an internal file naming convention, which indicates the project, type of media, asset number, and version number, for example, PROJECT_A_001_01.
If there are multiple courses for one project, you may also want to add an arbitrary course number to keep tabs on which asset belongs to which course. Once a file naming convention has been determined, these file names will be managed within a spreadsheet, housed within the main 200>Media folder.
The basic goal of this recommended folder structure is to organize your course assets and break them into three groups to further help with the organization.
If this folder structure sounds like it might be functional for your purposes, go ahead and download a ready-made version of the folder structure.