
The script editor is a dedicated online development environment that allows for text editing, automatic code formatting, and basic error detection, it can be opened from the tools menu of a spreadsheet, the tools menu of a text document, or directly from the Google Drive home page at https://drive.google.com | Create | Connect more apps | Script. This last document type is optional in the drive interface, but once you have it activated, it will remain available. I strongly recommend that you do so if you are interested in Google Apps Script.
For now, we will use the spreadsheet interface, open the script editor from the Tools menu, and write the code snippet we just prepared.
The script editor is probably the best thing that has happened to me in my long journey trying to learn programming in Google Apps Script because it has a very useful feature that some people still seem to ignore: autocompletion.
Autocomplete or Content assist (which is presently the official name of this tool) can be activated from the Edit menu in the script editor; the keyboard shortcut to activate it is Ctrl + Space bar.
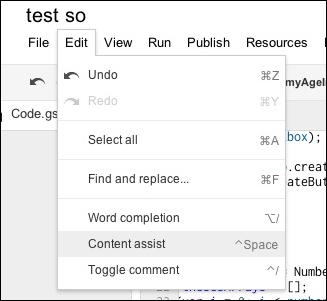
This writing assistance will help you avoid a lot of errors, from simple typos to type mismatch or syntax errors because it simply suggests all the possible methods available while you are typing your code.
For example, imagine we want to get the value from the cell that is selected in the sheet with which we are working (later, we'll see in detail what this really means). The code for it is as follows:

Let's admit that this is not so simple to type in when we are new to this; using the uppercase in the right places and the importance of sequence order are not really easy to manage.
Now press s, just s and nothing else, and then hold Ctrl and press Space bar. The following is a screenshot of what you will see:
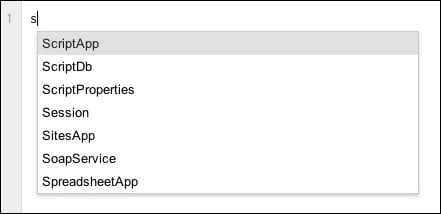
These are all the class objects available in Google Apps Script starting with letter S; you can choose the one you want with your mouse or the keyboard arrows, or even by simply adding more letters.
We want SpreadsheetApp, so we can select it right from the list or just type p and the following screenshot shows what we get:

Isn't it magic? No, there's no magic there, but it's really helpful and so easy!
This feature sometimes shows new services and methods even before they are officially announced! (Believe me, it's happened a few times that some of us discovered undocumented features just by accidentally using a keystroke.)
Anyway, even if it probably won't happen anymore since Google rewrote all its documentation recently and makes real efforts to keep it up-to-date, it is still really helpful for everybody, from an absolute beginner to a Google Apps Script expert.
As mentioned earlier, we have to use a dot to chain methods in JavaScript, so let's type a dot followed by pressing Ctrl + Space bar again, as shown in the following screenshot:
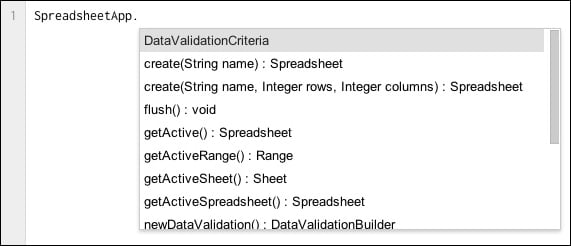
Now, the list in the previous screenshot is too long to show entirely in the small UI window, so let's narrow it down to what we are looking for, by typing the letter g as shown in the following screenshot:
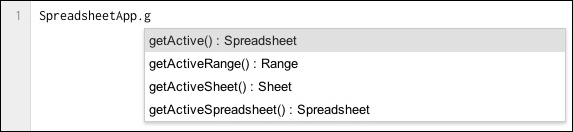
The choice is clear. Actually, we could use any of these methods to finally get the value in the selected cell, so let's go to the end of the process by just repeating the same workflow, as shown in the following screenshot:
I'm very happy to tell you that you just typed a beautiful line of code that is completely useless! But, at least it didn't cost you much effort.
That code is indeed not very interesting; it doesn't assign a value to a variable nor does it do anything else. It is just an example of correct syntax; correct but not useable.
The following screenshot shows a code that we could use:

In the single line of code shown in the previous screenshot, we create a variable (cellValue) and we assign it a value, which is taken from the content of the active cell. That's a good starting point.
In this example, we've assumed that the meanings of all these methods used have been clearly understood and that the choice has nothing to do with chance or hazard; that was indeed the case, but of course it won't be so clear if you have just started to work with these tools, so it might be interesting to have a quick look at it now.
The documentation on Google Apps Script is available on the Google Developers Products page as part of the Google Apps platform (https://developers.google.com/apps-script/) and shows a mix of guides, tutorials, and reference documentation along with a few links to helpful resources, including the Stack Overflow forum (http://stackoverflow.com/questions/tagged/google-apps-script) that I've already mentioned and where I've been participating since May 2012, which is when Google closed their Google Groups Help forum where I took my first steps in this subject. The Stack Overflow forum uses tags to sort the numerous posts; you can use this tagged link to restrict your search results to the relevant language (see Chapter 8, How to Expand Your Knowledge).

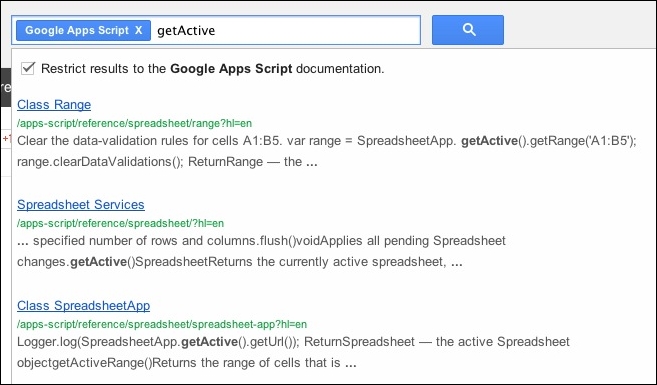
The very first thing we find on this web page is a search window, as illustrated in the preceding screenshot, in which we can type any keyword that we want to run a search for.
The search engine is Google's primary business, so we can be quite sure that it will return the results in a fast and reliable manner.
The results are by default restricted to Google Apps Script and suggest references to every documentation item in various categories from which you can choose. It shows a subset of its content as well.
When we choose one of the search results, we arrive at the reference documentation page where we find an exhaustive list of all the available methods in the relevant category.
Most of the important methods include code examples that show you how to use them and what data they return. In many cases, the example code can be a good starting code for a beginner.
You can also look for what you need manually, of course, using the sidebar index where every Google Apps Script class opens a folder tree containing every possible method you can use.
Another option is to have a look at the quickstart and tutorials links in the Overview section at https://developers.google.com/apps-script/overview. I cannot recommend enough that you read this at least once, particularly if you are not familiar with program writing but also in every other case because it will show you all the possible ways to use Google Apps Script with the help of various simple examples and video presentations.
I am not going to reproduce the documentation's content in this book as that would be completely useless, so let us continue with our first step in JavaScript programming.
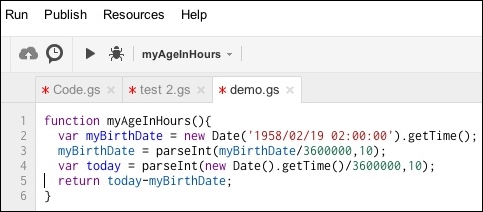
Earlier in this chapter, we wrote our first Google Apps Script function as follows:
function myAgeInHours(){
  var myBirthDate = new Date('1958/02/19 02:00:00').getTime();
  myBirthDate = parseInt(myBirthDate/3600000, 10);
  var today = parseInt(new Date().getTime()/3600000, 10);
  return today-myBirthDate;
}
But, we haven't really executed it yet, so let us try it now.
On top of the script editor, we have a
Run menu and a play icon  that will start executing the selected function, as shown in the following screenshot:
Clicking on the play icon or navigating to Run | myAgeInHours triggers the script execution; but if you try it, you will see that nothing happens. That is normal, as the function we wrote returns a result, but only in the context in which it is intended to work.
In other words, if another function would have called this function, it would have got the result as a number representing the duration in hours between now and my birth date, or if we had used the same function as a spreadsheet function, we would have seen the result in the spreadsheet cell.
Let us try this last method, better known as custom spreadsheet functions, in the next section.