
Our first Django project will be a complete blog site. Django provides a command that allows you to easily create an initial project file structure. Run the following command from your shell:
django-admin startproject mysite
This will create a Django project with the name mysite.
Let's take a look at the generated project structure:
mysite/
  manage.py
  mysite/
    __init__.py
    settings.py
    urls.py
wsgi.pymanage.py: A command-line utility to interact with your project. It is a thin wrapper around thedjango-admin.pytool. You don't need to edit this file.mysite/: Your project directory consist of the following files:__init__.py: An empty file that tells Python to treat themysitedirectory as a Python module.settings.py: Settings and configuration for your project. Contains initial default settings.urls.py: The place where your URL patterns live. Each URL defined here is mapped to a view.wsgi.py: Configuration to run your project as a WSGI application.
The generated settings.py file includes a basic configuration to use a SQLite database and a list of Django applications that are added to your project by default. We need to create the tables in the database for the initial applications.
Open the shell and run the following commands:
cd mysite
python manage.py migrate
You will see an output that ends like this:
Rendering model states... DONE
Applying contenttypes.0001_initial... OK
Applying auth.0001_initial... OK
Applying admin.0001_initial... OK
Applying contenttypes.0002_remove_content_type_name... OK
Applying auth.0002_alter_permission_name_max_length... OK
Applying auth.0003_alter_user_email_max_length... OK
Applying auth.0004_alter_user_username_opts... OK
Applying auth.0005_alter_user_last_login_null... OK
Applying auth.0006_require_contenttypes_0002... OK
Applying sessions.0001_initial... OK
The tables for the initial applications have been created in the database. You will learn about the migrate management command in a bit.
Django comes with a lightweight web server to run your code quickly, without needing to spend time configuring a production server. When you run the Django development server, it keeps checking for changes in your code. It reloads automatically, freeing you from manually reloading it after code changes. However, it might not notice some actions like adding new files to your project, so you will have to restart the server manually in these cases.
Start the development server by typing the following command from your project's root folder:
python manage.py runserver
You should see something like this:
Performing system checks...

System check identified no issues (0 silenced).
November 5, 2015 - 19:10:54
Django version 1.8.6, using settings 'mysite.settings'
Starting development server at http://127.0.0.1:8000/
Quit the server with CONTROL-C.
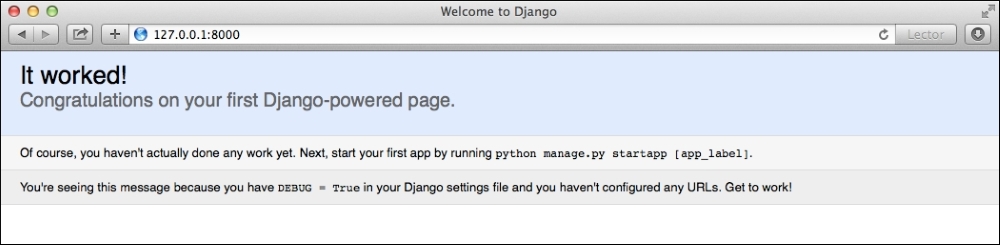
Now, open the URL http://127.0.0.1:8000/ in your browser. You should see a page telling you the project is successfully running, as shown in the following screenshot:
You can indicate Django to run the development server on a custom host and port, or tell it that you want to run your project loading a different settings file. For example, you can run the manage.py command as follows:
python manage.py runserver 127.0.0.1:8001 \
--settings=mysite.settings
This comes in handy to deal with multiple environments that require different settings. Remember, this server is only intended for development and is not suitable for production use. In order to deploy Django in a production environment, you should run it as a Web Server Gateway Interface (WSGI) application using a real web server such as Apache, Gunicorn, or uWSGI. You can find more information about how to deploy Django with different web servers at https://docs.djangoproject.com/en/1.8/howto/deployment/wsgi/.
Additional downloadable Chapter 13, Going Live covers setting up a production environment for your Django projects.
Let's open the settings.py file and take a look at the configuration of our project. There are several settings that Django includes in this file, but these are only a part of all the Django settings available. You can see all settings and their default values in https://docs.djangoproject.com/en/1.8/ref/settings/.
The following settings are worth looking at:
DEBUGis a boolean that turns on/off the debug mode of the project. If set toTrue, Django will display detailed error pages when an uncaught exception is thrown by your application. When you move to a production environment, remember you have to set it toFalse. Never deploy a site into production withDEBUGturned on because you will expose sensitive data of your project.ALLOWED_HOSTSis not applied while debug mode is on or when running tests. Once you are going to move your site to production and setDEBUGtoFalse, you will have to add your domain/host to this setting in order to allow it to serve the Django site.INSTALLED_APPSis a setting you will have to edit in all projects. This setting tells Django which applications are active for this site. By default, Django includes the following applications:django.contrib.admin: This is an administration site.django.contrib.auth: This is an authentication framework.django.contrib.contenttypes: This is a framework for content types.django.contrib.sessions: This is a session framework.django.contrib.messages: This is a messaging framework.django.contrib.staticfiles: This is a framework for managing static files.
MIDDLEWARE_CLASSESis a tuple containing middlewares to be executed.ROOT_URLCONFindicates the Python module where the root URL patterns of your application are defined.DATABASESis a dictionary containing the settings for all the databases to be used in the project. There must always be adefaultdatabase. The default configuration uses a SQLite3 database.LANGUAGE_CODEDefines the default language code for this Django site.
Don't worry if you don't understand much about what you are seeing. You will get more familiar with Django settings in the following chapters.
Throughout this book, you will read the terms project and application over and over. In Django, a project is considered a Django installation with some settings; and an application is a group of models, views, templates, and URLs. Applications interact with the framework to provide some specific functionalities and may be reused in various projects. You can think of the project as your website, which contains several applications like blog, wiki, or forum, which can be used in other projects.
Now let's create your first Django application. We will create a blog application from scratch. From your project's root directory, run the following command:
python manage.py startapp blog
This will create the basic structure of the application, which looks like this:
blog/
    __init__.py
    admin.py
    migrations/
        __init__.py
    models.py
    tests.py
    views.py
These files are as follows:
admin.py: This is where you register models to include them into the Django administration site. Using the Django admin site is optional.migrations: This directory will contain database migrations of your application. Migrations allow Django to track your model changes and synchronize the database accordingly.models.py: Data models of your application. All Django applications need to have amodels.pyfile, but this file can be left empty.tests.py: This is where you can add tests for your application.views.py: The logic of your application goes here. Each view receives an HTTP request, processes it, and returns a response.