

Along with Java and C#, Selenium WebDriver can also be used with various other programming languages. Among these, Python and Ruby are popular choices to create Selenium WebDriver tests. In this recipe, you will see how to install Selenium WebDriver client libraries in Python and Ruby.
You will need Python or Ruby installed before installing the Selenium WebDriver client library.
You can download and install the latest Python version from https://www.python.org/. In this recipe, Python 3.4 is used.
Similarly, you can download and install the latest Ruby version from https://www.ruby-lang.org/en/installation/. In this recipe, Ruby 2.1.3 is used.
Installation and setting up Selenium WebDriver with Python or Ruby is simple using following steps.
You can install Selenium WebDriver with Python using the pip tool with the following command line:
pip install selenium
This will get the latest version of Selenium WebDriver Python client library installed. That's it.
Let's create a simple test in Python using this installation. Create a google_search.py file in your favorite editor or IDE and copy the following code:
import unittest
from selenium.webdriver.support import expected_conditions
from selenium import webdriver
from selenium.webdriver.support.ui import WebDriverWait


class GoogleSearch(unittest.TestCase):
    def setUp(self):
        self.driver = webdriver.Firefox()
        self.driver.implicitly_wait(30)
        self.base_url = "https://www.google.com/"

    def test_google_search(self):
        driver = self.driver
        driver.get(self.base_url)

        element = driver.find_element_by_idname("q")
        element.clear()
        element.send_keys("Selenium testing tools cookbook")
        element.submit()

        WebDriverWait(driver, 30)\
            .until(expected_conditions.title_contains("Selenium testing tools cookbook"))
        self.assertEqual(driver.title, "Selenium testing tools cookbook - Google Search")

    def tearDown(self):
        self.driver.quit()

if __name__ == "__main__":
    unittest.main(verbosity=2, warnings="ignore")
You can run this test using the following command line:
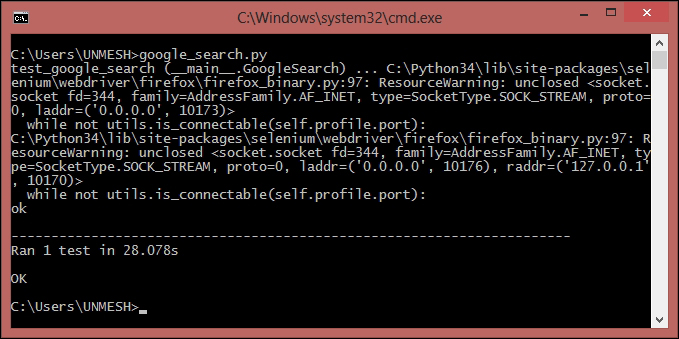
python google_search.py
The Python interpreter will execute the test and you will see a Firefox window being opened and performing the search operation on Google.com. At the end of the execution you will see the results, as shown in the following screenshot:
You can install Selenium WebDriver with Ruby using the gem tool with following command line:
gem install selenium-webdriver
This will get the latest version of Selenium WebDriver Ruby client library installed. That's it.
Let's create a simple test in Ruby using this installation. Create a google_search.rb file in your favorite editor or IDE and copy the following code:
require "selenium-webdriver"
gem "test-unit"
require "test/unit"

class GoogleSearch < Test::Unit::TestCase
  def setup
    @driver = Selenium::WebDriver.for :firefox
    @base_url = "https://www.google.com/"
    @driver.manage.timeouts.implicit_wait = 30
  end

  def test_google_search
    @driver.get(@base_url)

    element = @driver.find_element(:name, "q")
    element.clear
    element.send_keys "Selenium testing tools cookbook"
    element.submit()

    wait = Selenium::WebDriver::Wait.new(:timeout => 10)
    wait.until { @driver.title.include? "Selenium testing tools cookbook" }

    assert_equal "Selenium testing tools cookbook - Google Search", @driver.title
  end

  def teardown
    @driver.quit
  end
end
You can run this test using the following command line:
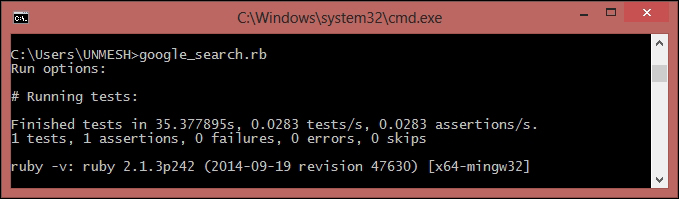
ruby google_search.rb
Ruby interpreter will execute the test and you will see a Firefox window being opened and performing the search operation on Google.com. At the end of the execution you will see the results, as shown in the following screenshot:
Selenium WebDriver is supported on various programming languages. For each supported language, a client library or language binding is published by the Selenium developers. These client libraries have Selenium WebDriver classes and functions that are needed to create automation scripts.
These libraries can be installed using package installers available with the respective languages. In this case, we used pip for Python, which connected to the
PyPI (Python Package Index) source using the Internet, downloaded the latest Selenium WebDriver Python client library and installed with the Python directory. Similarly, Selenium WebDriver Ruby Gem is installed using the gem utility.