

To protect our project against human error, we will use a version control system called Git. Version control is a tool that records changes in files over time. This allows a programmer to see how the code has changed from previous revisions and even revert the code to the previous state. Version control systems also make collaboration easier than ever, as changes can be shared between many different programmers and merged into the current version of the project automatically, without copying and pasting hundreds of lines of code.
Simply put, version control is like backups for your code, only more powerful.
Installing Git is very simple. Simply go to http://www.git-scm.com/downloads and click on the Operating System (OS) that is being run. A program will begin to download that will walk you through the basic installation process.
Git was originally developed solely for Unix OSes (for example, Linux, Mac OS X). Consequently, using Git on Windows is not seamless. During the installation, the installer will ask whether you want to install Git alongside the normal Windows Command Prompt. Do not pick this option. Choose the default option that will install a new type of command line on your system named Bash, which is the same command line the Unix systems use. Bash is much more powerful than the default Windows command line, and this will be used in all the examples in this book.
Note
A good introduction to Bash for beginners is located at http://linuxcommand.org/learning_the_shell.php#contents.
Git is a very complex tool; only the basics that are needed for this book will be covered here.
Note
To learn more, refer to the Git documentation at http://www.git-scm.com/doc.
Git does not track your changes automatically. In order for Git to run properly, we have to give it the following information:
Which folders to track
When to save the state of the code
What to track and what not to
Before we can do anything, we tell Git to create a git instance in our directory. In your project directory, run the following in your terminal:
$ git init
Git will now start to track changes in our project. As git tracks our files, we can see the status of our tracked files, and any files that are not tracked, by typing the following command:
$ git status
Now we can save our first commit, which is a snapshot of your code at the time that you run the commit command.
# In Bash, comments are marked with a #, just like Python
# Add any files that have changes and you wish to save in this commit
$ git add main.py
# Commit the changes, add in your commit message with -m
$ git commit -m"Our first commit"
At any point in the future, we can return to this point in our project. Adding files to be committed is called staging files in Git. Remember to add stage files only if you are ready to commit them. Once the files are staged, any further changes will not be staged as well. For an example of more advanced Git usage, add any text to your main.py file with your text editor and then run the following:
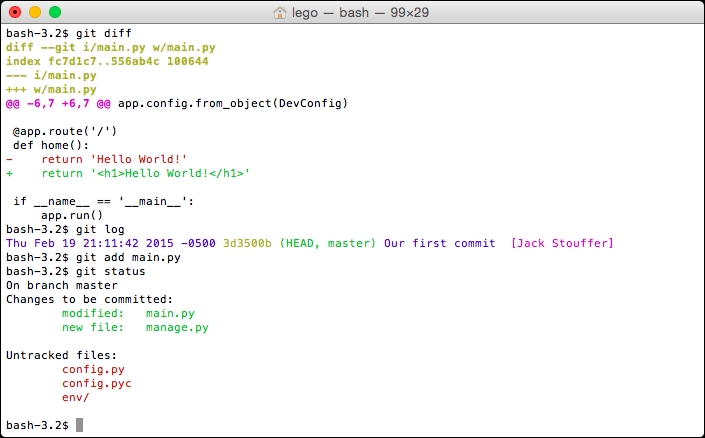
# To see the changes from the last commit
$ git diff
# To see the history of your changes
$ git log
# As an example, we will stage main.py
# and then remove any added files from the stage
$ git add main.py
$ git status
$ git reset HEAD main.py
# After any complicated changes, be sure to run status
# to make sure everything went well
$ git status
# lets delete the changes to main.py, reverting to its state at the last commit
# This can only be run on files that aren't staged
$ git checkout -- main.py
Your terminal should look something like this:
The Git system's checkout command is rather advanced for this simple introduction, but it is used to change the current status of the Git system's HEAD pointer—that is, the current location of our code in the history of our project. This will be shown in the next example.
Now, to see the code in a previous commit, first run this:
$ git log
Fri Jan 23 19:16:43 2015 -0500 f01d1e2 Our first commit  [Jack Stouffer]
The string of characters next to our commit message, f01d1e2, is called the hash of our commit. It is the unique identifier of that commit that we can use to return to the saved state. Now, to take the project back to that state, run this:
$ git checkout f01d1e2
Your Git project is now in a special state where any changes or commits will neither be saved nor affect any commits that were made after the one you checked out. This state is just for viewing old code. To return to the normal mode of Git, run this:
$ git checkout master