

Throughout the following recipes, we will install the latest Apache 2.4.x version on a Software as a Service (SaaS) platform hosted by DigitalOcean. The current Apache version supports HTTP/2. This recipe will show you how to do this.
Tip
HTTP/2 is an optimized version of the Hypertext Transfer Protocol (HTTP), also known as HTTP version 2 (HTTP/2). Some of the new features of HTTP/2 are a more efficient usage of network resources and network latency. HTTP/2 allows multiple concurrent connections over a single Transmission Control Protocol (TCP) connection at once, which optimizes TCP load. Merging CSS and JS is not necessary anymore. HTTP/2 service also provides the possibility to use server push, which allows a proactive push of resources to the client.
For this recipe, you will need to create an account at DigitalOcean https://www.digitalocean.com/. No other prerequisites are required.
For the purpose of this recipe, let's assume that we need to create an Apache hosting environment. The following steps will guide you through this:
The first step is creating an account at https://cloud.digitalocean.com/registrations. All the steps to create an account are straightforward. Confirm your mail and update your billing profile.
Start creating your first Droplet. Choose your hostname, and select your size (2GB CPU's or 40GB SSD Disk). Next, pick your region (DigitalOcean has many regions available worldwide). Select your image (we will use the latest Ubuntu). Select extra available settings such as Private Networking to run multiple servers including an Internet network or backup and IPv6 options. If you already have an SSH key, you can upload this:
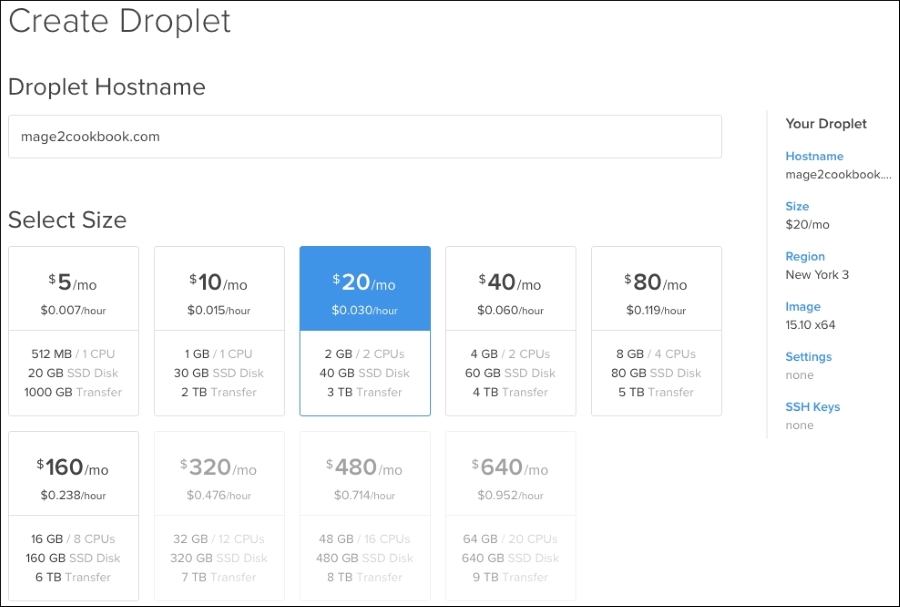
The Droplet takes approximately 60 seconds to get created. You will get an e-mail right after including all the additional login details such as the hostname, IP address, username, and password.
Configure your domain name,
yourdomain.com, to the addressed IP address from the Droplet:yourdomain.com A 123.123.123.123 www CNAME yourdomain.comConnect your Droplet with SSH using your favorite SSH client (putty or terminal) and change your password:
sudo ssh yourdomain.comFirst, we will update your server to the latest updates available:
apt-get update && apt-get -y upgradeNext, we will install Apache 2 using a third-party package. Currently, Ubuntu doesn't include the latest Apache 2.4.x with HTTP/2 support. The third-party vendor that we will use is https://launchpad.net/~ondrej/+archive/ubuntu/apache2. Run the following command:
echo "deb http://ppa.launchpad.net/ondrej/apache2/ubuntu wily main" | sudo tee -a /etc/apt/sources.list.d/apache2.list
echo "deb-src http://ppa.launchpad.net/ondrej/apache2/ubuntu wily main" | sudo tee -a /etc/apt/sources.list.d/apache2.list
Before we can install Apache 2, we need to authorize the package by installing a signed key:
apt-key adv --keyserver keyserver.ubuntu.com --recv-keys 0x4F4EA0AAE5267A6CNow, we will update our Ubuntu system using the latest Apache2 packages:
apt-get update && apt-get -y install apache2Once every Apache 2 package is installed, we can check whether everything is in order by running the following command on the shell:
apache2 -vThe output of this command is as follows:
root@mage2cookbook:~# apache2 -v
Server version: Apache/2.4.17 (Ubuntu)
If you have followed steps 1 to 9, you will be able to see if the web server is running. Go to your favorite browser and search using your yourdomain.com.
Let's recap and find out what we did throughout this recipe. In steps 1 through 3, we create a clean hosting server setup using DigitalOcean. Next, we connect the Droplet IP to your domain name in DNS. After login via SSH, we are able to update the server and continue to the process of installing Apache 2 via a third-party repository. Depending on the Ubuntu setup, we need to change the version name, such as precise, trusty, wily, vivid, or xenial, to install the software.
In step 8, we submit a key that will validate the repository before we can start installing the Apache 2 software. In step 9, we use a simple command to update the repository and start installing.