Book Image

Node.js 6.x Blueprints

By : Fernando Monteiro
Book Image

Node.js 6.x Blueprints

By: Fernando Monteiro

Overview of this book

Node.js is the most popular framework to create server-side applications today. Be it web, desktop, or mobile, Node.js comes to your rescue to create stunning real-time applications. Node.js 6.x Blueprints will teach you to build these types of projects in an easy-to-understand manner. The key to any Node.js project is a strong foundation on the concepts that will be a part of every project. The book will first teach you the MVC design pattern while developing a Twitter-like application using Express.js. In the next chapters, you will learn to create a website and applications such as streaming, photography, and a store locator using MongoDB, MySQL, and Firebase. Once you’re warmed up, we’ll move on to more complex projects such as a consumer feedback app, a real-time chat app, and a blog using Node.js with frameworks such as loopback.io and socket.io. Finally, we’ll explore front-end build processes, Docker, and continuous delivery. By the end of book, you will be comfortable working with Node.js applications and will know the best tools and frameworks to build highly scalable desktop and cloud applications.
Table of Contents (16 chapters)
Node.js 6.x Blueprints
Credits
About the Author
About the Reviewer
www.PacktPub.com
Preface

Inserting images in the application using the upload form


Now it's time to test the application, noting that for this you should start your MongoDB. Otherwise the application will return a failure error while connecting:

  1. Open your terminal/shell at the root project folder and type the following command:

    npm start
    
  2. Go to http://localhost:3000/signup and enter the following data:

  3. Go to http://localhost:3000/images-gallery, click on the Image Upload button, fill in the form with a title and choose an image (note that we set up the image size limit to MB just for example purposes). You will see a model form, as the following screenshot shows:
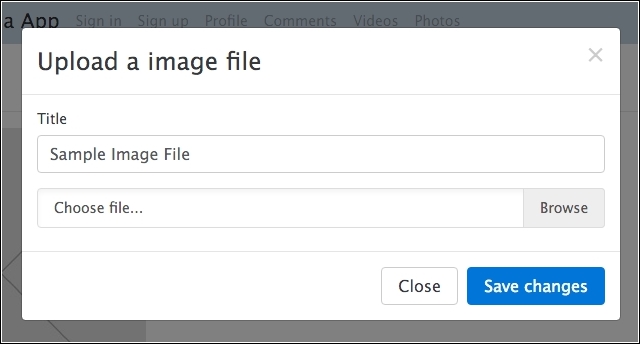
    Image upload form

  4. After choosing the image, click on the Save Changes button, and you're done! You will see the following screenshot at http://localhost:3000/images-gallery page:

    Gallery image screen