Book Image

Full Stack Web Development with Raspberry Pi 3

By : Soham Kamani
Book Image

Full Stack Web Development with Raspberry Pi 3

By: Soham Kamani

Overview of this book

Modern web technology and portable computing together have enabled huge advances in the Internet of Things (IoT) space,as well as in areas such as machine learning and big data. The Raspberry Pi is a very popular portable computer for running full stack web applications. This book will empower you to master this rapidly evolving technology to develop complex web applications and interfaces. This book starts by familiarizing you with the various components that make up the web development stack and that will integrate into your Raspberry Pi-powered web applications. It also introduces the Raspberry Pi computer and teach you how to get up and running with a brand new one. Next, this book introduces you to the different kinds of sensor you’ll use to make your applications; using these skills, you will be able to create full stack web applications and make them available to users via a web interface. Later, this book will also teach you how to build interactive web applications using JavaScript and HTML5 for the visual representation of sensor data. Finally, this book will teach you how to use a SQLite database to store and retrieve sensor data from multiple Raspberry Pi computers. By the end of this book you will be able to create complex full stack web applications on the Raspberry Pi 3 and will have improved your application’s performance and usability.
Table of Contents (13 chapters)
2
Getting Up-and-Running with Web Development on the Raspberry Pi

Fine-tuning our control - using the GPIO command-line tools

Controlling the Raspberry Pi's GPIO pins is surprisingly simple using the GPIO command-line interface.

First, install the GPIO command-line tools by running this:

git clone git://git.drogon.net/wiringPi
cd wiringPi/
./build

Verify that the gpio command-line tool has been installed by running this:

gpio -v

Let's say we have an LED connected to pin 4 (to be more specific, the positive end is connected to pin 4 and the negative end is connected to one end of a resistor, whose other end is connected to the ground pin).


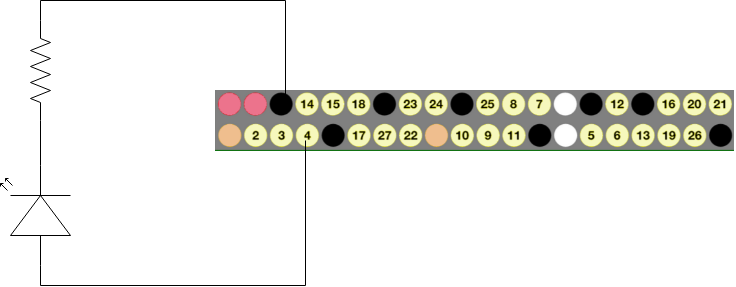
This circuit is similar to the pin-low Write mode we discussed earlier.

You can test this circuit through the following steps:

  1. Set the pin 4 to output mode:
gpio mode 4 output
  1. Set the pin to high:
gpio write 4 1

You should now see the LED glowing.

  1. Set the pin to low:
gpio write 4 0

The LED should...