

This recipe presents you with how to retrieve a LinkedIn user's profile through the user's authorization using OAuth 2.0 and Spring Social to abstract all Authorization Code grant type from the OAuth 2.0 protocol.
To run this recipe, create a simple web application using Spring Boot which will help the development of the application. To abstract and ease the OAuth 2.0 grant type implementation, and to help in using the LinkedIn API, this recipe also relies on the spring-social-linkedin project.
As described by OAuth 2.0's protocol, the client application must be registered at the Authorization Server which in this case is LinkedIn:
- So to satisfy this condition, the first thing to do is to register the application on LinkedIn by accessing https://www.linkedin.com/developer/apps/.
- When accessing the previous URL, click on
Create Applicationand you will be redirected to the following page which will ask you for basic information about the application being created:

- Unlike many other OAuth 2.0 Providers, LinkedIn requires an application logo as you might have seen in the previous image. LinkedIn also asks for more business data such as the website URL, business email, and business phone.

- As we are using Spring Social, let's add a Redirect URL which follows the pattern regarding the endpoint which was defined as
connect/linkedin. After entering theRedirect URL, click on theAddand then click onUpdatebutton. - Now, make sure to grab the
Authorization Keys(that is,client_idandclient_secret) to use in the application that we will create in the next step.
- Create the initial project using Spring Initializr as we did for the other recipes in this book. Go to https://start.spring.io/ and define the following data:
- Set up the
Groupascom.packt.example - Define the
Artifactassocial-linkd(you can use different names if you prefer, but do not forget to change all the references forlinkdthat were used throughout this recipe) - Add
WebandThymeleafas the dependencies for this project
- Set up the
- Import the project to your IDE (if using Eclipse, import as a Maven Project).
- Add the following dependency to the
pom.xmlfile:
<dependency>
   <groupId>org.springframework.boot</groupId>
   <artifactId>spring-boot-starter-social-linkedin</artifactId>
</dependency>
- For this recipe, the Spring Social provider implementation already provides a well-defined auto configuration support for Spring Boot. So, it's easier to create the application and just having to worry about the client credential settings. Open the
application.propertiesfile and add the following content (using the credentials generated for your application):
spring.social.linkedin.app-id=77a1bnosz2wdm8
spring.social.linkedin.app-secret=STHgwbfPSg0Hy8bO
- Now create the controller class
ProfileControllerwhich has the responsibility of retrieving the user's profile through the use of the LinkedIn API. This class should be created within the packagecom.packt.linkedin.example.sociallinkd. - Make sure the class
ProfileControllerlooks like the following:
@Controller
public class ProfileController {
   @Autowired
   private LinkedIn linkedin;
   @Autowired
   private ConnectionRepository connectionRepository;
   @GetMapping
   public String profile(Model model) {
       if (connectionRepository.findPrimaryConnection(LinkedIn.class) == null) {
             return "redirect:/connect/linkedin";
       }
       String firstName = linkedin.profileOperations()
           .getUserProfile().getFirstName();
       model.addAttribute("name", firstName);
       return "profile";
   }
} - As you might expect, the application will be able to retrieve the user's profile only when the user has made the connection between LinkedIn and the
social-linkdclient application. - So, if there is no connection available, the user will be redirected to
/connect/linkedinwhich is mapped by theConnectControllerclass from Spring Social. Such an endpoint will redirect the user to the view, defined by the namelinkedinConnectwhich maps directly to thelinkedinConnect.htmlfile that might be created undertemplates/connectdirectory, located within thesrc/main/resourcesproject directory as follows:

- Looking at the previous screenshot, you can see that there is also
linkedinConnected.html, which will be presented when a user's connection is available for thesocial-linkdapplication. - All the logic to decide when to present
linkedinConnect.htmlorlinkedinConnected.htmlis defined inside the methodconnectionStatusfrom theConnectControllerclass. The main logic is defined as presented in the following code:
if (connections.isEmpty()) {
   return connectView(providerId);
} else {
   model.addAttribute("connections", connections);
   return connectedView(providerId);
}- Add the following HTML content to
linkedinConnect.html:
<html>
<head><title>Social LinkedIn</title></head>
<body>
   <h2>Connect to LinkedIn to see your profile</h2>
    <form action="/connect/linkedin" method="POST">
     <input type="hidden" name="scope" value="r_basicprofile" />
      <div class="formInfo">
       Click the button to share your profile with
       <b>social-linkedin</b>
     </div>
     <p><button type="submit">Connect to LinkedIn</button></p>
   </form>
</body>
</html> - Now add the following HTML content to
linkedinConnected.html:
<html>
   <head>
     <title>Social LinkedIn</title>
   </head>
   <body>
     <h2>Connected to LinkedIn</h2>
     <p>Click <a href="/">here</a> to see your profile.</p>
   </body>
</html> - To present the user's profile, create the file
profile.htmlinside the templates directory with the following content:
<!DOCTYPE html>
<html xmlns:th="http://www.thymeleaf.org">
<head>
   <title>LinkedIn integration</title>
</head>
<body>
   <h3>Hello, <span th:text="${name}">User</span>!</h3>
   <br/>
</body>
</html> - Now that everything is perfectly configured, start the application and go to
http://localhost:8080to start running the authorization flow.
This recipe presented you with how you can create an application that interacts with LinkedIn to retrieve the user's profile using OAuth 2.0 protocol. This recipe relies on Spring Social Provider for LinkedIn, which saves us from having to create a controller to deal with OAuth 2.0 callbacks as well as building URLs for authorization and token requests. This recipe differs from other recipes using Spring Social because it presents one provider implementation which support Spring Boot's auto-configuration feature, so we don't need to create any configuration classes.
Besides the fact that a lot of OAuth 2.0's details are abstracted behind Spring Social, all the steps happen when we run the application and start the authorization flow. In fact, as we are using the Authorization Code grant type, the application retrieves the access token through two steps, which are authorization and token request.
To start the authorization flow you must go to http://localhost:8080/ which, in case of being not connected the user's LinkedIn account with the social-linkd application, should be redirected to /connect/linkedin:

The redirection is performed by the method profile from the ProfileController class. As the controller and this method do not define any paths for a request, it will be defined as / by default. As you may notice in the following code, the first thing the method repositories do is to check if the current user has connected her account with the application, which is social-linkedin:
if (connectionRepository.findPrimaryConnection(LinkedIn.class) == null) {
    return "redirect:/connect/linkedin";
}
The endpoint /connect/linkedin maps directly to the method connectionStatus from the ConnectController class of Spring Social. If there is no connection, this method calls the private method connectView which builds the name {providerId}Connect, which in LinkedIn's case is linkedinConnect. This is exactly the name of the view we created as linkedinConnect.html.
Open the file linkedinConnect.html to see which scope the application is asking for LinkedIn, and you must realize that it is r_basicprofile. All the available scopes defined by LinkedIn should be retrieved by accessing the application dashboard which is present in the section Default Application Permissions.
Back to the page generated by linkedinConnect view, if you click on the Connect to LinkedIn button, you will be redirected to LinkedIn, which will ask you for your credentials and for your consent.
Notice that LinkedIn, unlike many other OAuth 2.0 Providers, asks for permission at the same time it authenticates the user. If you click on Allow Access and send your credentials at the authentication form, social-linkd will receive the authorization code and will use it to retrieve an access token and create the connection for the current user within the application. Then, if there is a connection, the private method connectedView from ConnectController will be called, which will render the following HTML page defined by linkedinConnected.html:

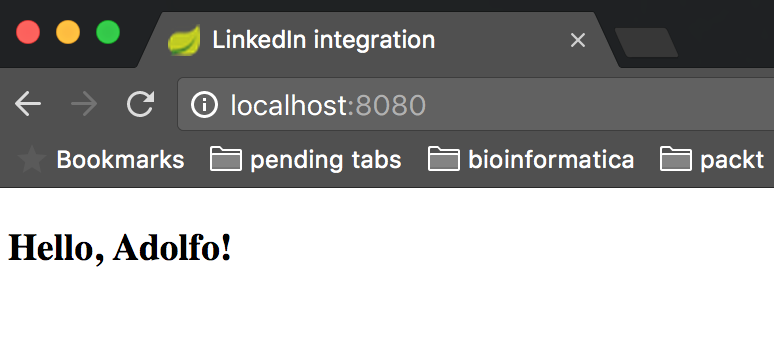
Clicking on the link here, you will then be redirected to the main page, where your profile name will be presented as follows:
For this recipe, we didn't create any configuration class. But if you want to define the base URL for callback redirection that happens when using the OAuth 2.0 protocol, you need to create a configuration class to define a custom ConnectController bean, as presented in the following code:
@Configuration
public class LinkedInConfiguration {
    @Bean
    public ConnectController connectController(ConnectionFactoryLocator locator,
        ConnectionRepository repository) {
        ConnectController controller = new ConnectController(locator, repository);
        controller.setApplicationUrl("http://localhost:8080");
        return controller;
    }
}
By doing such configurations, you avoid issues when the application runs behind a proxy. The redirect URI will be automatically generated using the request info which will be based on the application which might be running behind a proxy. This way, the OAuth 2.0 Provider won't be able to redirect to the right callback URL because it will be hidden by the proxy. The configuration presented previously allows you to define the proxy's URL.
Do not forget to define the same redirect URL at the OAuth 2.0 Provider and make all the communication through TLS/SSL.