
We have created views and URL patterns for the blog application. Now, it's time to add templates to display posts in a user-friendly manner.
Create the following directories and files inside your blog application directory:
templates/
    blog/
        base.html
        post/
            list.html
            detail.html
The preceding structure will be the file structure for our templates. The base.html file will include the main HTML structure of the website and divide the content into the main content area and a sidebar. The list.html and detail.html files will inherit from the base.html file to render the blog post list and detail views, respectively.
Django has a powerful template language that allows you to specify how data is displayed. It is based on template tags, template variables, and template filters:
- Template tags control the rendering of the template and look like {% tag %}.
- Template variables get replaced with values when the template is rendered and look like {{ variable }}.
- Template filters allow you to modify variables for display and look like {{ variable|filter }}.
You can see all built-in template tags and filters in https://docs.djangoproject.com/en/2.0/ref/templates/builtins/.
Let's edit the base.html file and add the following code:
{% load static %}
<!DOCTYPE html>
<html>
<head>
  <title>{% block title %}{% endblock %}</title>
  <link href="{% static "css/blog.css" %}" rel="stylesheet">
</head>
<body>
  <div id="content">
    {% block content %}
    {% endblock %}
  </div>
  <div id="sidebar">
    <h2>My blog</h2>
      <p>This is my blog.</p>
  </div>
</body>
</html>
{% load static %} tells Django to load the static template tags that are provided by the django.contrib.staticfiles application, which is contained in the INSTALLED_APPS setting. After loading it, you are able to use the {% static %} template filter throughout this template. With this template filter, you can include static files, such as the blog.css file, that you will find in the code of this example under the static/ directory of the blog application. Copy the static/ directory from the code that comes along with this chapter into the same location of your project to apply the CSS style sheets.
You can see that there are two {% block %} tags. These tell Django that we want to define a block in that area. Templates that inherit from this template can fill in the blocks with content. We have defined a block called title and a block called content.
Let's edit the post/list.html file and make it look like the following:
{% extends "blog/base.html" %}

{% block title %}My Blog{% endblock %}

{% block content %}
  <h1>My Blog</h1>
  {% for post in posts %}
    <h2>
      <a href="{{ post.get_absolute_url }}">
        {{ post.title }}
      </a>
    </h2>
    <p class="date">
      Published {{ post.publish }} by {{ post.author }}
    </p>
    {{ post.body|truncatewords:30|linebreaks }}
  {% endfor %}
{% endblock %}
With the {% extends %} template tag, we tell Django to inherit from the blog/base.html template. Then, we are filling the title and content blocks of the base template with content. We iterate through the posts and display their title, date, author, and body, including a link in the title to the canonical URL of the post. In the body of the post, we are applying two template filters: truncatewords truncates the value to the number of words specified, and linebreaks converts the output into HTML line breaks. You can concatenate as many template filters as you wish; each one will be applied to the output generated by the preceding one.
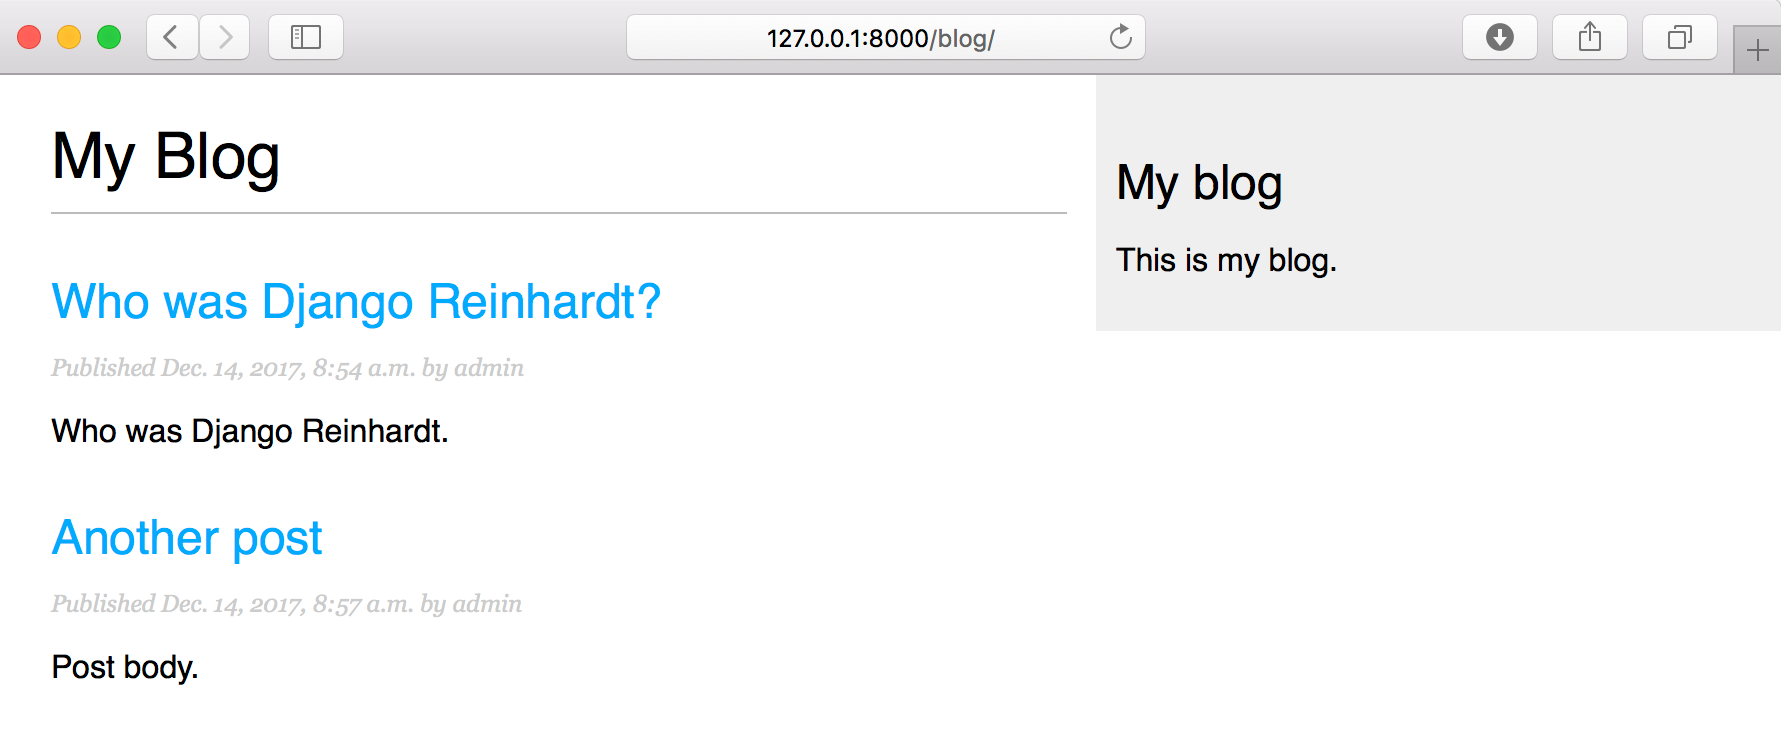
Open the shell and execute the python manage.py runserver command to start the development server. Open http://127.0.0.1:8000/blog/ in your browser, and you will see everything running. Note that you need to have some posts with the Published status to show them here. You should see something like this:
Then, let's edit the post/detail.html file:
{% extends "blog/base.html" %}

{% block title %}{{ post.title }}{% endblock %}

{% block content %}
  <h1>{{ post.title }}</h1>
  <p class="date">
    Published {{ post.publish }} by {{ post.author }}
  </p>
  {{ post.body|linebreaks }}
{% endblock %}
Now, you can return to your browser and click on one of the post titles to take a look at the detail view of a post. You should see something like this:
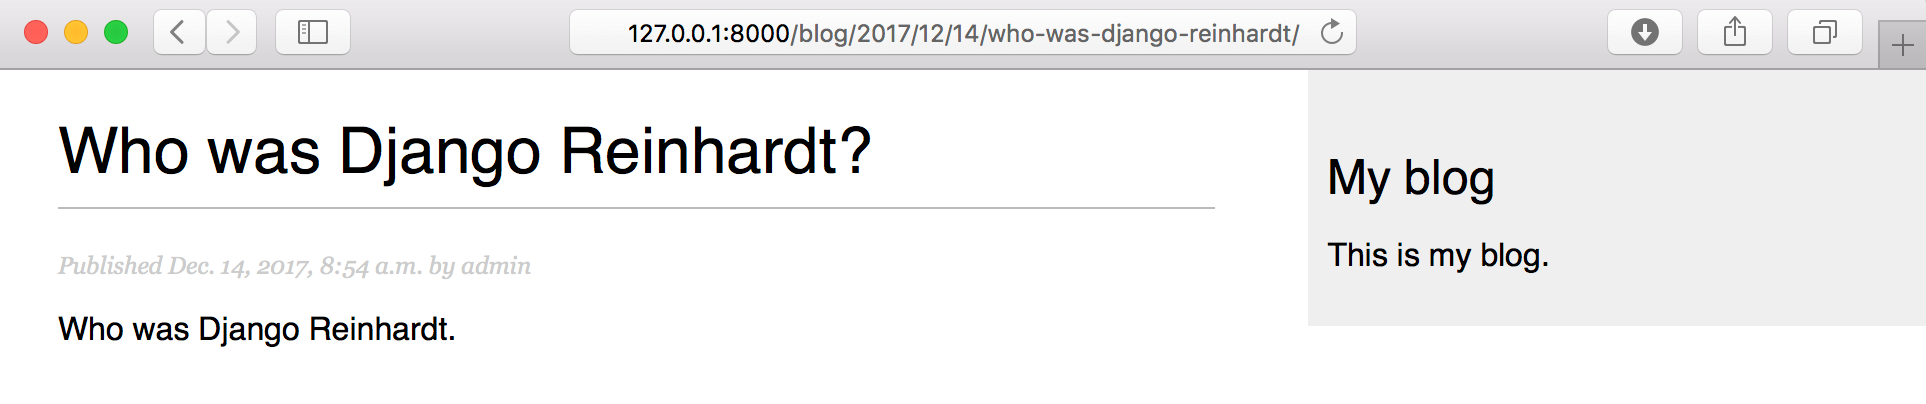
Take a look at the URL—it should be /blog/2017/12/14/who-was-django-reinhardt/. We have designed SEO-friendly URLs for our blog posts.