Book Image

Hands-On Full Stack Web Development with Aurelia

By : Diego Argüelles Rojas, Erikson Murrugarra
Book Image

Hands-On Full Stack Web Development with Aurelia

By: Diego Argüelles Rojas, Erikson Murrugarra

Overview of this book

Hands-On Full Stack Web Development with Aurelia begins with a review of basic JavaScript concepts and the structure of an Aurelia application generated with the Aurelia-CLI tool. You will learn how to create interesting and intuitive application using the Aurelia-Materialize plugin, which implements the material design approach. Once you fully configure a FIFA World Cup 2018 app, you'll start creating the initial components through TDD practices and then develop backend services to process and store all the user data. This book lets you explore the NoSQL model and implement it using one of the most popular NoSQL databases, MongoDB, with some exciting libraries to make the experience effortless. You'll also be able to add some advanced behavior to your components, from managing the lifecycle properly to using dynamic binding, field validations, and the custom service layer. You will integrate your application with Google OAuth Service and learn best practices to secure your applications. Furthermore, you'll write UI Testing scripts to create high-quality Aurelia Apps and explore the most used tools to run end-to-end tests. In the concluding chapters, you'll be able to deploy your application to the Cloud and Docker containers. By the end of this book, you will have learned how to create rich applications using best practices and modern approaches.
Table of Contents (19 chapters)
Title Page
Copyright and Credits
Dedication
Packt Upsell
Foreword
Contributors
Preface
Index

Deploying on AWS S3 Buckets


AWS is one of the biggest cloud providers across the globe. We will learn how to deploy our Aurelia application using AWS S3. Yes, I am not crazy! We will deploy our application without installing any server or Elastic Cloud Compute (EC2) virtual machine instance.

Uploading files

Before we start the process, you will need to have an account on AWS. Navigate to the following URL to create your free account—https://aws.amazon.com.

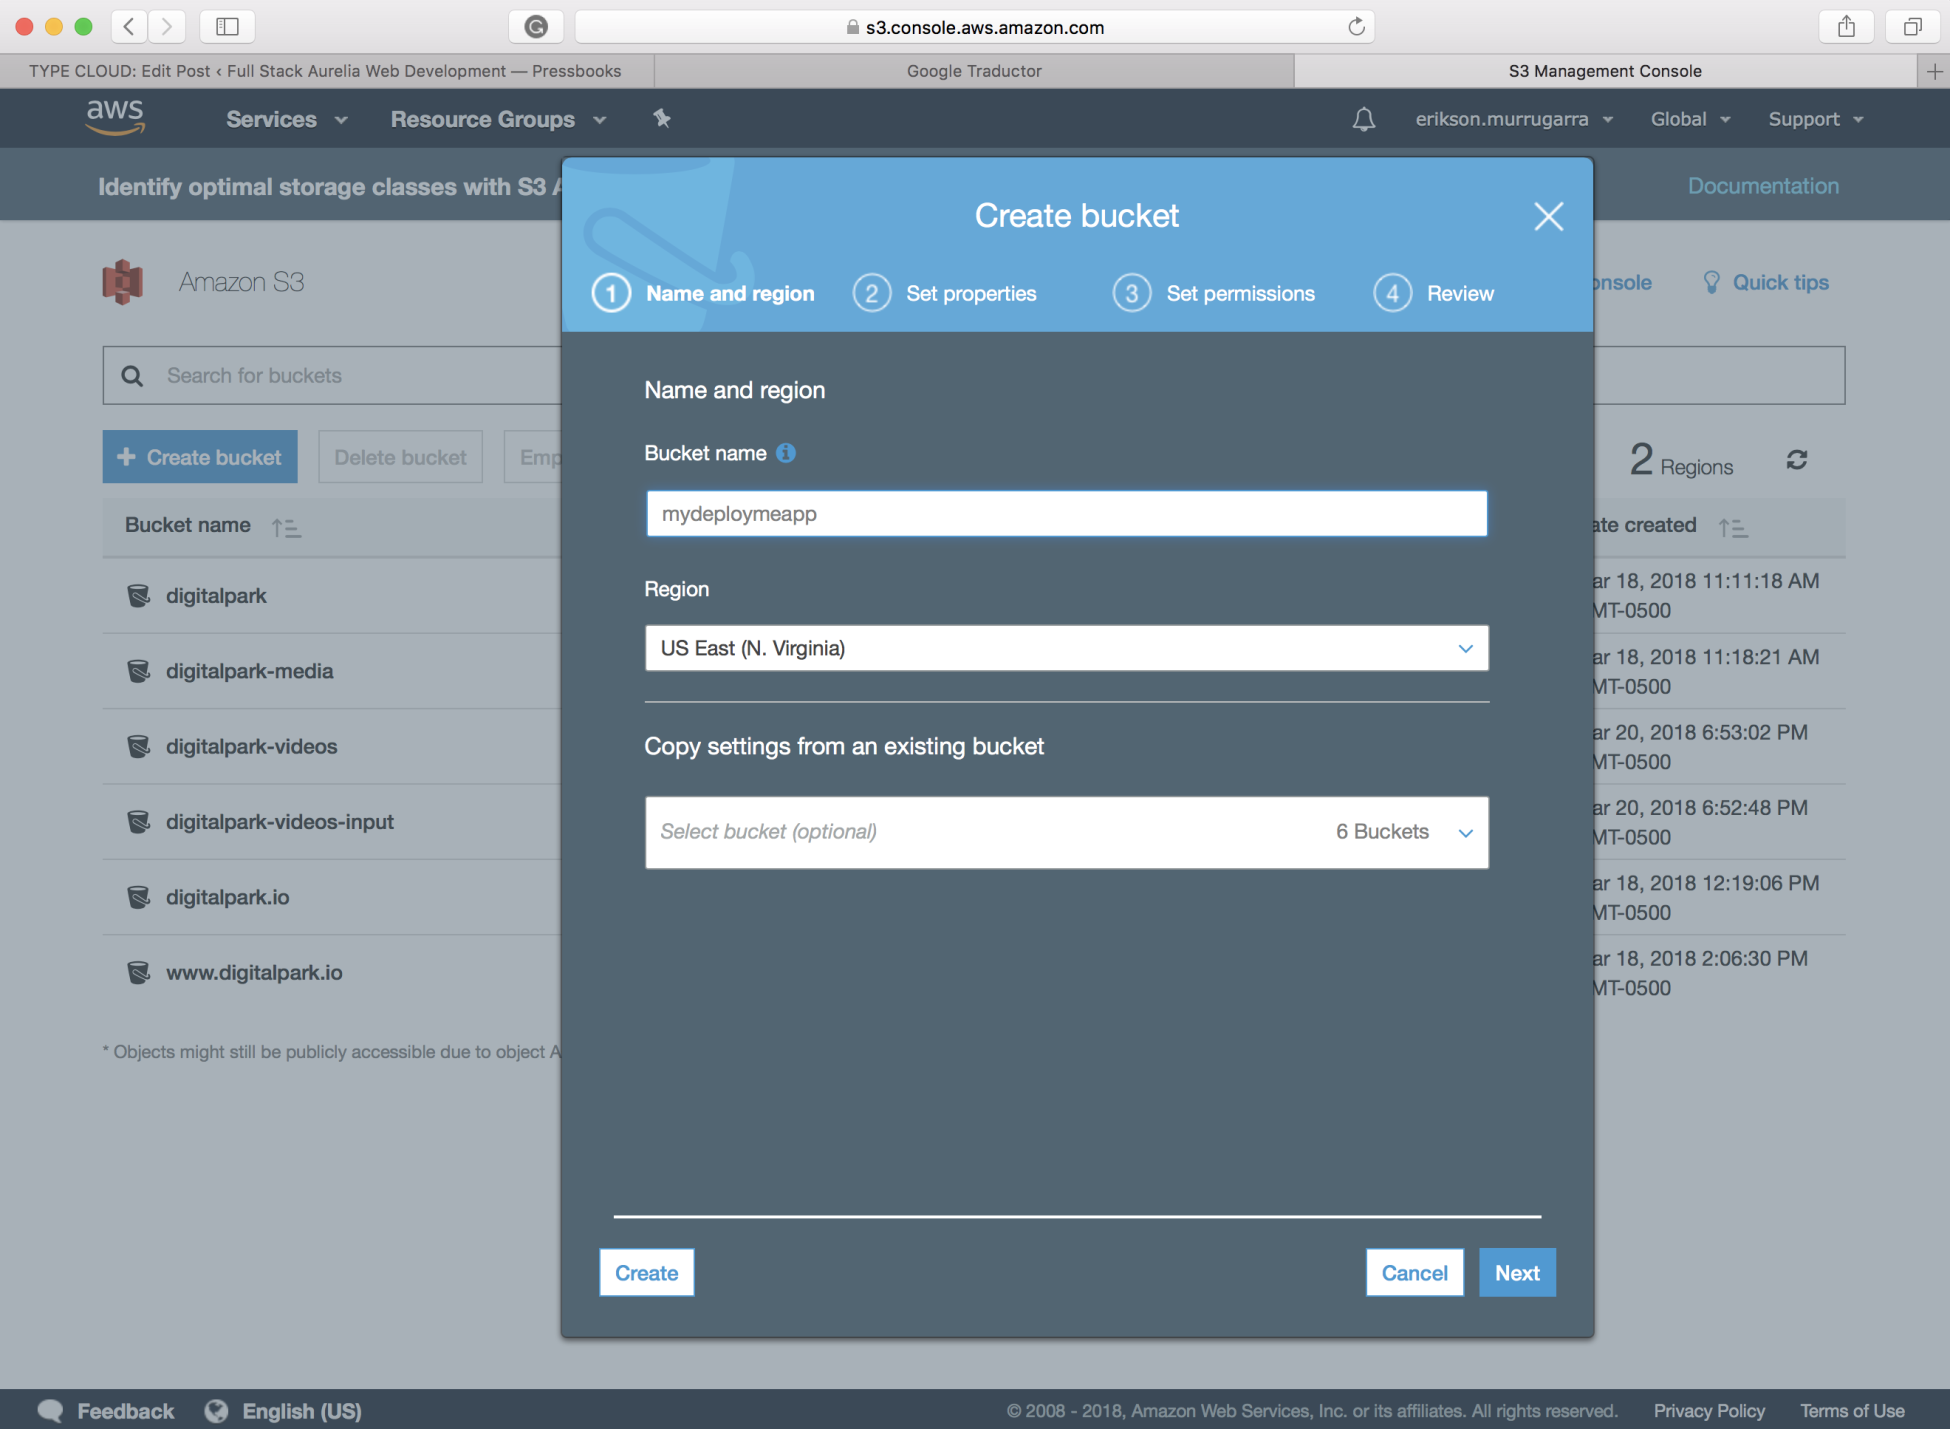
Once you are done with the registration process and are logged in to the AWS console, go ahead and navigate to the S3 service dashboard, as shown:

Once the S3 dashboard is loaded, you will see the list of all the your AWS buckets that you created before. If not, you will see an empty list. Click on the Create Bucket button to create a new bucket and name your bucket with your application's name and click on the Next button to accept the defaults:

Once created, you should see the new S3 bucket in the list:

Now get into your bucket, and let's...