Book Image

C# 8 and .NET Core 3 Projects Using Azure - Second Edition

By : Paul Michaels, Dirk Strauss, Jas Rademeyer
Book Image

C# 8 and .NET Core 3 Projects Using Azure - Second Edition

By: Paul Michaels, Dirk Strauss, Jas Rademeyer

Overview of this book

.NET Core is a general-purpose, modular, cross-platform, and opensource implementation of .NET. The latest release of .NET Core 3 comes with improved performance and security features, along with support for desktop applications. .NET Core 3 is not only useful for new developers looking to start learning the framework, but also for legacy developers interested in migrating their apps. Updated with the latest features and enhancements, this updated second edition is a step-by-step, project-based guide. The book starts with a brief introduction to the key features of C# 8 and .NET Core 3. You'll learn to work with relational data using Entity Framework Core 3, before understanding how to use ASP.NET Core. As you progress, you’ll discover how you can use .NET Core to create cross-platform applications. Later, the book will show you how to upgrade your old WinForms apps to .NET Core 3. The concluding chapters will then help you use SignalR effectively to add real-time functionality to your applications, before demonstrating how to implement MongoDB in your apps. Finally, you'll delve into serverless computing and how to build microservices using Docker and Kubernetes. By the end of this book, you'll be proficient in developing applications using .NET Core 3.
Table of Contents (13 chapters)

Configuring Azure Storage

Setting up an Azure Storage account is quite a straightforward process; you'll need to start by signing in to Azure. If you don't have an account, then you can create one here: https://azure.microsoft.com/. Once you've signed up, visit https://portal.azure.com.

Most cloud providers have a storage model and it wouldn't be difficult to use an alternate provider; however, you would need to change some of the code that interfaces with Azure.

Start by selecting the storage blade from the Azure portal:

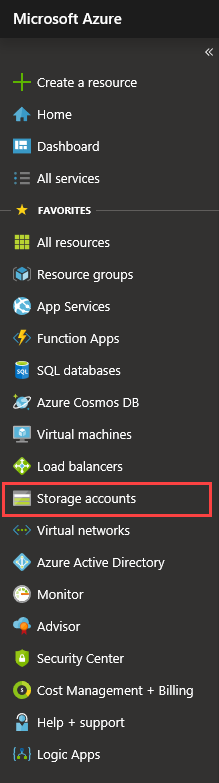
Alternatively, you could just search for Storage. Once the blade appears, select Add and fill in the details for your new account:

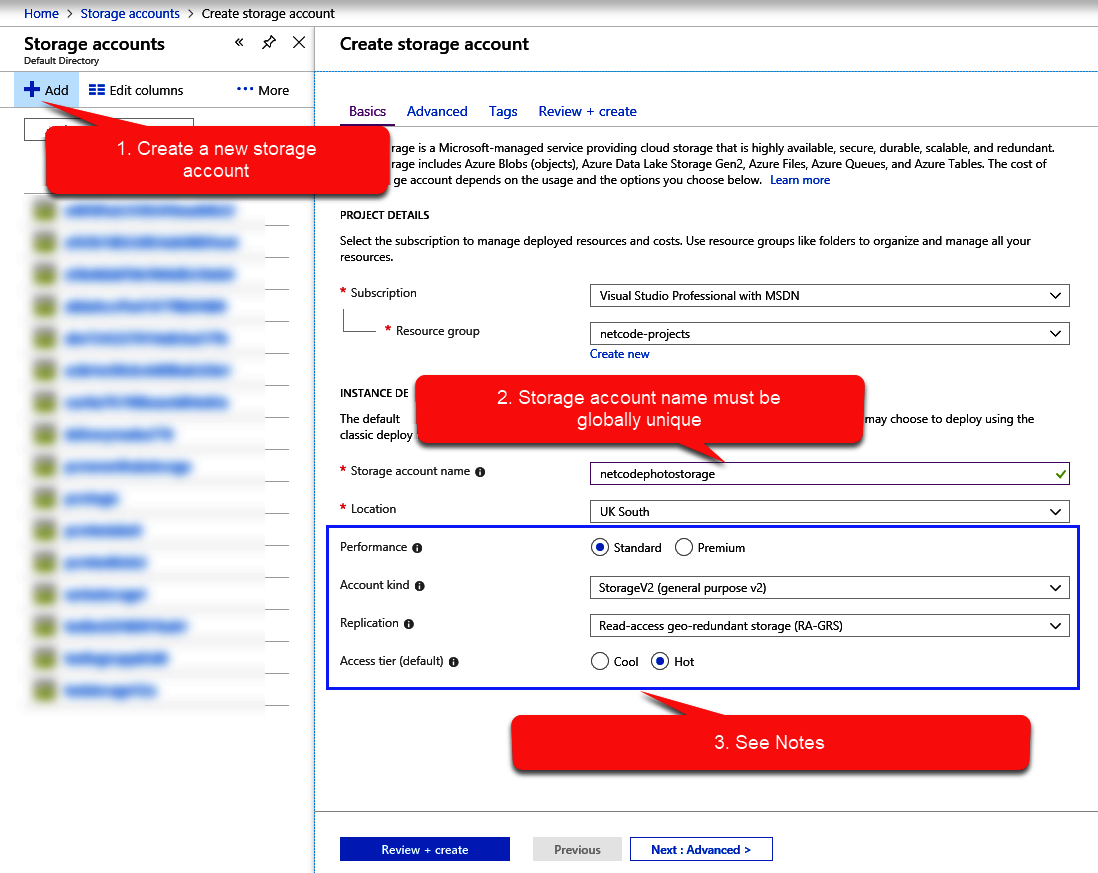
If you've already gone through the rest of this book, you'll be familiar with most of this screen; however, the preceding section, labeled 3. See Notes, denotes a section of the storage account that...