Book Image

Vue CLI 3 Quick Start Guide

By : Ajdin Imsirovic
Book Image

Vue CLI 3 Quick Start Guide

By: Ajdin Imsirovic

Overview of this book

The sprawling landscape of various tools in JavaScript web development is becoming overwhelming. This book will show you how Vue CLI 3 can help you take back control of the tool chain. To that end, we'll begin by configuring webpack, utilizing HMR, and using single-file .vue components. We'll also use SCSS, ECMAScript, and TypeScript. We'll unit test with Jest and perform E2E testing with Cypress. This book will show you how to configure Vue CLI as your default way of building Vue projects. You'll discover the reasons behind using webpack, babel, eslint, and other modern JavaScript toolchain technologies. You'll learn about the inner workings of each through the lens of Vue CLI 3. We'll explore the extendibility of Vue CLI with the built-in settings, and various core and third-party plugins. Vue CLI helps you work with Vue components, routers, directives, and services in the Vue ecosystem. While learning these concepts, you'll examine the evolution of JavaScript. You'll learn about use of npm, IIFEs, modules in JavaScript, Common.js modules, task runners, npm scripts, module bundlers, and webpack. You'll get familiar with the reasons why Vue CLI 3 is set up the way it is. You'll also learn to perform linting with ESLint and Prettier. Towards the end, we'll introduce you to working with styles and SCSS. Finally, we'll show you how to deploy your very own Vue project on Github Pages.
Table of Contents (10 chapters)

Default toolchain, fatigue level zero

In this section, we'll create a default boilerplate Vue app. Contrary to the previous section, in this section, we will actually build an entire app, properly. We'll use two approaches: Vue CLI 3 on the command line, and Vue CLI 3 with a GUI.

You might ask why we ran Vue CLI 3 with no configuration in the first place? The answer is, it might be useful for quick experiments, and to get started with some basic commands.

Vue CLI 3 default app via the command line

We create Vue CLI 3 apps with the vue create command. Let's see what options we have available:

vue create -h

This is what will get returned:

Usage: create [options] <app-name>

create a new project powered by vue-cli-service

Options:
-p, --preset <presetName> Skip prompts and use saved or remote preset
-d, --default Skip prompts and use default preset
-i, --inlinePreset <json> Skip prompts and use inline JSON string as preset
-m, --packageManager <command> Use specified npm client when installing dependencies
-r, --registry <rul> Use specified npm registry when installing dependencies (only for npm)
-g, --git [message] Force git initialization with initial commit message
-n, --no-git Skip git initialization
-f, --force Overwrite target directory if it exists
-c, --clone Use git clone when fetching remote preset
-x, --proxy Use specified proxy when creating project
-b, --bare Scaffold project without beginner instructions
-h, --help output usage information

Let's begin by skipping all the prompts and using the default option:

vue create -d first-default-app

Your console will display the following output:

Vue CLI v3.3.0
? Creating project in C:\...
? Initializing git repository...
? Installing CLI plugins. This might take a while...

And indeed it does take a while. Luckily, there's a visual cue, a progress bar that lets us know how far along we are in setting up our project.

Once ready, we'll simply run the following:

cd first-default-app

Once our console is pointing to the correct directory, we can run the app with the following:

npm run serve

And now we can view the default app in the browser:

As we can see, we have a welcome message, and then the page lists the installed CLI plugins. Obviously, the babel and eslint plugins come as defaults. Each of these links points to their respective sections inside the vue-cli repository on GitHub.

Next, we see some essential links and some links to get acquainted with the larger ecosystem of Vue.js (namely, the links to vue-router, vuex, vue-devtools, vue-loader, and awesome-vue).

Vue CLI 3 default app via the UI

To get started with the Vue CLI GUI, let's first stop the server that was running in the previous section, using the Ctrl + C shortcut keys. The console will respond with the following message:

Terminate batch job (Y/N)?

Type Y (capitalization is irrelevant) and press the Enter key.

This will give us back the control of our current console window and allow us to type new commands.

Let's first go one level up from the current directory in our console:

cd ..

Next, let's run this command:

vue ui -h

And we'll get the following output:

Usage: ui [options]

start and open the vue-cli ui

Options:
-H, --host <host> Host used for the UI server (default: localhost)
-p, --port <port> Port used for the UI server (by default search for available port)
-D, --dev Run in dev mode
--quiet Don't output starting messages
--headless Don't open browser on start and output port
-h, --help output usage information

This time, we'll run the command without any flags:

vue ui

We'll be greeted with the following output in the console:

? Starting GUI...
? Ready on http://localhost:8000

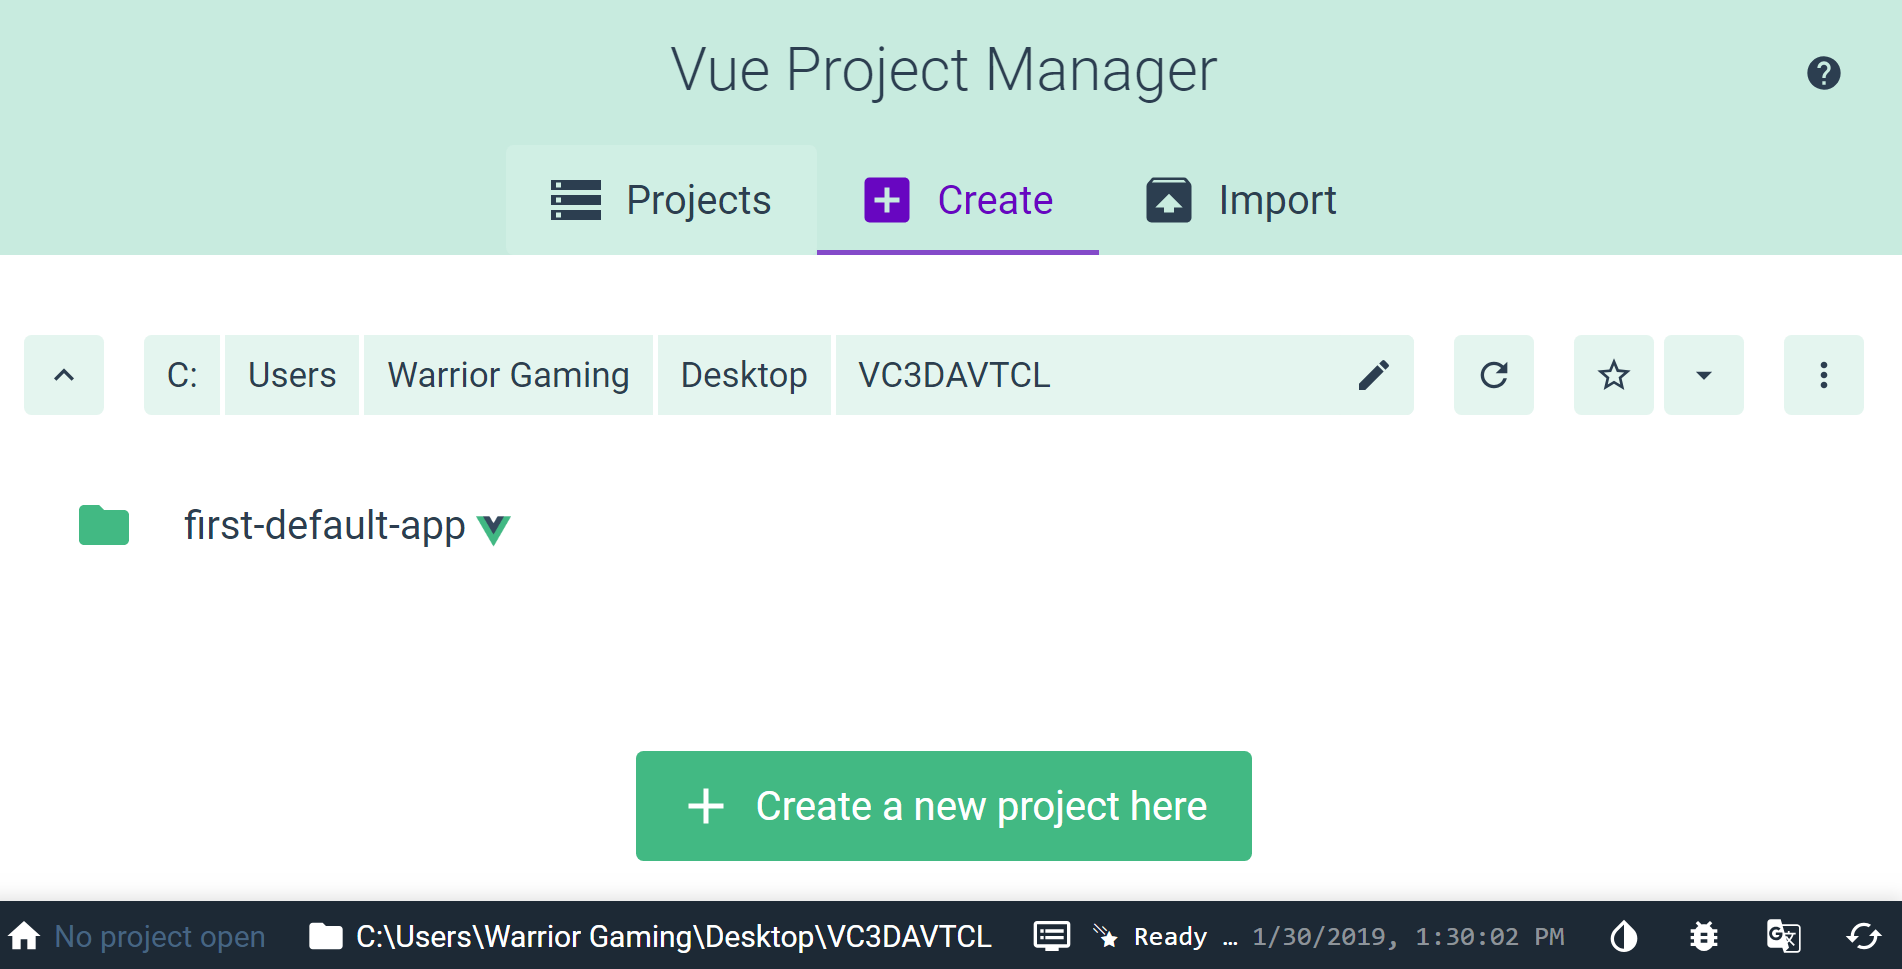
This time, we can create a project, visually. Initially, we see that there are no Vue projects in the current folder:

Let's create one by clicking the Create tab.

A new window will open, with a big button that reads Create a new project here:

As we can see in the preceding screenshot, there are also a number of other buttons and options that we can use. We will examine these in the chapters that follow; at this point, we are just getting familiar with the tool we're using:

As we can see from the previous screenshot, the Next button, at the bottom of the page, is currently disabled. To enable it, simply type the project folder name inside the top-most input. We'll call our folder second-vue-project. Now click Next.

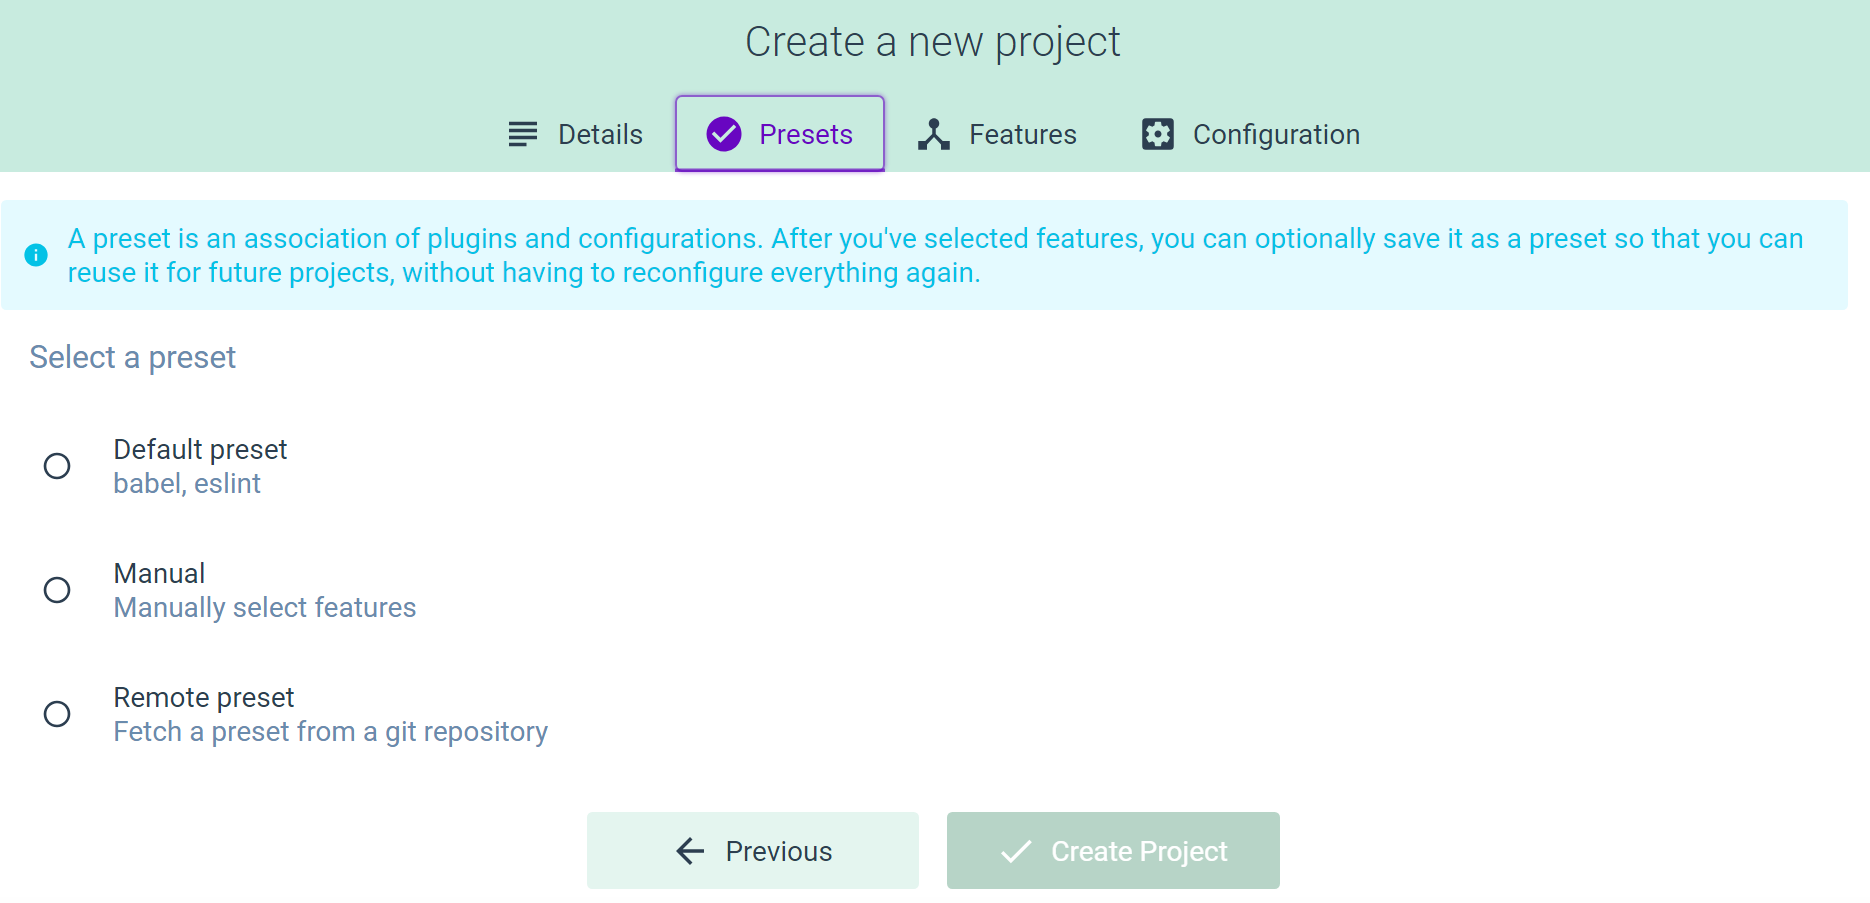
Inside the next window, you can choose a preset. Let's set it to Default preset:

Choosing a preset will make the Create Project button clickable. You'll see a loader icon in the center of the screen, with the following message:

Installing Vue CLI plugins. This might take a while...

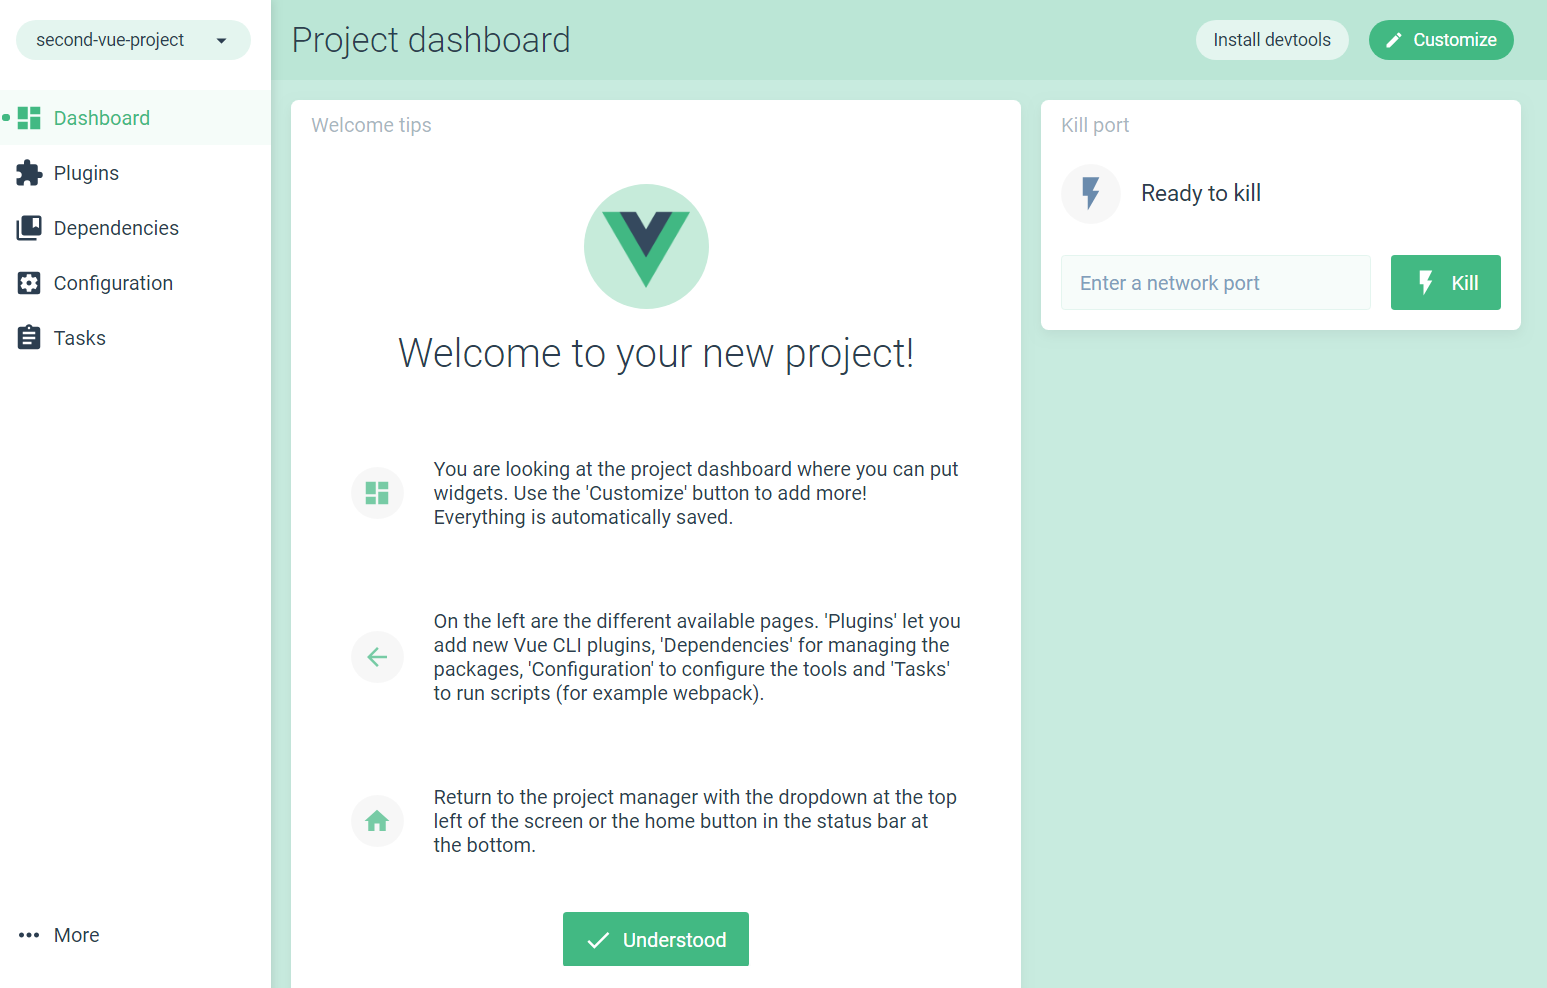
You'll see a few other messages as the installation progresses. Finally, when done, you'll be greeted with the following window:

Our project is now ready to be worked on, which we'll do in the next chapter.