

Setting up the Go environment
At the time of writing this book, the latest version of Go is Go 1.15.6. To install Go, you can either download or use the official binary distributions, or you can install Go from the source code (https://github.com/golang/go).
Important note
The official binary distributions are available for FreeBSD (release 8 and above), Linux (2.6.23 and above), macOS (Snow Leopard and above), and Windows (XP and above). Both the 32-bit (386) and 64-bit (amd64) x86 processor architectures are supported. For FreeBSD and Linux, the ARM processor architecture is also supported.
To install Go, download the distribution package from the https://golang.org/dl/ web page, as shown here, and choose the file that's appropriate for your platform:
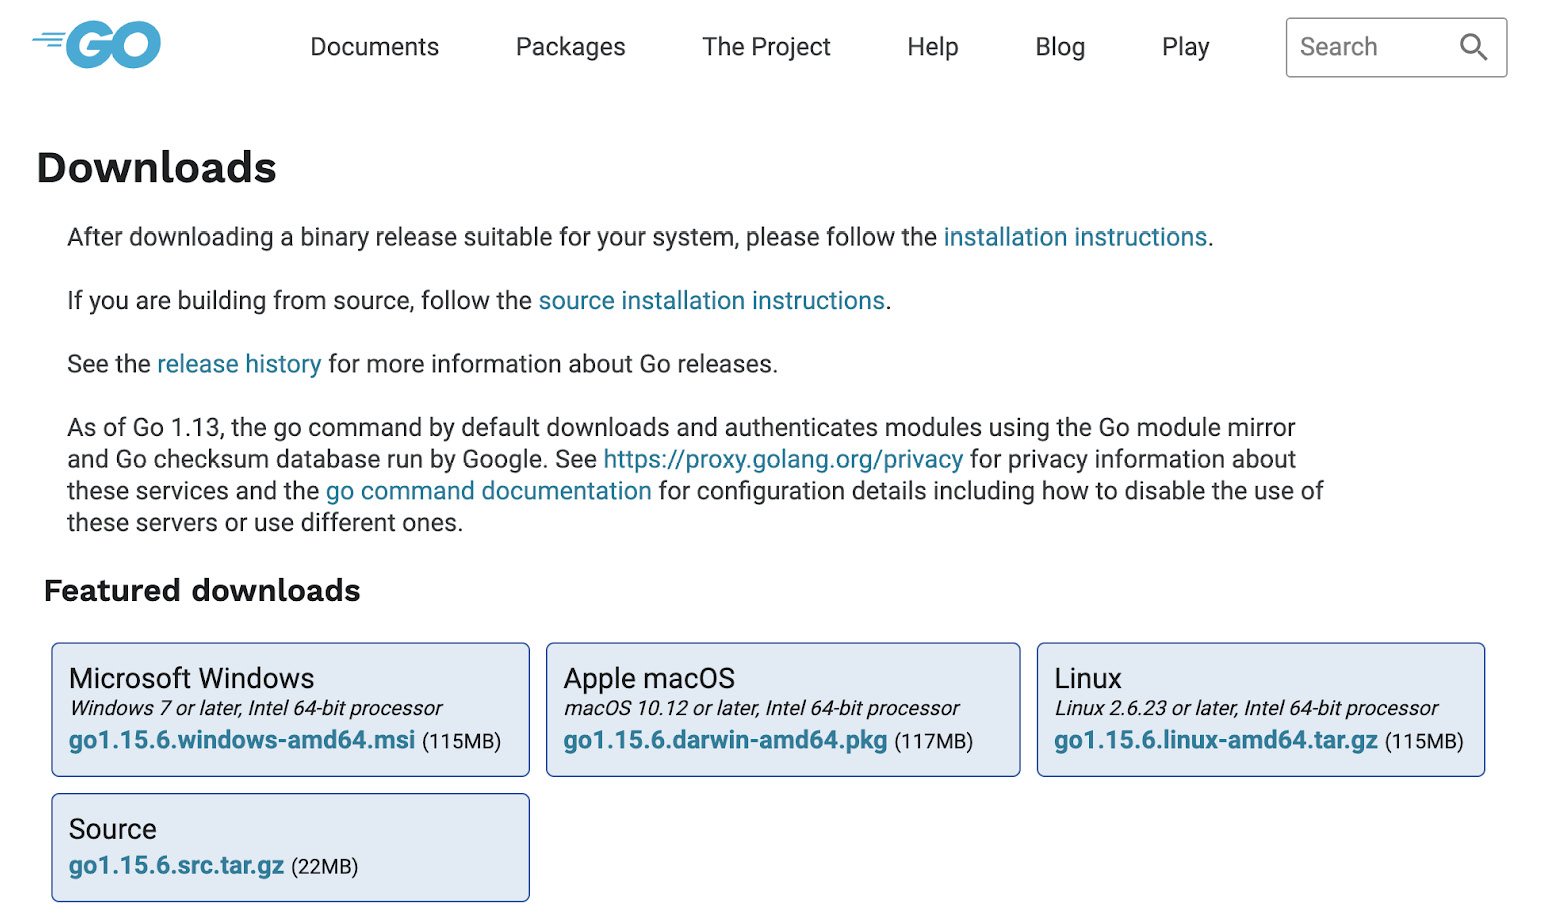
Figure 1.5 – Golang available packages
Once you have the distribution package, install Go according to your platform of choice. We will cover this in the following sections.
Linux/FreeBSD
To install Go on Linux or FreeBSD, you must download go.-.tar.gz. The latest Go for Linux on a 64-bit architecture is go1.15.6.linux-amd64.tar.gz:
wget -c https://golang.org/dl/go1.15.6.linux-amd64.tar.gz   //64bit
wget -c https://golang.org/dl/go1.15.6.linux-386.tar.gz     //32bit
Download the archive and extract it into the /usr/local folder. Then, run the following command as root or through sudo:
tar -C /usr/local -xzf go1.15.6.linux-amd64.tar.gz
Add /usr/local/go/bin to the PATH environment variable. You can do this by adding the following line to $HOME/.profile or /etc/profile (for a system-wide installation):
export PATH=$PATH:/usr/local/go/bin
Verify that you've installed Go by opening a command prompt and typing the following command:
go version
This command should display the installed version of Go:

Figure 1.6 – Installed version of Go
Let's move on to see how to set up a Go environment on Windows.
Windows
To install Go on Windows, you can either use the MSI installer or the ZIP archive. Installing from MSI is easier. The latest Go for Windows on a 64-bit architecture is go1.15.6.windows-amd64.msi. You will then need to execute one of the following commands based on your system:
wget -c https://golang.org/dl/go1.15.6.windows-amd64.msi   //64bit
wget -c https://golang.org/dl/go1.15.6.windows-386.msi     //32bit
Open the MSI file you downloaded and follow the prompts to install Go. By default, the installer will place Go at C:\Go and set up C:\Go\bin in your PATH environment variable. You can change the location as needed:
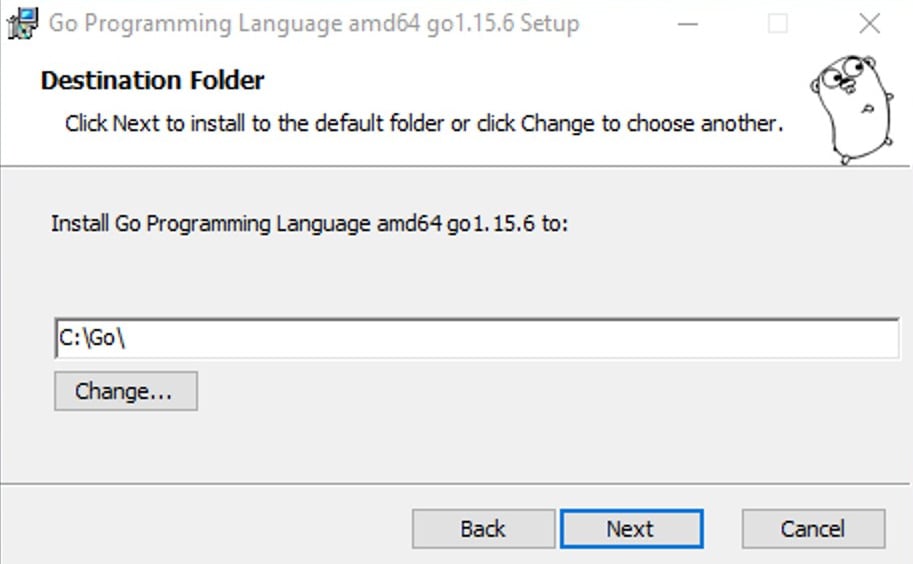
Figure 1.7 – Golang installation wizard
After installing Go, you will need to close and reopen any open command prompts so that changes to the environment that have been made by the installer are reflected in the command prompt.
Important note
Using the ZIP archive is easy as well. Extract the files into a directory (for example, C:\Go) and add the bin subdirectory to your PATH variable.
Once installed, click on the Start menu. Then, in the menu's search box, type cmd. After, press the Enter key. In the command prompt window that appears, type the go version command, as shown here:

Figure 1.8 – Installed version of Go
You'll see go version go1.15.6 windows/amd64, as shown in the preceding screenshot. With that, you're all set up!
MacOS
For MacOS, you can download the appropriate PKG file; that is, go1.15.6.darwin-amd64.pkg (at the time of writing this book). Once downloaded, run through the installation wizard. The package will install the distribution to /usr/local/go and place the /usr/local/go/bin directory in your PATH environment variable:
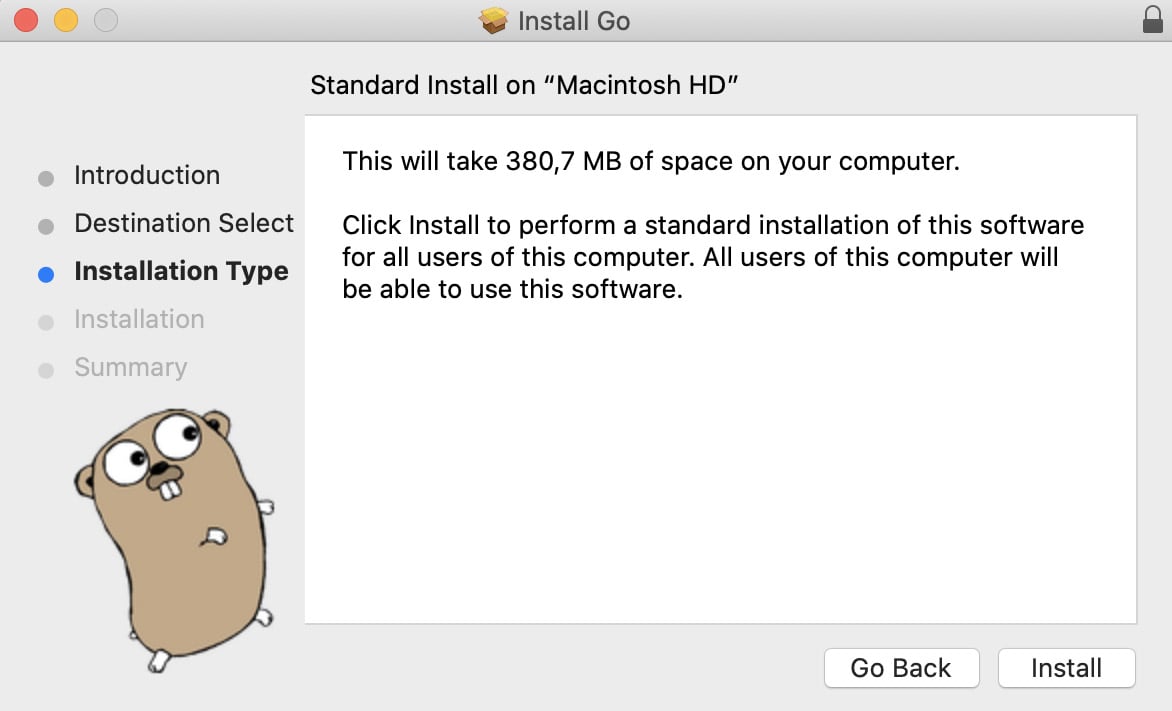
Figure 1.9 – Installing Go on MacOS
You'll need to restart your terminal, or run this command in your Terminal:
source ~/.profile
Alternatively, you can use Homebrew to install Go. This can be as simple as doing the following:
brew install [email protected]
The Terminal window will give you feedback regarding the installation process of Go. It may take a few minutes before the installation is complete. Verify that you've installed Go by opening a command prompt and typing the go version command.
Important note
In the future, to update Go, you can run the following commands to update Homebrew and then update Go. You don't have to do this now as you've just installed the latest version:
brew update
brew upgrade golang
Now that you've installed Go, you need to set it up properly. Go development tools are designed to work with code maintained in public repositories, and the model is the same, regardless of whether you're developing an open source program or something else. Go code is developed in a workspace. A workspace is made up of three directories, namely the following:
bin: This will contain all you Go executable binaries.src: This will store your source files, which are organized in packages, with one subdirectory in thesrcdirectory representing one package.pkg: This will store your package objects.
The default directory for the Go workspace is the home directory with a go subdirectory or $HOME/go. Issue the following command to create the directory structure for your Go workspace:
mkdir -p $HOME/go/{bin,src,pkg}
The -p option tells mkdir to create all the parents in the directory, even if they don't currently exist. Using {bin, src, pkg} creates a set of arguments for mkdir and tells it to create the bin, src, and pkg directories. This will ensure the following directory structure is now in place:
The go, bin and  src folders should be at the same level (remove extra spaces from go and src folders, so the folders are aligned with bin folder)
$HOME
 └── go
 ├── bin
 └── src
Next, you need to set the GOPATH environment variable, as follows:
export GOPATH=$HOME/go
export PATH=$PATH:$GOPATH/bin
You can verify your $PATH has been updated by using the echo command and inspecting the output:
echo $PATH
You should see your $GOPATH/bin in your home directory. If you were logged in as USER, you will see /Users/USER/go/bin in the path:
/Users/USER/go/bin:/usr/local/sbin:/usr/local/bin:/usr/bin:/bin:/usr/sbin:/sbin
With the Go workspace and GOPATH created, we can go ahead and set up the development environment.
Integrated development environment
Throughout this book, I will be using an IDE to write RESTful API and services. Using an IDE can boost your productivity since it provides rich features such as autocompletion, highlighting code, a powerful built-in debugger, and custom extensions. There are many IDEs available. In this book, I will be using VSCode.
To install VSCode, download the appropriate package based on your system from https://code.visualstudio.com/download:
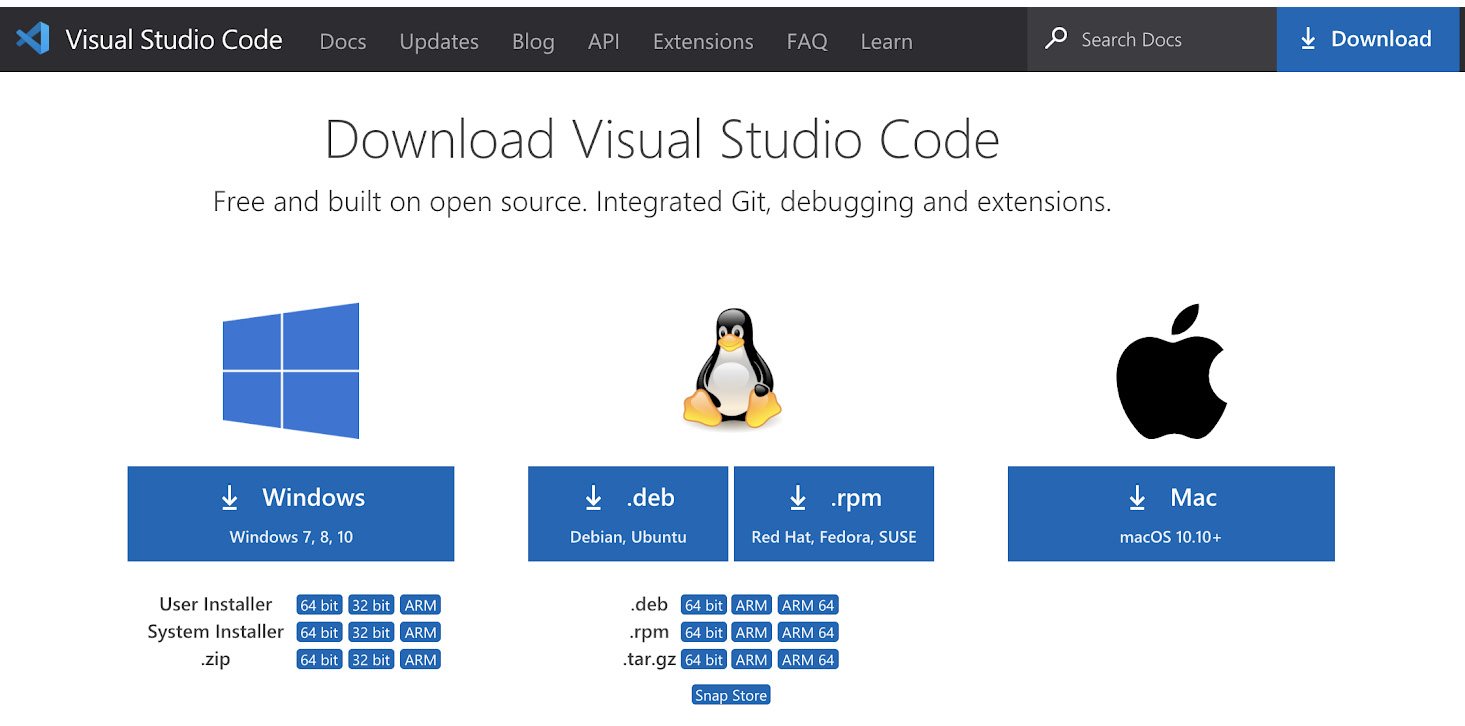
Figure 1.10 – VS Code – available packages
Note
Mac users can also use Brew to install VSCode with the following command:
brew install --cask visual-studio-code
Once downloaded, run the setup wizard and follow the instructions. Once the installation is complete, launch VSCode. You will be presented with the following start screen:

Figure 1.11 – VSCode user interface
VSCode supports all the popular programming languages and Git integration by default. You can also install extensions to extend the functionality of VSCode. The VS Code marketplace contains a huge list of free community plugins and extensions. To enable support for Golang, you need to install an extension called Go by navigating to the Extensions tab from the left sidebar:
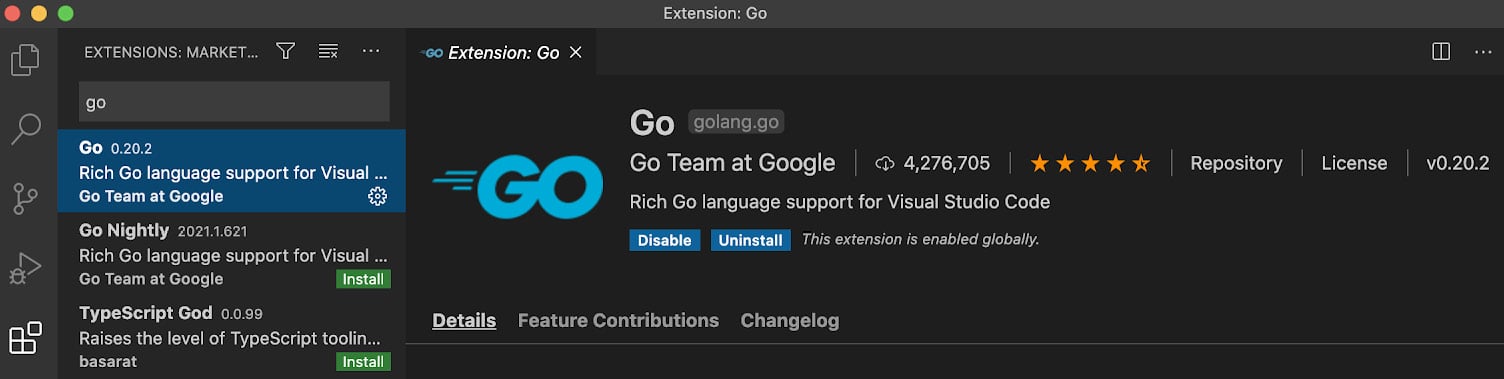
Figure 1.12 – Golang extension for VSCode
Click on the Install button and then restart VSCode for the changes to take effect.
Installing Go tools
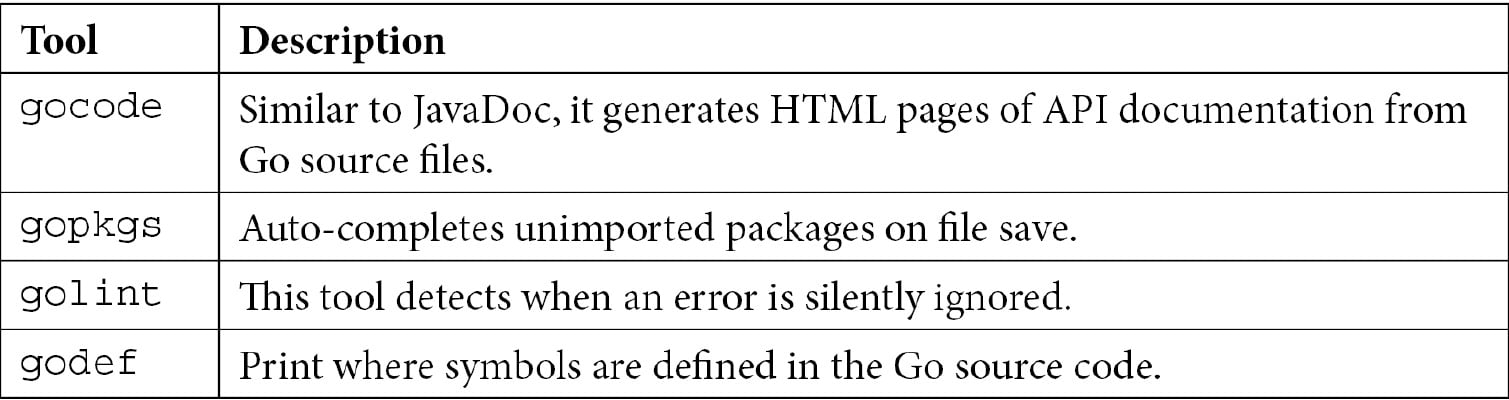
Next, we will install the following Go tools, which are a set of packages that help improve your development workflow and overall experience while writing code:
Important Note
A complete list of the available Go tools can be found at https://pkg.go.dev/golang.org/x/tools.
To install the tools, click on View | Command Pallete, or use the Ctrl + Shift + P shortcut and type goinstall update/tools:
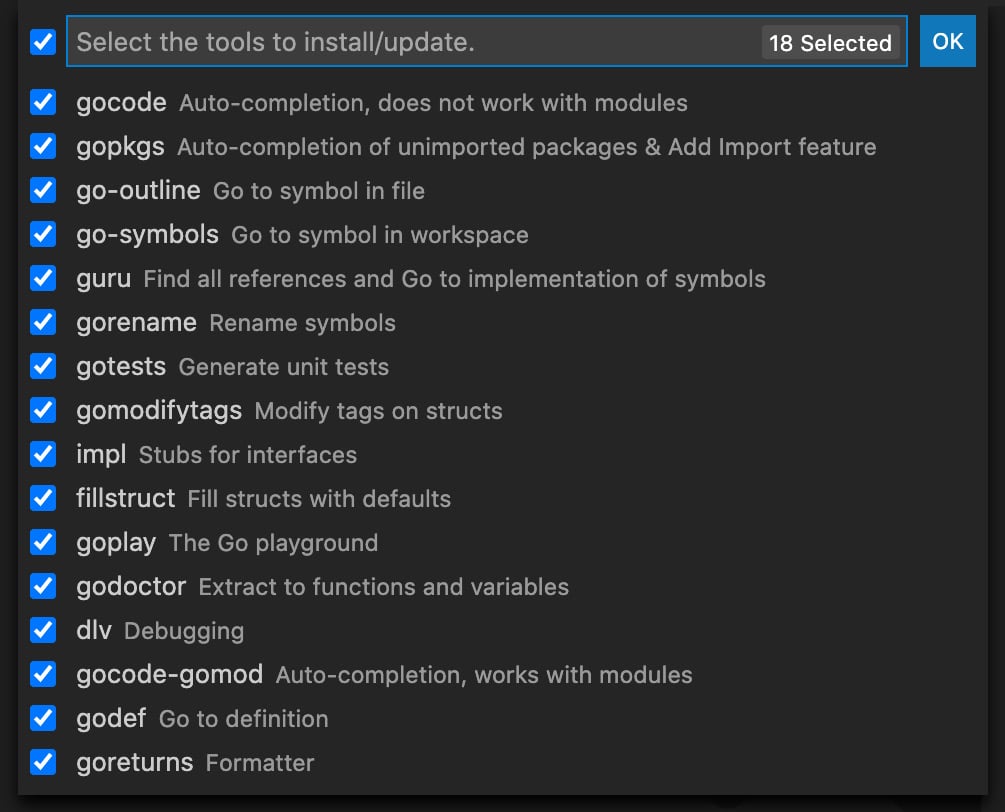
Figure 1.13 – Available Go tools on VSCode
Check all the dependencies and click on OK. It will take some time to download all the dependencies:
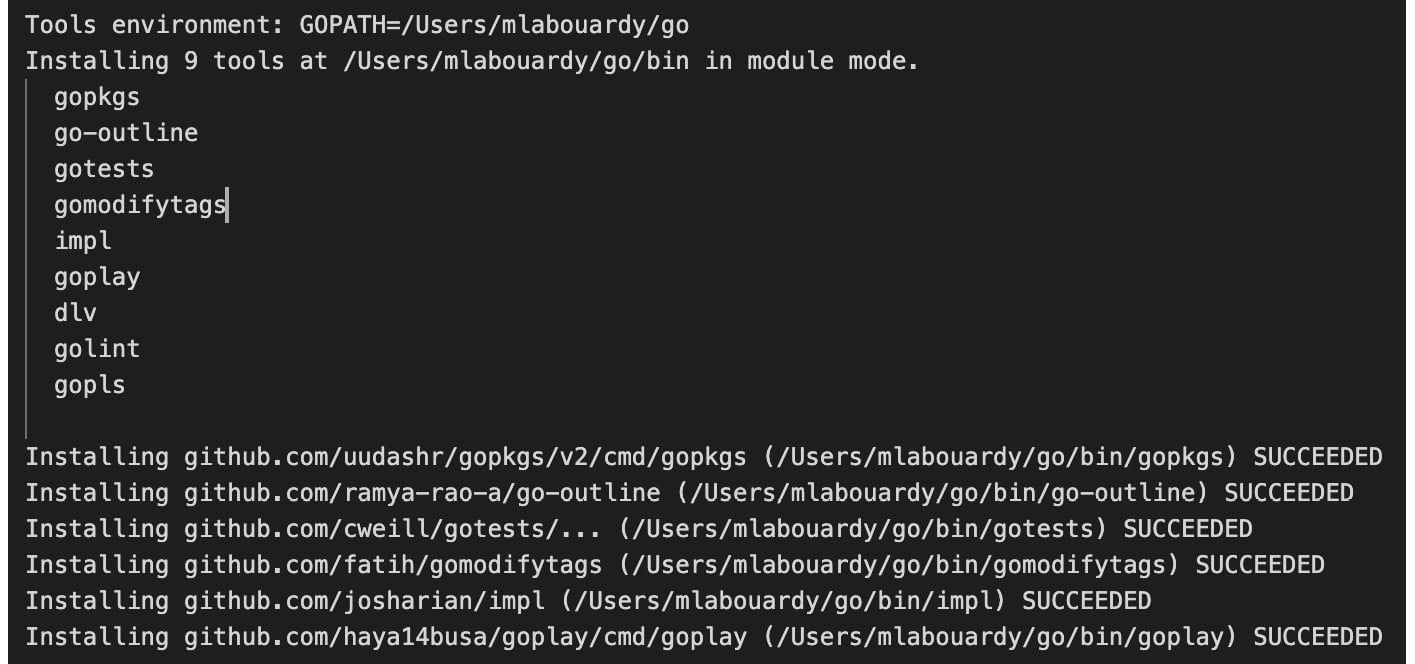
Figure 1.14 – Go tools installation
With Go installed and configured on your computer, you are now ready to install the Gin framework.