
The Moodle experience
As Moodle encourages interaction and exploration, your students' learning experience will often be non-linear. Moodle can enforce a specific order upon a course using something called conditional activities. Conditional activities can be arranged in a sequence. Your course can contain a mix of conditional and non-linear activities.
In this section, I'll take you on a tour of a Moodle learning site. You will see a student's experience from the time the student arrives at the site, enters a course, and works through some material in the course. You will also see some student-to-student interaction and some functions that are used by the teacher to manage the course.
Working with the demonstration sites to learn and practice
Moodle.org contains two types of demonstration sites where you can start a course from scratch or experiment with courses that are already partially completed and populated. They are both in Moodle 4.0. You can choose your role so that you can experiment with being a student, teacher, manager, administrator, and more. To enter the site and begin, go to https://moodle.org/demo:
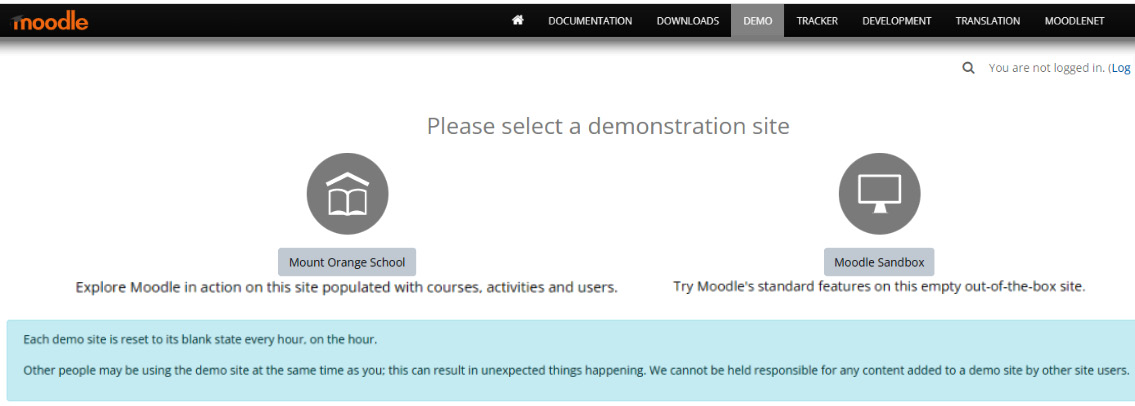
Figure 1.3 – The Moodle demo site has two options: starting from scratch via Moodle Sandbox or partially completed and populated courses via Mount Orange School
Tip
The Sandbox option has more roles and is often easier to use if you want to practice working with plugins. It is located at https://sandbox.moodledemo.net/. You will need to log in as an administrator.
The demo site – Mount Orange School
Let's take a look at the way that the site is set up. Notice that there is a menu at the very top of the screen. It provides several menu items, including Home, Dashboard, My courses, and Site administration. On the right-hand side, you'll see a column of menu items that says Main menu. This is a "block" that has been set up to help students quickly find their way through the course and go to the places that have been set up. This aspect is new in Moodle 4.0:
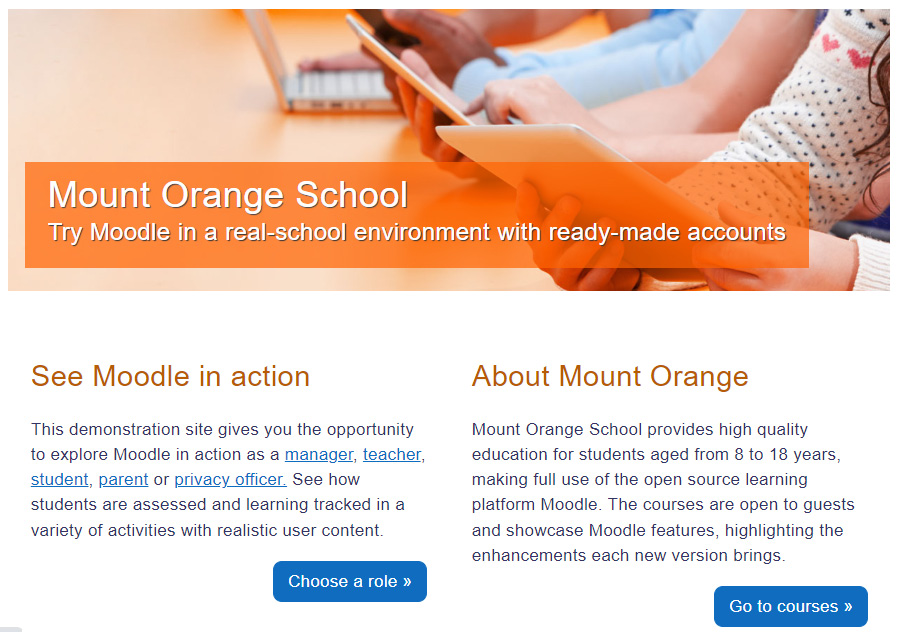
Figure 1.4 – The Mount Orange School demo, which can be customized
The following is a close-up of the navigation bar at the top of the screen:

Figure 1.5 – A close-up of the navigation bar
Let's review each option:
- Home: This is the page you're on now. To edit it, go up to the top right-hand corner and click on the Edit mode slider button. Once you've turned that on, you'll see that little pencil icons and gear icons pop up everywhere, ready for you to start editing.
- Dashboard: This is a valuable tool that helps students organize their tasks, manage time, and then track the progress of their courses. Any time that you upload a resource or an activity that has a date due, it will appear in the calendar and the timeline.
- My courses: This screen lists the courses that you have enrolled in. It is different than the listing of courses on the site's Home page, which will list all the courses for the site.
- Site administration: This page looks different for different users. For a person with administrator permissions, when you click on the link, a page will open with different categories of configurations. Once you open the Site administration page, you'll see a horizontal navigation bar with a list of links. They include the following:
- General: This contains all the general settings and utilities, which range from analytics, competencies, and badges, to licenses and security. The important thing to remember with this list is that all the settings are universal, site-wide settings. You can customize the different courses so that they have independent settings.
- Users: This is where you administer site-wide settings for user accounts, permissions, privacy, and more.
- Courses: This is where you manage and access all the courses and categories on the site, upload new courses, set activity chooser settings, and set up backups.
- Grades: Here, you can set the site-wide settings for grades, grading scales, grade categories, and more. You can also set up site-wide grader reports and grade history.
- Plugins: Moodle 4.0 has a wide array of plugins, which are also activities and controls. If you want your site to do something, chances are, you can find it as a plugin. Keep in mind that plugins can be site-wide or specific to a course or a course category. For an at-a-glance look at the default settings and availability of the different plugins, you can click Plugins overview.
- Appearance: This is where you can set the appearance of your site and incorporate themes. The default themes in the demo site are Boost and Classic.
- Server: Unless you are an administrator, you will have very few reasons to tamper with server settings. However, you may need to look at tasks, email configurations, and web services.
- Reports: This area contains various performance reports for the software and activity of Moodle.
- Development: This area contains links for developers who are creating new code or enhancing and customizing their installation of Moodle. There is a template library that makes it easy to get started. Cookbooks are widely available in Moodle repositories and on GitHub.
Just for fun, let's log in as though we are an administrator for the Moodle Sandbox demo and see what it looks like as we start to configure the site and a course.
Logging in as an administrator on the Sandbox demo site
You've registered as an administrator and have logged in. Now, you can experiment with your first course. Once you've logged in, you'll see that you can switch roles or maintain your role as an administrator. Scroll down and you'll see a link to My first course:
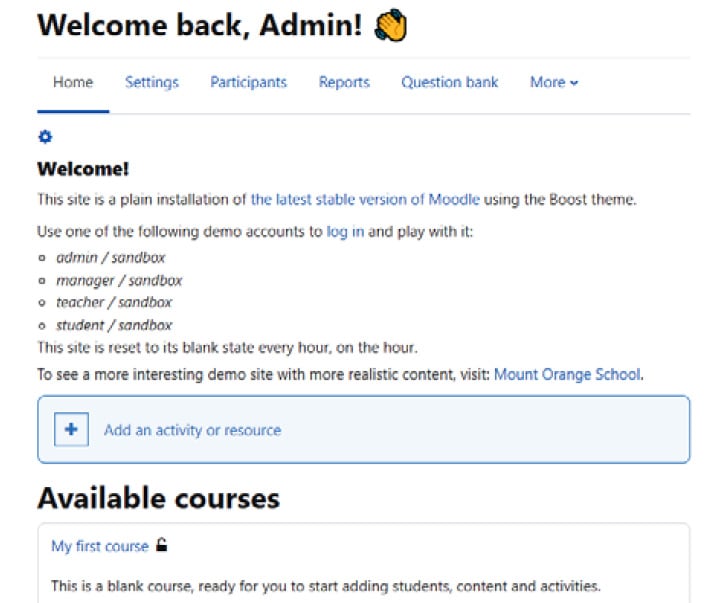
Figure 1.6 – Selecting the role for your demonstration experience
Using moodlecloud.com for cloud-based hosting
Moodle has created a cloud-based version of Moodle, which allows you to set up courses, develop a sandbox, and launch courses. It is located at https://moodlecloud.com/app/en/login. The pricing depends on the number of users and courses. MoodleCloud is hosted by Moodle and always has the latest version and supports several themes. However, it does not offer all the different themes, and may not be as robust as a solution for those with dedicated servers. I've used it often and I like it. The only downside is that there is sometimes a time lag.
The main menu
Log into MoodleCloud or the Sandbox site. Be sure to switch on Edit mode in the top right-hand corner. For the Sandbox demo site, please to go to sandbox.moodledemo.net. Note Moodle sandbox demo in the left of the following screenshot. Under that, you'll see a horizontal line of menu items:
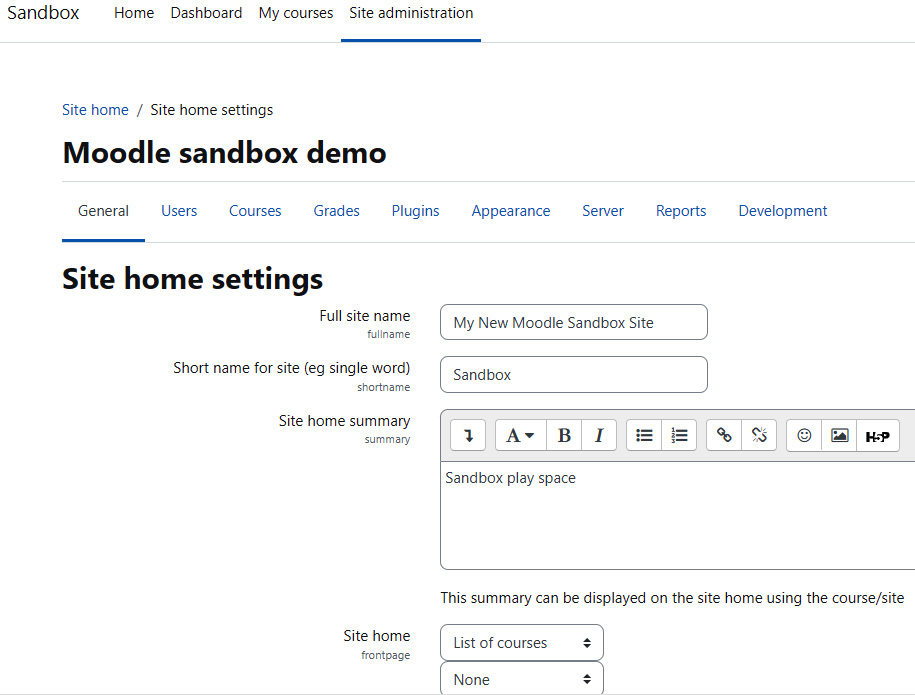
Figure 1.7 – Setting up a new Moodle site
Once you've set up your site, you'll see that there are several menu items on the upper row. They have changed in Moodle 4.0 and make it easier for you to go to the most often-used categories in Moodle. You will see Home, Settings, Participants, Reports, Question Bank, and More:

Figure 1.8 – Setting up Moodle 4.0 at the course level
Let's look at these categories in more detail:
- Home: This is your site's home page and can be configured to describe the school, list courses, and more.
- Settings: This category allows you to set the site's home name, summary, and announcements, as well as adding blocks, such as a Calendar block and a Timeline block.
- Participants: Here, you can enroll, unenroll, and manage users. While managing users, you can create groups, groupings, manage permissions, and assign roles.
- Reports: Reports have been expanded in Moodle 4.0. You can add competency breakdowns and upload guidelines and rubrics. In addition, you can generate user logs and look at live logs of user activity. You can even create activity reports, track course participation, generate statistics, and set up rules for monitoring events.
- Question bank: The fact that the Question Bank appears in the menu of the site's home page is new in Moodle 4.0. It has been set up this way to make it easier for you to develop and manage questions that will then be used for quiz activities. Quizzes of all sorts constitute the heart of many courses, and part of the job of a Moodle site administrator or teacher is to develop, classify, manage, and deploy these questions. We'll learn how to write effective quiz questions, as well as showing you how to work with quizzes and quiz questions, later in this book.
- More: This dropdown menu contains three links which relate to your site's content and functionality. The links are: Content bank, Filters, and Course reuse.
Modifying the course and menu items
As always, to be able to edit a course or the menu items, you'll need to go to the top right-hand side of the page and click on Edit mode. After that, you can add activities, resources, plugins, and more. We'll go into all of that throughout this book. For now, let's look at how the Moodle experience has been enhanced through Moodle 4.0. Notice that My courses still lists your courses, but now, it shows which ones are in progress, and how much of each has been completed:
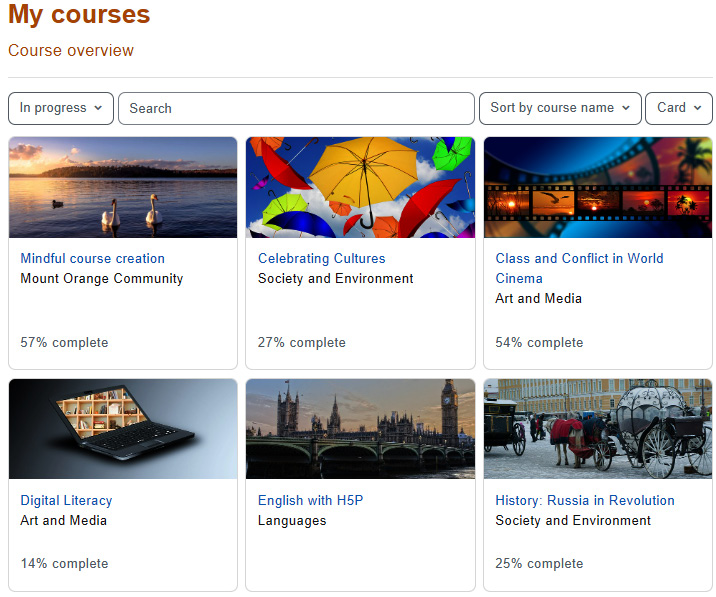
Figure 1.9 – Moodle 4.0's My courses page with a course overview that shows the percentage completed for each course
Then, to further enhance the user experience and enhance time management and develop self-efficacy, Moodle 4.0 has improved the course Timeline, as well as the course Calendar, so that they show the student's deadlines, which can be combined with group members if desired:
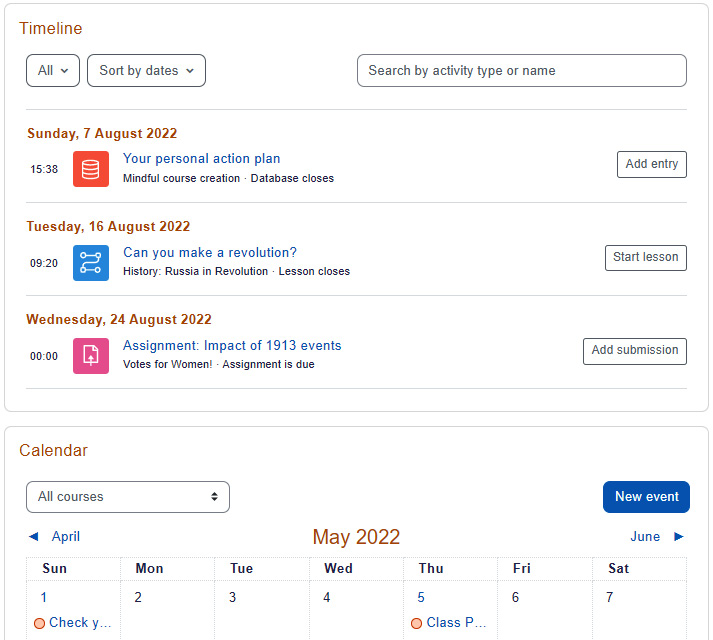
Figure 1.10 – Moodle 4.0's updated Timeline and Calendar