
Setting up a gRPC server
Now that your environment has been set up, you are ready to create your gRPC server application.
There are several ways to proceed. Regardless of whether you've chosen to use the IDE or CLI, you will be able to use the gRPC project template to initialize your application code, with all the gRPC capabilities already pre-defined. However, in real-life scenarios, you may want to add gRPC capabilities to an existing hosted web service. Therefore, we will go through the process of creating a bare-bones ASP.NET Core application and then add gRPC capabilities to it.
Initializing an ASP.NET Core project via an IDE
If you are using an IDE (Rider, Visual Studio, or Visual Studio for Mac), the process of initializing a new ASP.NET Core project is the same. When you launch the IDE, you will be presented with the option to create a new project. Click on this option and, from the list of templates, choose Web App.
This template will be called slightly differently, depending on what IDE you are using. For example, on Visual Studio for Windows, multiple templates represent an ASP.NET Core web application. For this project, any of them would be suitable. However, since you will only be using basic ASP.NET Core features, you should choose the most basic template. On the Windows version of Visual Studio, it is called ASP.NET Core Web App:
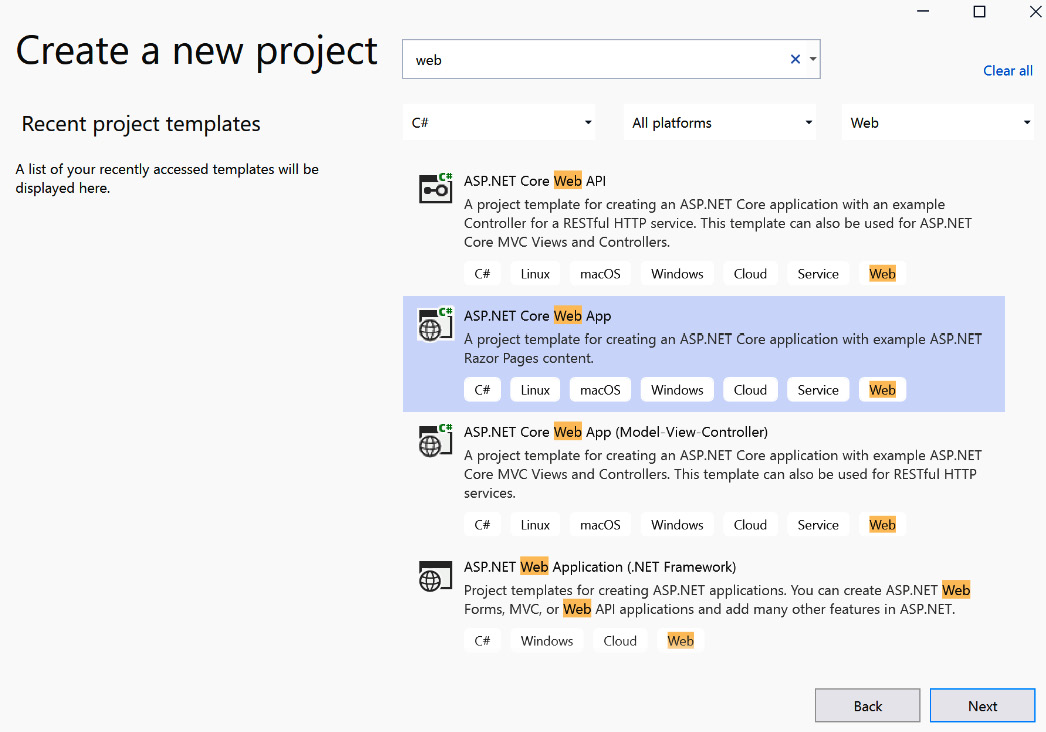
Figure 1.4 – Web App project template in Visual Studio 2019
JetBrains Rider will have a similar project template name with some variations, depending on the version. However, if you are using Visual Studio for Mac, the project template that you need will be called Web Application:
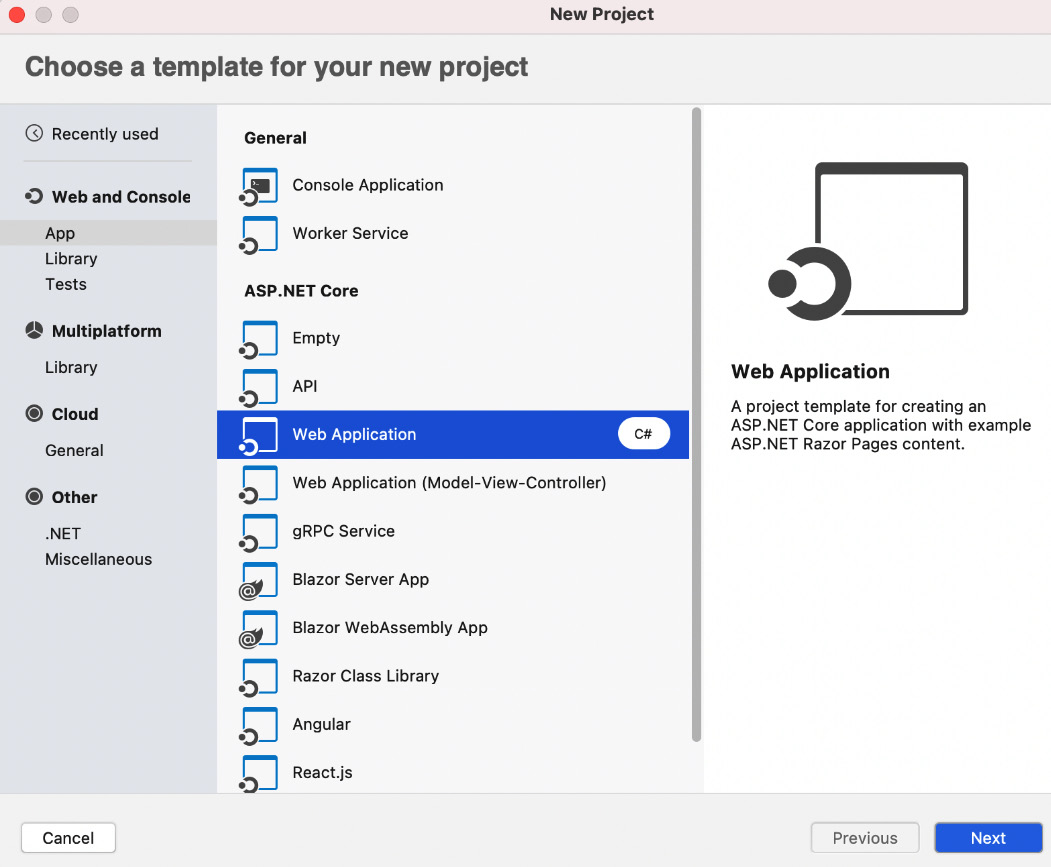
Figure 1.5 – Web Application template on Visual Studio for Mac
Once you select the template, you will be asked for the project's name. I have called mine BasicGrpcService. You can give yours any name, but for the convenience of following the instructions, you should give your project the same name:
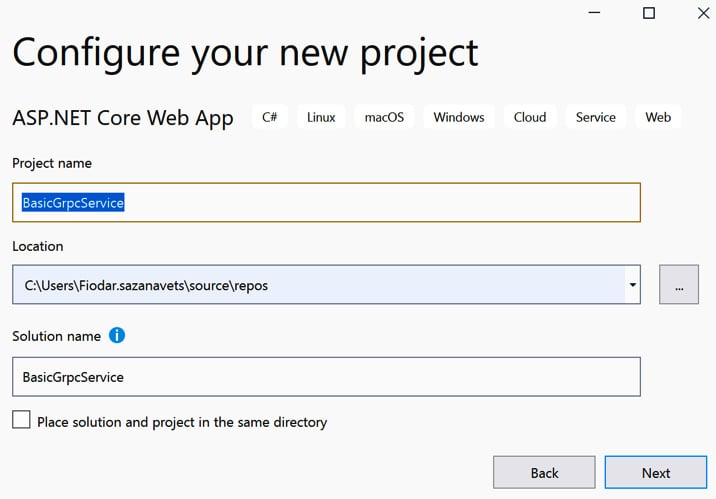
Figure 1.6 – Naming your project
When you're asked which framework version you would like to use, select the latest one, which, at the time of writing, is .NET 5.
Also, if you are asked for the authentication type, select None. If you have the Configure for HTTPS option, make sure that it's selected. Leave the remaining settings as-is and click on Create:

Figure 1.7 – Runtime selection and ensuring HTTPS is enabled
At this point, a solution should have been created with an ASP.NET Core project inside it.
Initializing an ASP.NET Core project via the dotnet CLI
If you don't have access to an IDE or if you prefer to work with the command line, you can create the project via the dotnet CLI, which will be available on any system that has the .NET 5 SDK installed. To do so, navigate to the folder that you want to place your project in and execute the following command:
dotnet new webapp -o BasicGrpcService
Finally, since you have selected to enable HTTPS (which is recommended for gRPC), you will need to install and trust the development HTTPS certificate for .NET.
If you are using a Mac, then you will not be able to configure the HTTPS on gRPC endpoints, so you will need to enable HTTP too. The instructions on how to do so are available in the Running a gRPC service on Mac section.
If you are using an IDE, such as Visual Studio or Rider, the process of installing and trusting the development certificate will happen automatically. You will receive a prompt when you launch your application via the IDE for the first time. Otherwise, you can configure the certificate via a CLI command.
To do so on Windows or Mac, you can execute the following command inside your project folder:
dotnet dev-certs https --trust
On Linux, this command may not work, as different Linux distributions have completely different mechanisms for trusting self-signed HTTPS certificates. If you are using Linux, you will need to obtain this information from the documentation that's specific to the distribution you are using.
Congratulations! You now have a functioning ASP.NET Core application that you can start adding gRPC server components to.
Adding gRPC server components to an ASP.NET Core project
Because you have initially chosen a basic ASP.NET Core application template, your project file (BasicGrpcService.csproj) should only contain the most basic markup, such as this:
<Project Sdk="Microsoft.NET.Sdk.Web">
  <PropertyGroup>
    <TargetFramework>net5.0</TargetFramework>
  </PropertyGroup>
</Project>
Now, we will need to modify it to add gRPC components. First, we will run the following command from the project folder to install the required NuGet package:
dotnet add BasicGrpcService.csproj package Grpc.AspNetCore
Here, we have added a NuGet package reference to the Grpc.AspNetCore library. This library adds all the necessary components to enable gRPC inside an ASP.NET Core application.
There is also another element that you may not be familiar with if you haven't used gRPC inside an ASP.NET Core application before. It's called Protobuf and its role is to tell the application which protocol buffer files are available for writing code against. This element will ensure that the right code snippets are generated inside your application.
You will need to add the following markup snippet to the BasicGrpcService.csproj file to enable this:
<ItemGroup>
  <Protobuf Include="Protos\greeter.proto"
    GrpcServices="Server" />
</ItemGroup>
Your file will look similar to this:
<Project Sdk="Microsoft.NET.Sdk.Web">
  <PropertyGroup>
    <TargetFramework>net5.0</TargetFramework>
  </PropertyGroup>
  <ItemGroup>
    <Protobuf Include="Protos\greeter.proto"
      GrpcServices="Server" />
  </ItemGroup>
  <ItemGroup>
    <PackageReference Include="Grpc.AspNetCore"
      Version="2.34.0" />
  </ItemGroup>
</Project>
Please note that the Protobuf element has the GrpcServices attribute set to Server. We've done this to tell our compiler that we only expect our application to act as a server while using the greeter.proto file from inside the Protos folder. This will ensure that only server-related classes will be generated by the compiler.
You can choose the Client role as well. In this case, it's only the client-side components that will be generated from our proto file. But since we are building the server-side application right now, it's certainly not the right role to choose.
Also, you can choose to omit the GrpcServices attribute completely. In this case, you will be able to generate both server-side and client-side components for your code.
Next, we will need to add a proto file that defines the communication mechanism between the client and the server. To do so, create a Protos folder inside your project folder and place the greeter.proto file inside it with the following content:
syntax = "proto3";
option csharp_namespace = "BasicGrpcService";
 package greeter;

// The greetings manager service definition.
service GreetingsManager {
  // Request the service to generate a greeting message.
  rpc GenerateGreeting (GreetingRequest) returns
    (GreetingResponse);
}

// The request message definition containing the name to be
  addressed in the greeting message.
message GreetingRequest {
  string name = 1;
}

// The response message definition containing the greeting   text.
message GreetingResponse {
  string greetingMessage = 1;
}
This is a very bare-bones proto file. It's the equivalent of a Hello World application as it's only there to demonstrate the very basic functionality to a complete beginner.
We will cover the format of the proto file in more detail later. For now, let's go through the basics by using this example.
The first element is syntax. In our case, its value is set to proto3. There were several iterations of the gRPC communication protocol and the current one is the third iteration. Due to this, we have explicitly specified it here, as some applications may otherwise assume that this file represents an older version of the protocol.
Then, we have the csharp_namespace option. This option is specific to the C# language as it's the language that we will be working with. It tells our compiler what namespace it should use while generating classes based on these proto definitions. So, the server and client classes that are based on the service elements of the proto file will be under the namespace defined here.
Next, we have the package element. package in Protobuf is conceptually similar to C# namespaces, but it's intended for Protobuf rather than the code that gets generated from it. package allows one proto definition to reference other definitions, just like the C# class can reference external libraries by using namespaces.
Next, we have the service definition. A single proto file can have lots of these. But essentially, a single proto service represents a single client or server class in the code.
Inside the server, rpc definitions represent remotely called procedures, which are equivalent to C# methods. Each of those definitions has a unique name, a single message definition as its parameter (the request message), and a single message definition as its return object (the response message).
The RPC definition must always have a single request and a single response. You cannot have RPC without putting anything into the parameters or its return statement. Nor can you specify multiple message definitions in either of those places.
However, there are ways of sending or returning empty messages in gRPC calls. Even though a message definition must be specified, it doesn't need to have any fields.
Likewise, there are multiple ways of sending or receiving multiple messages. First, both the client and the server can stream messages, which will enable the system to send or receive multiple messages of the same schema rather than one. Also, each message can have other messages as data types in its fields. It can also use collections, which allows it to put multiple messages of the same kind into a single field.
Messages are defined by the message keyword in a proto file. The closest equivalent in C# is basic classes or structs that are used for data transfer.
Each message can have zero or any number of data fields. Each data field is defined by its data type (which we will cover in more detail in Chapter 3, Protobuf – the Communication Protocol of gRPC), unique name, and unique sequence number. For example, this is the only data field that we will use inside GreetingRequest:
string name = 1;
The sequence number at the end must start with 1 and be unique for each field. These sequence numbers simplify the process of API versioning in gRPC, which we will cover in more detail in Chapter 3, Protobuf – the Communication Protocol of gRPC.
Finally, our example contains multiple comments, which, just like in C#, start with //. They are completely ignored by the compiler.
Adding some code to use gRPC components
Now, we are ready to start modifying our application so that it can use the gRPC components that we have added.
First, you will need to create a Services folder inside your project folder. Then, we must add a file to it and name it GreetingsManagerService.cs. Then, we must put the following content into this file:
using System.Threading.Tasks;
using Grpc.Core;
namespace BasicGrpcService
{
     public class GreetingsManagerService :
       GreetingsManager.GreetingsManagerBase
    {
        public override Task<GreetingResponse>
          GenerateGreeting(GreetingRequest request,
            ServerCallContext context)
        {
            return Task.FromResult(new GreetingResponse
            {
                GreetingMessage = "Hello " + request.Name
            });
        }
    }
}
Please note that, at this stage, you may receive a compiler error. If you do, it will persist until you build the application. But don't worry about it for now.
This class represents the server-side logic that is defined by the GreetingsManager service, which we specified in the greeter.proto file. The basic code placeholders are auto-generated from the proto file and, in our case, are placed in the GreetingsManager.GreetingsManagerBase class, which our class extends. Then, we just need to override the methods from this class to apply our custom logic.
The override of the GenerateGreeting task is the representation of the GenerateGreeting RPC, which is defined inside the GreetingsManagerer service in the greeter.proto file. However, you may have noticed that it doesn't match the definition. Yes – as the proto file has specified, it accepts a parameter of the GreetingRequest type and returns an object of the GreetingResponse type. However, it also has an additional input parameter of the ServerCallContext type.
Well, this parameter is nothing but a collection of metadata that was populated by the client sending the request. It contains information such as the username and connection state. It plays a similar role to HttpContext, which is used by the HTTP endpoints (MVC, REST API, and so on) of ASP.NET Core.
This code is very simple. When a client calls this method, the Name property of the GreetingRequest input parameter is read. This value is inserted at the end of the Hello text. So, for example, if the name is John, the output would be Hello John. Then, this value is inserted into the GreetingMessage property of a newly initialized instance of the GreetingResponse object, which is returned to the calling client.
Next, we will need to modify our Startup class to register the GreetingsManagererService class as a valid gRPC endpoint. To do so, first, add the following line inside the ConfigureServices method. If you are using .NET 6 project template, there will be no Startup class. And neither will there be ConfigureServices method. So, you will just need to apply the following code to the main body of Program.cs class, replacing services with builder.Services. And it will need to be placed before the Build event:
services.AddGrpc();
Next, add the following code inside the call to app.UseEndpoints, inside the Configure method:
endpoints.MapGrpcService<GreetingsManagerService>();
Finally, inside your Properties folder in the root of your project folder, locate the profiles element and replace its content with the following:
"profiles": {
    "BasicGrpcService": {
      "commandName": "Project",
      "dotnetRunMessages": "true",
      "launchBrowser": false,
      "applicationUrl":
        "http://localhost:5000;https://localhost:5001",
      "environmentVariables": {
        "ASPNETCORE_ENVIRONMENT": "Development"
      }
    }
  }
That's it – our gRPC server has been fully configured. Now, you can launch your application and see if it works correctly. If it does, you should see some console output, and the application shouldn't throw any visible errors:
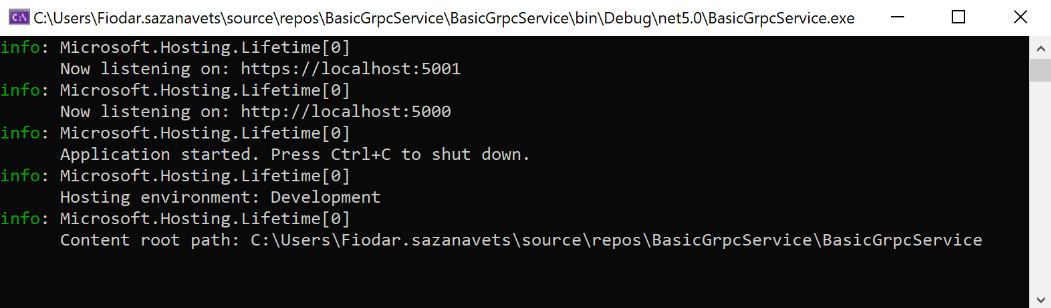
Figure 1.8 – Console output from the gRPC server
With this, we have set up our gRPC server. Now, let's move on to the next step and set up a gRPC client that can talk to it.