

Adding data for each page
The home page of our website has a large banner at the top. It would be great to be able to reuse the HTML from that banner on the About page as well. If we move the HTML from the home page into an include and use it in both places, the headline and banner text will be identical. That’s where page data comes in.
Adding variable data to the home page
In the index.html file, we already have the YAML frontmatter that we used when setting up the layout in Chapter 1. This is where the page data lives.
To add additional variables, we can follow the same format as we use for the layout variable and add a new line to the frontmatter. This time, add a title and bannerContent variable. Each of these will contain a string that will be used by the templates:
---
layout: "layouts/base.html"
title: "This is my homepage"
bannerContent: "This is my banner content"
---
These two new variables are accessible inside of the page, the layout controlling the page, and the includes that are included on the page.
To start, replace the static HTML in index.html with Liquid variable expressions, as we discussed in Chapter 1 for the {{ content }} variable. Any variable entered into the frontmatter of a page is accessible by the key given to it:
<section class="banner">
  <h1>{{ title }}</h1>
  <p>{{ bannerContent }}</p>
</section>
Now that we have the content as data in our page, we can move the HTML from the page into an include placed in the base layout.
Copy the markup from the home page and move it into a new file named banner.html in the src/_templates/includes directory. Your directory structure should now be updated.
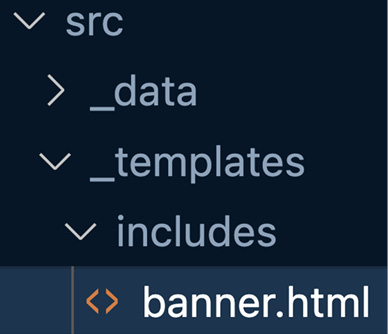
Figure 2.1 – banner.html should now be in the includes directory
No noticeable changes should happen on the home page. Once the file is added, we can include banner.html in the base.html layout file with the following code:
{% include "includes/banner.html" %}
At this point, we can modify the About page to handle the same data.
This HTML is now on every page using the base.html layout. That means we have access to it on the About page as well as the home page. Right now, there’s no data, so the h1 and p elements will appear on the page but will be empty. We’ll update the About page with the proper data in a moment, but let’s first add protections against pages that don’t have this content.
Writing conditionals to display no markup if data doesn’t exist
To protect our HTML, we need to add conditionals to our include. We need to think about three different cases:
- When there is no
titleorbannerContent, don’t display the entire section - When there is no
title, don’t displayh1, but display thebannerContentparagraph - When there is no
bannerContent, displayh1, but not thebannerContentparagraph
Most conditional operators you may be used to from other languages are also available in Liquid (and Nunjucks). For the first case, we need to check whether either title or bannerContent exists; for the second case, we need to check whether title exists; and for the third case, we need to check whether bannerContent exists:
{% if title or bannerContent %}
  <section class="banner">
    {% if title %}<h1>{{ title }}</h1>{% endif %}
    {% if bannerContent %}<p>{{ bannerContent }}</p>
      {% endif %}
  </section>
{% endif %}
This adds all the protections we need. Now, the About page no longer has a blank banner at the top. But we do need a banner, so let’s update the About page.
Adding About page data and content
When we created the About page in Chapter 1, we set it up to use base.html like the home page. Because it’s using that layout, we now have access to the same banner include if we provide the same data structure to the page frontmatter. By adding the same data to the About page’s frontmatter, we can have a custom banner:
---
layout: "layouts/base.html"
title: "About us"
bannerContent: "This is a little paragraph about the
  company."
---
The page should now display a banner across the top, but let’s take this one step further. While it makes sense to keep the home page as an HTML document, authoring long-form content isn’t easy in HTML. While the frontmatter may be structured data, we can also use other types of content data in our pages. Let’s convert the page from HTML to Markdown—a more ergonomic way of authoring structured content in code.
To do this, change the file extension from .html to .md. By default, 11ty will read that as a Markdown document and use Markdown and Liquid to generate HTML from it. This means that all valid HTML and Liquid tags work in the page’s code, as well as standard Markdown syntax:
---
layout: "layouts/base.html"
title: "About us"
bannerContent: "This is a little paragraph about the
  company."
---
## The page content can go here
It can use any markdown, since we're in a markdown page. Like [an anchor](https://packtpub.com) or **bold text**.
* Or an unordered list
* With some items
1. Or an ordered list
1. With some items (no need to have different numbers in a
  Markdown ordered list)
Now we have structured page data and our page content is transformed into data, but let’s take this a step further and create unique styling for the home page banner compared to the About page banner.
Typically, a home page banner will be styled with more padding and take up more space compared to an interior page, where getting users to the content faster is important.
To accomplish this, we need to dynamically add a class to the home page banner to modify its styles. Let’s add a pageId variable to the frontmatter of the home and About pages. For the home page, set it to home, and for About, set it to about.
Then, we can modify the banner include to add a class when pageId is home. We can do this with another Liquid conditional, this time checking the value of pageId rather than just whether it exists:
{% if title or bannerContent %}
  <section class="banner{% if pageId == "home" %} banner—
    home{% endif %}">
    {% if title %}<h1>{{ title }}</h1>{% endif %}
    {% if bannerContent %}<p>{{ bannerContent }}</p>
      {% endif %}
  </section>
{% endif %}
We add banner--home as a class in the section when it matches home; otherwise, it’s just banner. This matches the class in the CSS file to set a min-height on the banner. If you want to take this a step further, you could use the pageId value itself and set styles for every page ID in your CSS.
Whitespace
Note the whitespace choices in the class list. There’s no space between banner and the conditional and there’s a space preceding banner--home. This is intentional and will render the HTML with no awkward whitespace. If you don’t mind extra spaces in your source code, you can choose to accommodate that space before the conditional. I care more about the rendered markup than perhaps I should.
We can also use pageId to set an active state on our navigation to show users what section in the navigation the current page is in.
To do that, open the navigation.html include we created in Chapter 1. For each navigation list item, we can create a conditional to check which pageId is in use and display an active class for the proper navigation item:
<nav>
    <ul>
        <li {% if pageId == "home" %}class="active"
          {% endif %}><a href="/">Home</a></li>
        <li {% if pageId == "about" %}class="active"
          {% endif %}><a href="/about">About</a></li>
    </ul>
</nav>
Now that we have a working navigation and About section, let’s expand on the home page by adding data for a standard web design pattern—the triptych.
Adding an array to the frontmatter and looping through it in a page
We’ve drastically simplified the About page and applied reusable components between pages. The home page still has a section that has a lot of repeating HTML. The triptych area—three identically styled cards next to each other—has the same markup, but different content for each card.
We could put three sets of uniquely keyed data in the home page frontmatter and write the HTML around that, but it would be better to write the markup once and allow the data to be looped through and render the repeated HTML. To do this, we can use a YAML array and a Liquid for loop.
Add the following to the frontmatter of index.html:
triptychs:
  - headline: "Triptych 1"
    content: "Triptych 1 content"
  - headline: "Triptych 2"
    content: "Triptych 2 content"
  - headline: "Triptych 3"
    content: "Triptych 3 content"
Whitespace part 2
Note the whitespace again. YAML is whitespace sensitive, so the exact spacing is important.
If we add a dash before the start of each first property, YAML will interpret this as an array. The keys in the array should line up and the next dash will denote the next item in the array.
To use this data, we'll use another built-in Liquid template tag: {% for %}.
The for tag is a paired shortcode that will loop through an array. It follows this syntax: {% for <variable-to-store-data> in <array-variable> %}. This allows you to format your code in efficient ways:
<section class="triptych">
  {% for triptych in triptychs %}
  <div class="triptych__item">
    <h2>{{ triptych.headline }}</h2>
    <p>{{ triptych.content }}</p>
  </div>
  {% endfor %}
</section>
Let’s make this even more reusable. Right now, this works in this space, but what if we want to have this style of item elsewhere? Let’s refactor it into an include and transform the data we pass into it so that it works with any data to make a new card. Make a new include named card.html. Bring the entire triptych__item into the new include and reference the include from within the for loop:
<section class="triptych">
  {% for triptych in triptychs %}
    {% include "includes/card.html" %}
  {% endfor %}
</section>
This works and might feel like we’re done, but it will only work with data under the triptych key. To fix this, we can pass specific data under specific keys to the include.
We can extend the previous code snippet to rename each variable as we pass it into the include. We set the headline variable to triptych.headline and the content variable to triptych.content to give it the proper format for the new include. This way, anywhere we want to use the include, we just pass the correct data to the correct key.
The new for loop looks as follows:
<section class="triptych">
  {% for triptych in triptychs %}
    {% include "includes/card.html", headline:
      triptych.headline, content: triptych.content %}
  {% endfor %}
</section>
The new include looks as follows:
<div class="triptych__item">
  <h2>{{ headline }}</h2>
  <p>{{ content }}</p>
</div>
The frontmatter is a great place to work with simple data, but as you may have noticed, it starts to get very complicated with just a little extra data. Let’s make the developer experience a little better by moving the data to an external file.