
Setting up our workspace with Angular CLI
Setting up a frontend project today is more cumbersome than ever. We used to manually include the necessary JavaScript and CSS files in our HTML. Life used to be simple. Then frontend development became more ambitious: we started splitting up our code into modules and using special tools called preprocessors for both our code and CSS.
All in all, our projects became more complicated, and we started to rely on build systems to bundle our applications. As developers, we are not huge fans of configuration—we want to focus on building awesome apps. Modern browsers, however, do more to support the latest web standards, and some of them have even started to support modules. That said, this is far from being widely supported. In the meantime, we still have to rely on tools for bundling and module support.
Setting up a project with Angular can be tricky. You need to know what libraries to import and ensure that files are processed in the correct order, which leads us to the topic of scaffolding. Scaffolder tools almost become a necessity as complexity grows, but also where every hour counts towards producing business value rather than fighting configuration problems.
The primary motivation behind creating the Angular CLI was to help developers focus on app building, eliminating the boilerplate of configuration. Essentially, with a simple command, you should be able to initialize an application, add new artifacts to it, run tests, and create a production-grade bundle. The Angular CLI supports all of this with the use of special commands.
Prerequisites
Before we begin, we need to make sure that our development environment includes a set of software tools that are essential to the Angular development workflow.
Node.js
Node.js is a JavaScript runtime built on top of Chrome's v8 JavaScript engine. Angular requires a current or LTS version. If you have already installed it, you can run node -v in the command line to check which version you are running. If not, you can get it from https://nodejs.org.
Angular CLI uses Node.js to accomplish specific tasks, such as serving, building, and bundling your application.
Npm
Npm is a software package manager that is included by default in Node.js. You can check this out by running npm -v in the command line. The Angular framework is an ecosystem of various libraries, called packages, that are available in a central place called npm registry. The npm client downloads and installs the libraries that are needed to run your application from the registry.
Git
Git is a client that allows us to connect to distributed version-control systems, such as GitHub, Bitbucket, and GitLab. It is optional from the perspective of the Angular CLI. You should install it in case you want to upload your Angular project in a Git repository, which is something that you might want to do.
Installing Angular CLI
The Angular CLI is part of the Angular ecosystem and is available to download from the npm package registry. Since it is used for creating Angular apps and projects, we need to install it globally in our system. Open a terminal and run the following command:
npm install -g @angular/[email protected]
Important Note
On some Windows systems, you may need to have elevated permissions to do this, in which case you should run your command-line window as an administrator. In Linux/macOS systems, run the command using the sudo keyword: sudo npm install -g @angular/[email protected].
The command that we used to install Angular CLI uses the npm client followed by a set of runtime arguments:
installori: Denotes the installation of a package-g: Denotes that the package will be installed to the system globally@angular/cli: Denotes the name of the package to install@10.0.0: Denotes the version of the package to install
CLI commands
Angular CLI is a command-line interface tool that automates specific tasks during development, such as serving, building, bundling, and testing an Angular project. As the name implies, it uses the command line to invoke the ng executable and run commands using the following syntax:
ng command [options]
Here, command is the name of the command to be executed and [options] denotes additional parameters that can be passed to each command. To view all available commands, you can run the following:
ng help
Some commands can also be invoked using an alias instead of the actual command name. In this book, we revise the most common ones (the alias of each command is shown inside parentheses):
new (n): Creates a new Angular application from scratch.build (b): Compiles an Angular application and outputs generated files in a predefined folder.generate (g): Creates new files that comprise an Angular application.serve (s): Builds an Angular application and serves it from a preconfigured web server.test (t): Runs unit tests of an Angular application.deploy: Deploys an Angular application to a web-hosting provider. You can choose from a collection of providers that are included in the Angular CLI.add: Installs a third-party library to an Angular application.update: Updates an Angular application along with its dependencies. Dependencies are libraries, npm packages, that are needed for the Angular application to run.Important Note
A library must be compatible with the Angular CLI that is to be used with add and update commands. The way that a library adds compatibility is out of the scope of this book.
Angular CLI follows the same major version of Angular, as all other packages of the framework do. The version that we use in this book and the accompanying source code is 10. You can check which version you have installed by running ng version or ng v in the command line.
Angular CLI uses modern web techniques to orchestrate an Angular application and provide us with a fantastic development experience. It uses Webpack under the hood, a popular module bundler for modern JavaScript applications. We do not interact directly with Webpack, but through the Angular CLI interface.
Creating a new project
Now that we have prepared our development environment, we can start creating magic by scaffolding our very first Angular application. We use the new command of the Angular CLI and pass the name of the application that we want to create as an option. To do so, go to a folder of your choice and type the following:
ng new my-app
Creating a new Angular application is an easy and straightforward process. The Angular CLI will ask you for some details about the application that you want to create so that it can scaffold the Angular project as best as it can. Initially, it will ask you if you want to include routing in your app.
Would you like to add Angular routing? (y/N)
Routing is related to navigating from one view of your application to another, and it is something that we will learn about later in Chapter 7, Navigate through Components with Routing. For now, answer No to the question and press Enter.
The next question is related to the styling of your application.
Which stylesheet format would you like to use? (Use arrow keys)
It is common to use CSS for styling Angular applications. You can, however, use preprocessors, such as SCSS or Less, that can provide added value to your development workflow. In this book, we work with CSS directly, so you can accept the default choice, CSS, and press Enter.
The process may take some time depending on your internet connection. During this time, Angular CLI will download and install all of the necessary dependencies, as well as create default files for your Angular application. When finished, it will have created a folder called my-app. Navigate to the newly created folder and start your application with the following command:
ng serve
Angular CLI compiles the Angular project and starts a web server that watches for changes in project files. This way, whenever you make a change, the web server rebuilds the project to reflect the new changes.
To preview the application, open your browser and go to http://localhost:4200
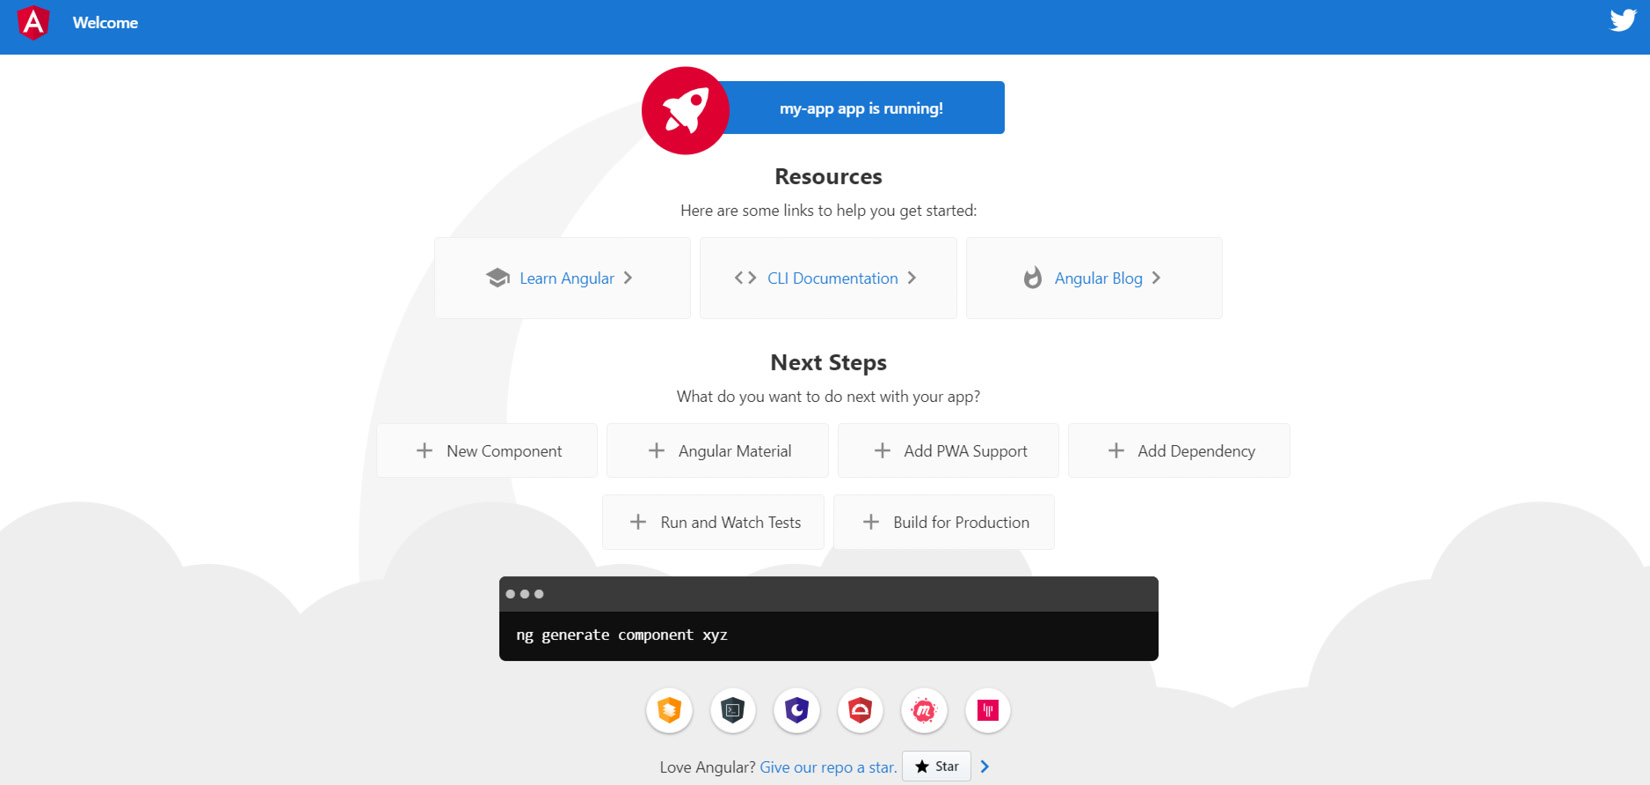
Figure 1.1 – Landing page of a new Angular app
When we create a new Angular application from scratch, the Angular CLI displays, by default, a landing page that contains useful links, such as where to look for additional resources and documentation about the Angular framework or the next steps to start building our application. In the next section, we will explore how Angular makes the whole process work and learn how to make a change to this landing page.