Book Image

ChronoForms 3.1 for Joomla! site Cookbook

By : Bob Janes
Book Image

ChronoForms 3.1 for Joomla! site Cookbook

By: Bob Janes

Overview of this book

Joomla! is a fantastic way to create a dynamic CMS. Now you want to go to the next step and interact with your users. Forms are the way you ask questions and get replies. ChronoForms is the extension that lets you do that and this book tells you how. From building your first form to creating rich form based applications we will cover the features that ChronoForms offers you in a clear hands-on way. Drawing on three years daily experience using ChronoForms and supporting users there is valuable help for new users and experienced developers alike. We will take you through form development step by step: from creating your first form using ChronoForms’ built-in drag-and-drop tool; validating user input; emailing the results; saving data in the database, showing the form in your Joomla! site and much more.Each chapter addresses a topic like ‘validation’ or ‘email’ and the recipes in the chapter each address a different user question from the beginners’ question ‘How do I set up an email?’ through to more advanced questions like using some PHP to create a custom email Subject line.Over eight chapters and eighty recipes we cover all of the ‘Frequently Asked Questions’ that new users and developers have about using ChronoForms. The recipe structure allows you to pick and choose just the solution that you need.
Table of Contents (17 chapters)
ChronoForms 3.1 for Joomla! Site Cookbook
Credits
About the Author
About the Reviewer
Preface

Registering users with the Joomla! Registration plug-in


In this recipe we'll start out by copying the standard Joomla! Registration process using a ChronoForm and the ChronoForms Joomla! Registration plugin.

Getting ready

We'll start off with a standard Joomla! Registration. The default Joomla! registration form looks like this:

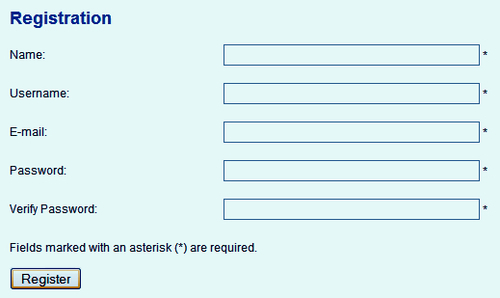
We could use the techniques from Chapter 10, Creating Common Forms to copy the HTML from this form, but instead we'll use the ChronoForms Wizard to create a new version.

Add these five text inputs with the names and IDs name, username, email, password and password_2 and then add the submit button. Use PasswordBox elements for the two password elements; they conceal the entries with asterisks. Make all the elements Required and check E-mail Validation for the e-mail element.

Save the form with a suitable name like registration_1. Publish it and click the link to open it in a browser window to check that it looks fine.

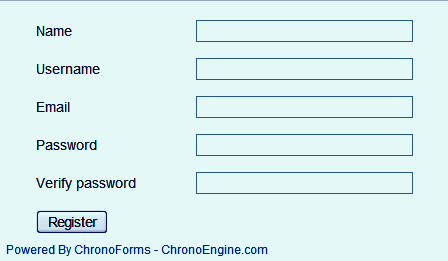
If you like you can add asterisks and extra text...