

The first step to configure a local development environment is to install a local web server on your computer. This will transform your computer into a system capable of displaying web pages and performing all tasks related to rendering a WordPress website locally.
Having a local web server has many benefits:
Provides a quick response to the frequent page refreshes that are made as plugin code is written, tested, and refined, since all information is processed locally
Removes the need to constantly upload new plugin file versions to a remote web server to validate code changes
Allows development to take place when no Internet connection is available (for example, when traveling on an airplane)
Offers a worry-free programming environment where you cannot bring down a live website with a programming error or an infinite loop
There are many free packages available online that contain all of the web server components necessary to run a WordPress installation. This recipe shows you how to easily install one of these packages.
1. Visit the XAMPP website (http://www.apachefriends.org/en/xampp.html) and download the appropriate XAMPP package for your computer.
2. Optional on Windows: Disable the Windows User Access Control (UAC) feature to give full permissions to XAMPP to install itself on your system (visit http://windows.microsoft.com/en-US/windows7/Turn-User-Account-Control-on-or-off for more information on how to perform this procedure).
3. Launch the XAMPP installer (
xampp-win32-1.7.5-VC9-installer.exeon the Windows platform).4. Select your language of choice and acknowledge the warning message about User Access Control (UAC).
5. If possible, do not modify the default installation directory of
c:\xamppsince some references to this folder will be made in this book.6. Uncheck the Create a XAMPP Desktop icon option, unless you want to have an icon for the web server on your desktop.
7. Check the Install Apache as service option to automatically start the web server when your computer starts.
8. Check the Install MySQL as service option to automatically start the database server when your computer starts.
9. Leave the Install Filezilla as service option unchecked since we will not need a local FTP server during the development of WordPress plugins.

10. Click on the Install button to proceed with the web server installation.
11. Click on Finish once the installation is complete. The XAMPP installer will register the necessary services with Windows based on the options selected during the installation process.
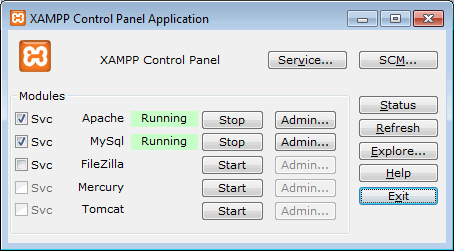
12. Launch the XAMPP Control Panel using the Start Menu shortcut to verify the status of the web and database servers. Both the Apache and MySql services should be displayed as Running in XAMPP Control Panel Application.
13. Open a web browser and navigate to the address
http://localhostto display your local web server's welcome page.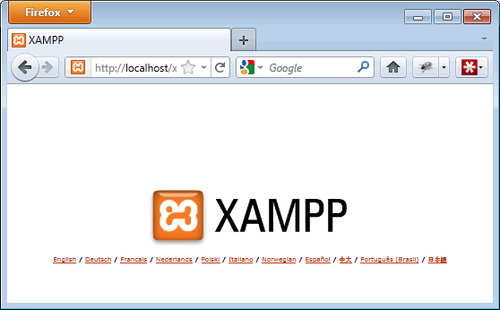
14. Open the
c:\xampp\apache\conf\httpd.conffile in a text editor (for example, Notepad).15. Search for the
DocumentRootconfiguration option and change its value to a different location on disk to avoid keeping your project files under the original installation directory. For example, you could set it to a new directory designed to hold your local development installation of WordPress, such asDocumentRoot "C:/WPDev".16. Search for the
Directoryoption and change it to the same path that was used for theDocumentRoot, that is<Directory "C:/WPDev">.17. Save and close the
httpd.conffile.18. Create the directory specified as
DocumentRoot, if it does not already exist on your computer.19. Open the XAMPP Control Panel.
20. Stop and re-start the Apache service for the new configuration to take effect.
The XAMPP package contains all of the components necessary to run a web server capable of hosting a WordPress website on your computer. These components include:
Apache web server
PHP interpreter
MySQL database server
phpMyAdmin database management interface
The XAMPP package also includes an FTP server tool called FileZilla Server. We do not need to install this service since we can just locally access the web server files.
Once XAMPP is installed and started, the keyword localhost that we type in the web browser is recognized by the operating system as a request to communicate with the web server on the local computer and the Apache web server displays the welcome page from its documentation.
The XAMPP documentation is a set of flat HTML files located in the c:\xampp\htdocs directory on the Windows platform. This is the web server's default working directory.
The last few steps of the recipe instruct the Apache web server to look for the local website's content in a new directory. This is a safety precaution to be sure that site files are not deleted inadvertently if XAMPP is uninstalled. It can also help in managing multiple sites on a single computer.
While XAMPP is a full-featured local web server package and is available on the three major operating systems, there are many others available online. Here is a list of some of the most popular ones:
For Windows:
WampServer (http://www.wampserver.com/en/)
EasyPHP (http://www.easyphp.org/)
For Mac OS X:
Note
For a more complete list of web server packages, visit http://en.wikipedia.org/wiki/List_of_AMP_packages.
If it's not possible for you to set up a local web server to develop WordPress plugins, or if you are planning to share the development tasks with one or more people, then an alternative to setting up a local web server is to create a remote development environment.
The easiest way to create such an environment, assuming that you already have a web hosting account set up, is to create a subdomain off your main domain. This will allow you to create a standalone test installation for WordPress that will still provide safety from affecting a live site but will not carry the other benefits of a local installation.