

The Kendo UI framework consists of two parts—the framework components and the user interface (UI) widgets. Most of the content that we will cover in this book relates to the user interface widgets and how to use them, but we will begin with the important topic of how to manage data within Kendo UI. The DataSource component and Templates provide a good starting place and will build a foundation that we will use throughout the rest of this book.
Kendo UI Templates are script blocks that contain a small section of page markup that is used by other Kendo UI widgets to display repeating content. We will cover these first, since they will be used throughout the rest of our examples. Here is an example of a simple template:
var template = kendo.template("<span>#= horseColor #</span>");
$("#horseDiv").html(template({
  horseColor: 'brown}));
Running this code would set the HTML content of the horseDiv to a span element that contained the horseColor value that was passed into the template function object. It would produce the following code output:
<div id='horseDiv'><span>brown</span></div>
Templates can also be written within a special type of HTML script block so that their layout appears more naturally within the HTML content.
<script type="text/x-kendo-template" id="template">
<tr>
<td>#= rank #</td>
<td>#= rating #</td>
<td>#= title #</td>
<td>#= year #</td>
</tr>
</script>
In this template sample, note the lines containing the code fragments #= variable_name #. These indicate the sections of code that are interpreted by the Kendo UI Template engine. The variable names inside these code blocks are supplied to the template when it is used. The JavaScript property names that you use inside of a template need to be properties on the object that is passed to the template when it is called. Note also that the script type is x-kendo-template instead of javascript, this is important so that the browser will not attempt to execute the script block on its own. This is a code sample showing this template being initialized in JavaScript:
<script type="text/javascript">
var template = kendo.template($("#template").html());

functionshowMovies() {
$("#moviesTable").html(template(
            {rank: 1, rating: 9.2, title: 'Prometheus', year: 2012}
        ));
    }
showMovies();
</script>
Notice how the template is created through a call to kendo.template(). This method takes the literal template code as its parameter, which is why the example shows a call to the jQuery statement $("#template").html() since this code returns the literal content of the template script block as it appears in the web page. So, in this example, it is equivalent to calling kendo.template('<tr><td>#= rank #</td>…'). This means that templates can also be created in-line by typing out the exact template code directly in the constructor.
When the template object is called as a method, it needs the data passed in as a parameter. When the example code above runs, it produces this output:
<table id="moviesTable">
<tr>
<td>1</td>
<td>9.2</td>
<td>Prometheus</td>
<td>2012</td>
</tr>
</table>
Templates can also include JavaScript which makes it possible to do more advanced operations, such as iterating over an array and rendering the template for each item in that array individually. In this case, you supply the template with an array of objects instead of a single object as before. This time, using the explicit parameter name data is critical. Note how JavaScript code is surrounded by single # signs like # javascript code # and variable statements are surrounded by #= and then # as in #= variable statement #. Note also that the space between the # signs and the content inside is important.
<script type="text/x-kendo-template" id="template">
# for(vari=0; i<data.length; i++) { #
<tr>
<td>#= data[i].rank #</td>
<td>#= data[i].rating #</td>
<td>#= data[i].title #</td>
<td>#= data[i].year #</td>
</tr>
    # } #
</script>
Templates are an important part of building functional Kendo UI widgets, and they become even more useful when used in tandem with the DataSources and Grids as we will see later.
The Kendo UI DataSource is a JavaScript object that gives data a common interface for the various Kendo UI widgets. The full documentation for the DataSource object can be found on the Kendo UI website at this address: http://docs.kendoui.com/api/framework/datasource. The DataSource is a fairly complicated object and relies on some building blocks that deserve explanations of their own. These building blocks are the Kendo objects known as Schema, Transport, and Model. Let's address these first and then continue exploring the DataSource itself.
It is important to note that when creating a DataSource object, you should use the new keyword to instantiate a new object instead of just using an object literal:
var dataSource = new kendo.data.DataSource({...<properties>...});The Model object is from the namespace kendo.data.Model
and inherits from Kendo's ObservableObject. It provides a known structure, or model, to the data that is used by a DataSource and can also be used to enable some more advanced functionality such as change tracking. To create a new model, you must do so through the method kendo.data.Model.define()
. In this method, you pass an object that defines the structure of the model and sets configurable options on the data elements within. Here is an example of a model:
var Service = kendo.data.Model.define( {
id: "serviceId", // the identifier of the model
fields: {
"serviceName": {
type: "string"
        },
"unitPrice": {
type: "number"
        },
"serviceId": {
type: "number"
  }
    }
});

var currentService = new Service( {
serviceName: "Rotate Tires",
unitPrice: 29.95,
serviceId: 400
});

console.log(currentService.get("serviceName")); // outputs "Rotate Tires"
console.log(currentService.get("unitPrice")); // outputs 29.95
In this example, we have created a model with three properties and we set the data type for each of them. We then created a new model object from our model definition and demonstrated how to access its properties through the model.get() method. We just demonstrated that the ID of the model object is defined through the property called id, and that the fields are defined through a property called fields. Within the fields property, these are the options that can be set to configure each data element:
fields: {
"serviceName": {    // Property name for a field
type: "string", // "string"(default), "number", "boolean", or "date"
defaultValue: "Inspection", // Default value for field when model is
                           / created. Default for string is "", number
                         // is 0, and date is new Date() (.i.e. today)
editable: true, // Specifies whether field is editable
nullable: false, // Specifies if default value should be used when empty
parse: function(){...} // Specifies custom parser for field value
validation: {...} // Specifies the validation options used by Kendo
                      // Validator such as 'required', 'min', and 'max'.
    },...
}
These are not all required, but they are available when you want a very specific configuration. Here is an example from the Kendo UI site:
var Product = kendo.data.Model.define( {
id: "id", // the identifier is the "id" field (declared below)
fields: {
  /* name of the field */
name: {
type: "string", // the field is a string
validation: { // validation rules
required: true // the field is required
    },
defaultValue: "<empty>" // default field value
  },

  /* name of the field */ price: {
type: "number", // the field is a number
validation: { // validation rules
required: true, // the field is required
min: 1 // the minimum value is 1
    },
defaultValue: 99.99 // default field value
  },

  /* name of the field */ id: {
editable: false, // this field is not editable
nullable: true // a default value will not be assigned
        }
    }
});
Since the properties within a model are observable, you need to use special getter and setter methods to properly trigger the behaviors that other functions and objects are observing. To retrieve the current value of one of these properties, use model_name.get() such as currentService.get('unitPrice'). To set the value of the property and thereby change it, use model_name.set() such as currentService.set('unitPrice', 14.95). The concept of observable objects is a key feature of the MVVM framework that we will cover in a later chapter.
Two other methods available on model objects are isNew and toJSON. The isNew method checks if the model is new or not. This is determined by whether or not the id field is still set at the default value. If the id field is not set at the default value, the model object is not considered new. The toJSON method returns a JSON representation of the complete model's properties and values.
Since, as I mentioned, the model inherits from ObservableObject, it exposes three events to which you can attach custom behaviors—change, get, and set. The syntax for these is to use model.bind() with the name of the event and a function to handle it:
currentService.bind('change', function(e){
alert(e.field + " just changed its value to " +
currentService.get([e.field]));
});The schema object within a DataSource is responsible for describing the raw data format. It functions at a higher level than the model, and can even contain a model definition within it. The Schema's job is to instruct the DataSource on where to find information on errors, aggregates, data, groups, and total records within the raw data object that the DataSource is using. Each of these pieces of information exists as a property within the schema object like this:
schema: {
  errors: function(response) {
    return response.errors;
  },
  aggregates: function(response) {
    return response.aggregates;
  },
  data: function(response) {
    return response.data;
  },
  total: function(response) {
    return response.totalCount;
  }
}
In the preceding code sample, each of the properties has been set to a function which, when passed the raw data object, will return the appropriate data from within that object. These properties can also be set to text fields, in which case the field name given must exist at the top level of the object and already contain the appropriate data in the appropriate format:
schema: {
  errors: "errors_field_name",
  aggregates: "aggregates_field_name",
  data: "data_field_name",
  total: "total_field_name"
}
The aggregates property needs data returned in an object format with a structure something like this. Each property name inside the aggregates object can contain information on its aggregate values, such as the maximum value (max), minimum value (min), or the total count:
{
unitPrice: {   // Field Name
  max: 100,     // Aggregate function and value
  min: 1     // Aggregate function and value
  },
productName: {  // Field Name
  count: 42     // Aggregate function and value
  }
}
In this case, the data has a max and min defined on the unitPrice field and a count defined on the productName field. The DataSource object has not calculated these values; rather they are already present in the raw data sent from the remote server, and the schema has indicated to the DataSource object where to locate them. It is possible to use a function to calculate aggregate values, but it is normal for the raw data to already contain these values within it as returned by a remote server.
As I said earlier, the schema can contain a model definition within it. If this is the case, the DataSource will call kendo.data.Model.define on the model definition for you, in order to create the model objects from the raw data:
var dataSource = new kendo.data.DataSource({
schema: {
  model: {
    id: "ProductID",
    fields: {
    ProductID: {
      editable: false,
      nullable: true
      },
      ...
If you have already defined a Model definition, you can simply reference it and the DataSource will use it just the same:
vardataSource = new kendo.data.DataSource({
schema: {
model: Product // Use the existing Product model
    }
});
The schema object has a parse property, which you can set to a function that will be called before the raw data is processed. This gives you a chance to do any pre-processing if you need it. There is also a type property that can be set to either json or xml.
The transport object contains properties that a DataSource can use to communicate with a remote server for any of its normal data functions. Those data functions are create, destroy, read, and update (corresponding to the different actions that can be taken on a record). Each of these data functions exists as a property object within the transport object and follows the same pattern of configuration options. I should note that not all of the data functions are required; only those functions that your DataSource should perform need to be defined within your transport object. This is the basic configuration structure for the transport object.
transport: {
  create: { // this sets configuration for creating new records
            // on the remote server
  },
  destroy: { // this sets configuration for deleting records
             // on the remote server
  },
  read: {  // this sets configuration for reading records
           // from the remote server
  },
  update: { // this sets configuration for updating records
            // on the remote server
  },
  autoSync: false, // set true to automatically sync all changes
  batch: false     // set true to enable batch mode
}
Here are the different options for configuring the transport object's remote data operations. Each of the four properties follows the same configuration pattern, but in this code sample I have shown different ways of configuring them for the sake of example. In this first code sample, I have configured the create operation to simply send the value of an HTML element to the remote server.
create: { // for creating data records on remote source.
url: "/orders/create", // the url to the create service.
data: {  // data to send to the create service as part of the request.
// this can also be specified as a function call.
orderId: $("#input").val()
},
cache: true, // make false to force fresh requests every time.
contentType: "application/json", // default is
  // "application/w-www-form-urlencoded"
dataType: "json", // "jsonp" is also common.
type: "POST" // which http verb to use.
  }
In this example, we have set the destroy method to use a jQuery $.ajax function to send data to the remote server instead of configuring it directly on the destroy configuration object. You can do this if you prefer the jQuery syntax and want to easily attach callback functions to the results of the operation.
destroy: {  // same options as "create", with some alternatives shown.
      // this is how you use $.ajax() to run this remote service call.
          // this option can be used with "create", "destroy", "read",
              // and "update"
    $.ajax( {
url: "/orders/destroy",
data: options.data, // the data field contains paging, sorting,
                          // filtering, and grouping data
success: function(result) {
               // notify the DataSource that the operation is complete
Options.success(result);
}
});
}
In this example, we have created a function to serve as the source of data for the read operation. This might be useful if you need to perform some custom logic before receiving remote data, or if you need to bypass the remote data source entirely for some reason.
read: {  // same options as above in "create" and "destroy".
data: function() {  // this is how you specify data as a function.
return {
id: 42,
name: "John Doe"
};
}
}
Remember that the configuration options you just saw are valid for any of the transport operations, I simply showed different operations as an example for each configuration. When a DataSource is configured with a transport configuration like this, it will use the properties and functions within these options to perform the related actions. It will call read when it is loading data, update when a record has been changed, destroy when a record has been deleted, and create when a new record is added.
When reading from local data, you need to reference it by using the property called data like this:
var someData = [{ title: 'Prometheus', year: 2012, rating: 9, rank: 25 }];

var dataSource = new kendo.data.DataSource({
data: someData
});
Some other properties of DataSource that we have not yet seen are more for data manipulation—aggregate
, filter
, group
, sort
, page
, and pageSize. They can work on the data client-side, or they can request that the server do the operations by using the serverAggregates, serverFiltering, serverGrouping, serverSorting, and serverPaging properties by adding these to the DataSource object properties list and setting them to true.
The aggregate property takes an array of fieldnames and aggregate function names:
aggregate: [{ field: 'title', aggregate: 'count' }]The
filter property can take a simple object, an array of simple objects, or a configurable object with some more logic to specify filtering that should be done on the data:
// simple object
filter: { field: 'title', operator: 'startswith', value: 'Shawshank' }

// ...or array...
filter: [{field: 'year', operator: 'eq', value: '1998'}, {field: ...

// ...or configurable object...
filter:{
logic: "or",
filters: [
{ field: 'title', operator: 'startswith', value: 'Shawshank' }]
}
These are the different operators that can be used with the filter object. They can also be used when asking the server for filtering by using the serverFiltering
property.
Equality:
eq,==,isequalto,equals,equalto,equalInequality:
neq,!=,isnotequalto,notequals,notequalto,notequal,neLess:
lt,<,islessthan,lessthan,lessLess or Equal:
lte,<=,islessthanorequalto,lessthanequal,leGreater:
gt,>,isgreaterthan,greaterthan,greaterGreater or Equal:
gte,>=,isgreaterthanorequalto,greaterthanequal,geStarts With:
startswithEnds With:
endswithContains:
contains
The group
and
sort properties can take either an object or an array of objects to specify grouping:
group: { field: 'year', dir: 'asc' }
sort: { field: 'title', dir: 'desc' }
The
page and pageSize properties both take numbers to indicate the page number and records per page respectively.
The DataSource methods are used to either change or retrieve certain elements of the DataSource object. Several of them are related to the same data manipulation properties that we just talked about—aggregate, aggregates, filter, group, page, pageSize, and sort. In each of these cases, calling the method without parameters will return the current value of the like-named property within the DataSource; calling the method with a parameter value will set the value of the like-named property of the DataSource to the new value passed in:
// get the current group descriptors
var g = dataSource.group();

// set a new value for filtering
dataSource.filter({ field: 'year', operator: 'gt', value: 1990 });
There are also methods for adding and removing records. The methods add and insert both add a new record to the DataSource. The
add method simply takes a model object or an object literal matching the current data format of the items in the DataSource. The
insert
method takes the same object as add, but also specifies an index property indicating the zero-based location at which to insert the new record. The remove method takes a model object and removes it from the DataSource:
// add a new item
dataSource.add({ year: 1997, title: 'The Fifth Element', rating: 10 });

// insert an item at the 6th position in the DataSource
dataSource.insert(5, {year: 1995, title: 'Twelve Monkeys', rating 9.5});

// remove an item from the DataSource
var movie = dataSource.at(5);
dataSource.remove(movie);
The at
,
get
, and
getByUid methods retrieve specific records from the DataSource:
// get the 3rd item in the DataSource
var movie = dataSource.at(2);

// get the model instance with an id of 5
// (id is determined by the value of the schema.model.id property)
var movie = dataSource.get(5);

// get the model instance, or ObservableObject if no model has been set
// uid is a property inherited from ObservableObject
varuid = $("tr").data("uid");
var movie = dataSource.getByUid(uid);
The fetch
,
query
,
read
, sync
,
cancelChanges
, and
view
methods are used for managing the current contents and structure of the DataSource:
// fetches data using the current filter/sort/group/paging information.
// will fetch data from transport if data is not already available in memory.
dataSource.fetch(); // can optionally take a callback function which
                    // is executed once the data is ready.

// executes a query over the data (i.e. paging/sorting/filtering/grouping)
// this effects what the call to dataSource.view() will return.
dataSource.query({ page: 5, pageSize: 20, group:{field:'year',dir:'asc'}});

// read data into the DataSource using the transport.read setting
dataSource.read();  // also conveniently causes the change event to fire

// synchronizes changes through the transport for any pending CRUD operations.
// if batch mode is enabled, it uses only one call per operation type (create,
//   read, update, destroy)
dataSource.sync();

// discards all un-synced changes made to the DataSource
dataSource.cancelChanges();

// returns the current state of the items in the DataSource with all applied
//settings such as paging, sorting, filtering, and grouping.
// to ensure that data is available, this method should be used from
//within the change event of the DataSource
change: function(e){
    ...
kendo.render(template, dataSource.view());
}
To finish up the list, we will look at data,
total
, and
totalPages:
// retrieve an observable array of items (the current data within the DataSource)
var movies = dataSource.data();

// set the DataSource to some new data
datSource.data([{year: 2009, title: 'Cargo', rating: 6.8}, {year: ... ]);

// get, but not set, the total number of items in the DataSource
var total = dataSource.total();

// get, but not set, the total number of pages of items in the DataSource
var pages = dataSource.totalPages();
It is important to note that you must call dataSource.read() in order for the DataSource object to initiate the read process and populate itself with data. In other words, until you call dataSource.read(), there is nothing to read inside your DataSource.
There are three events that are available on the DataSource object—
change
, error
, and
requestStart
. The change event is fired when data is changed or read from the transport. The error event is fired any time an error occurs during data read or data sync; it is also fired if schema.errors has been set within the DataSource and the response from a server operation contains data in the field specified by schema.errors. The requestStart event is fired when a data request is about to start. Like other events, these can be set as part of the DataSource definition or later through the bind method.
// set event handler as part of DataSource definition
var dataSource = new kendo.data.DataSource({
change: function(e){
        // handle event
    }
});

// or set event handler later through the bind method
dataSource.bind("error", function(e){
    // handle event
});
As you will see later, the change event can be a good place to put some code in order to generate markup while a DataSource is reading in new records. It is also the appropriate place to put any other code that should respond to changes in the DataSource.
Now that we have seen the definitions of the components within a DataSource, we will put together our first example page to demonstrate the basic usage of the DataSource object in JavaScript. Add a new HTML file to the static folder of the project and name it DataSource.html. Start out by adding this code:
<!DOCTYPE html>
<html>
<head>
<title>DataSource</title>
<script src="/Scripts/kendo/jquery.js"></script>
<script src="/Scripts/kendo/kendo.all.js"></script>
<link href="/Content/kendo/kendo.common.css" rel="stylesheet" />
<link href="/Content/kendo/kendo.default.css" rel="stylesheet" />
</head>
<body>
<div id="example" class="k-content">
<table id="movies">
<thead>
<tr>
<th>Rank</th>
<th>Rating</th>
<th>Title</th>
<th>Year</th>
</tr>
</thead>
<tbody>
<tr>
<td colspan="4"></td>
</tr>
</tbody>
</table>
</div>
</body>
</html>
We have referenced jQuery and Kendo UI Web JavaScript files in the head of our page. Now let's add a template block after the div tag so that we can script the creation of additional table rows:
<script id="template" type="text/x-kendo-template">
<tr>
<td>#= rank #</td>
<td>#= rating #</td>
<td>#= title #</td>
<td>#= year #</td>
</tr>
<script>
Now what we need is the ability to take some data and fill out that table using the layout as defined by this template, enter the DataSource. Add this code after the template script block that you just typed in:
<script type="text/javascript">
    $(document).ready(function() {
        // create a template using the above definition
var template = kendo.template($("#template").html());

var movies = [
{ "rank": 1, "rating": 9.2, "year": 1994,
"title": "The Shawshank Redemption" },
{ "rank": 2, "rating": 9.2, "year": 1972,
"title": "The Godfather" },
{ "rank": 3, "rating": 9, "year": 1974,
"title": "The Godfather: Part II" },
{ "rank": 4, "rating": 8.9, "year": 1966,
"title": "Il buono, ilbrutto, ilcattivo." },
{ "rank": 5, "rating": 8.9, "year": 1994,
"title": "Pulp Fiction" },
{ "rank": 6, "rating": 8.9, "year": 1957,
"title": "12 Angry Men" },
{ "rank": 7, "rating": 8.9, "year": 1993,
"title": "Schindler's List" },
{ "rank": 8, "rating": 8.8, "year": 1975,
"title": "One Flew Over the Cuckoo's Nest" },
{ "rank": 9, "rating": 8.8, "year": 2010,
"title": "Inception" },
{ "rank": 10, "rating": 8.8, "year": 2008,
"title": "The Dark Knight" }
        ];

var dataSource = new kendo.data.DataSource({
data: movies,
change: function () {
// subscribe to the CHANGE event of the data source
$("#movies tbody").html(
kendo.render(template, this.view())); // populate the table
            }
        });

// read data from the "movies" array
dataSource.read();
    });
</script>
Let's step through this code. You should recognize the first few lines where a Kendo template is created from the script block that you typed just a few paragraphs ago. After that, you see a JavaScript array of objects holding data about various movies. This array is going to be the raw data behind the DataSource object that comes next. The DataSource object is instantiated (note the new keyword) into the variable called dataSource. It references the movies array as its data parameter and then defines a function to handle the change event of the DataSource object. Inside this change event, we are using jQuery to select the movies table and then using kendo.render() to generate markup from our template variable for each item in our dataSource object. Note how the template we are using does not need special JavaScript to iterate over a collection; the DataSource object passes all of the data to the change event through this.view(). Finally, we call dataSource.read() which reads in the data and consequently fires the change event, thereby adding the content to our movies table.
The kendo.render() method takes a template function as its first argument and then an array of data as its second argument. It runs the data through the template, generating the resulting markup and returning it back to the caller. In the case above, we have used jQuery to set the <tbody> element's HTML to the result of this kendo.render()function.
Our last example was a demonstration of using local data (a JavaScript array) with a DataSource. It is also very common and important to use the DataSource with data that exists on a remote system. To simulate this, we will turn to the ASP.NET MVC framework to create a server for our remote data.
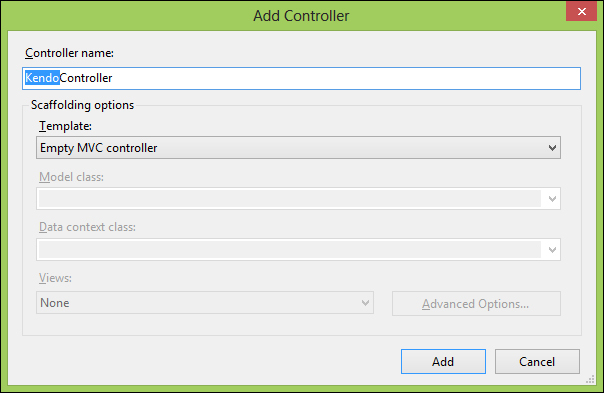
In the Visual Studio Solution Explorer window, right-click on the Controllers folder and choose Add, Controller. Name the new controller KendoController and leave the rest of the dialog that opens at its default settings.
The newly created controller class will appear in the editor portion of Visual Studio and you will see a generic Index() method sitting in the file. This method is known as an action method
and is used to process an HTML response back to a web browser. The comment above it indicates the route and HTTP verb that are used to locate this action method:
// GET: /Kendo/

public ActionResult Index()
{
return View();
}
In this case, it shows that typing the route "Kendo", as in http://<server-name>/Kendo/, would match this action method and cause it to return its view to the browser. It would also work to specify http://<server-name>/Kendo/Index and it is usual to supply both the controller name, "Kendo", and the action method name, "Index", in a normal route. As a matter of convention, the MVC framework names all controller classes with the suffix "Controller", but it does not use the suffix when referring to the controller in an actual route (such as the path in the address bar of your web browser). This means that the KendoController class is referred to as "kendo" when it is part of a route. GET is the default HTTP verb that this controller will accept when the browser requests this route.
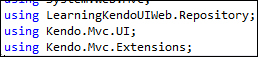
At the top of KendoController, add a using statement for a namespace that we are about to create—LearningKendoUIWeb.Repository. Also add Kendo.Mvc.UI and Kendo.Mvc.Extensions:
Add a new action method called RemoteData and set it up like this:
publicJsonResultRemoteData()
{
var repository = new SampleRepository();
var data = repository.GetAllMovies();
returnJson(result, JsonRequestBehavior.AllowGet);
}
This is a simple method that instantiates a repository (which we will create in just a moment), gathers some data from that repository, and then returns it to the client as JSON. The second parameter to the Json() method notifies the controller class that it is acceptable to return JSON data from this method even though the verb is GET.
Right-click on the Models folder and click on Add, Class. Name the new class Movie.cs. This is a very simple class to hold data about a movie:
namespace LearningKendoUIWeb.Models
{
public class Movie
  {
public int Rank { get; set; }
public double Rating { get; set; }
public int Year { get; set; }
public string Title { get; set; }
  }
}
Add a new folder to the project and call it Repository. Add a class to this folder called SampleRepository.cs:
using LearningKendoUIWeb.Models;

namespaceLearningKendoUIWeb.Repository
{
public class SampleRepository
  {
public List<Movie>GetAllMovies()
    {
var movies = new List<Movie>{
new Movie { Rank = 1, Rating = 9.2,
                    Title = "The Shawshank Redemption", Year = 1994 },
new Movie { Rank = 2, Rating = 9.1,
                    Title = "The Godfather", Year = 1974 }
            };
            Return movies;
      }
   }
}
Feel free to add more movies to this list, the more the better. Now we have a simple repository class that can return a list of movie objects, so the action method we created in KendoController is finally valid. When the RemoteData action method is called, it will return the list of Movie objects as a JSON array of objects like this:
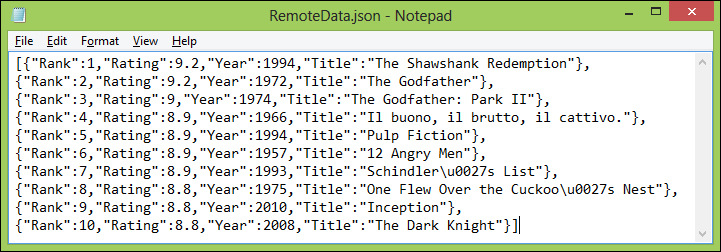
I have added more movies to my repository, but the structure of the result is the same. This is exactly the sort of data that DataSource knows how to use. Here is how to wire up DataSource to use it, find the line in the RemoteData.cshtml file where the dataSource variable is created in JavaScript and change the code so that it looks like this:
var dataSource = new kendo.data.DataSource({
  transport: {
read: {
url: 'Kendo/RemoteData/'
        }
    },
change: function () {
        $("#movies tbody").html(kendo.render(template, this.view()));
    }
});
Instead of the using the data property to point to a locally available array of objects, we are using the transport property to tell Kendo that we need to request the data from a remote source. In this case, all we have specified is how the DataSource can read remote data and that is all we need, since the only method call we make to the DataSource is in this line:
dataSource.read();
These examples have only scratched the surface, but it does show the DataSource in action in a real page. It is hard, however, to really demonstrate a DataSource object in isolation. The DataSource is only actually useful when it serves a data-rich widget, like the Kendo UI Grid. In the pages to follow, we will explore this Grid widget and will be able to demonstrate a more fully configured DataSource that the Grid can take full advantage of. We will also see how to configure both the Grid and the DataSource through the MVC Razor syntax within a view page.