
Recording the screen is tricky and requires some skill and practice. This is where our resolution decisions and zooming and panning roles come into play.
Before we start recording, we should take time to plan out the actions we are going to capture and the way we will make these actions flow.
Consider the following:
Does the video involve multiple steps to achieve a certain result? How will we link these steps?
In the video, will we record key presses, such as the typing of words, phrases, file names, and passwords? If so, do we know exactly what we are going to type and where?
Will we be describing each action separately, or in one or two sentences?
Have we created a dummy account with a false e-mail address to avoid giving away any personal data onscreen?
It doesn't hurt to run through the recording process a couple of times before capturing anything. Making notes of the most basic points can help us to plan the action effectively, which will save a huge amount of time at the editing stage. If we are adding a voice narration to the video, a carefully planned script will be helpful. We will discuss scripting in detail later in this chapter.
Any notes that we make will also aid in scripting any voice-over we are planning to record.
To obtain the best source material from capture, there are a number of simple rules that we can follow:
We should set the recording dimensions according to the rules we have made.
After setting the desired capture size, we can resize the application windows we plan to record, so that they will fit into the recording area. This means we do not need to crop the video later.
We may decide to include other effects such as textboxes. We can take time to plan ahead. We can check whether there is enough space within the recording area to fit extra annotations into the shot? If not, we may have to increase the recording dimensions to allow us to shrink the video and make room for these effects on the canvas.
Camtasia will capture the mouse pointer in a screen recording, so we should consider how we can use our mouse during the recording. We can actively minimize the mouse movements so we don't distract our viewer from the important action on screen.
We can move the mouse pointer in deliberate and smooth strokes, pausing where we want to cut the video or extend the frames to give the voice overtime to catch up.
Recording the screen in Camtasia Studio is very simple. In this section, we will record a basic screen capture on our Windows PC. We can quickly produce a screen grab at the beginning of a project. This is a useful method for testing the resolution dimensions and frame rates we are intending to use in the output. Perform the following steps:
Navigate to Tools | Record the screen. The screen capture window is displayed alongside the recording area, as shown in the following screenshot. Here, we can choose the options we are going to use for this recording.

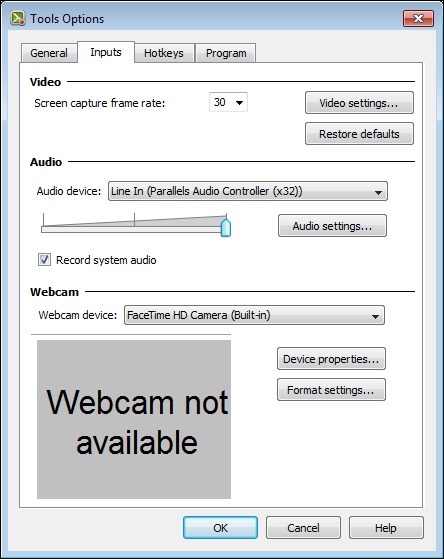
Navigate to Tools | Options to access a number of useful settings that can be applied to the recording. The Inputs tab allows us to set frame rates as shown in the following screenshot:
The Program tab includes useful options for Recording region, particularly the Force popup dialogs into region setting, as shown in the following screenshot:

In the original dialog box, click on the red rec button. Camtasia initiates a countdown before starting to record the screen. The recording area is displayed and the controls remain accessible above or beneath the recording area. In the following screenshot, we can see the controls that are accessible while recording the screen:

Click on Stop or press F10. A preview window is displayed, as seen in the following screenshot. This allows us to check through the recording before deciding whether to keep it or not.
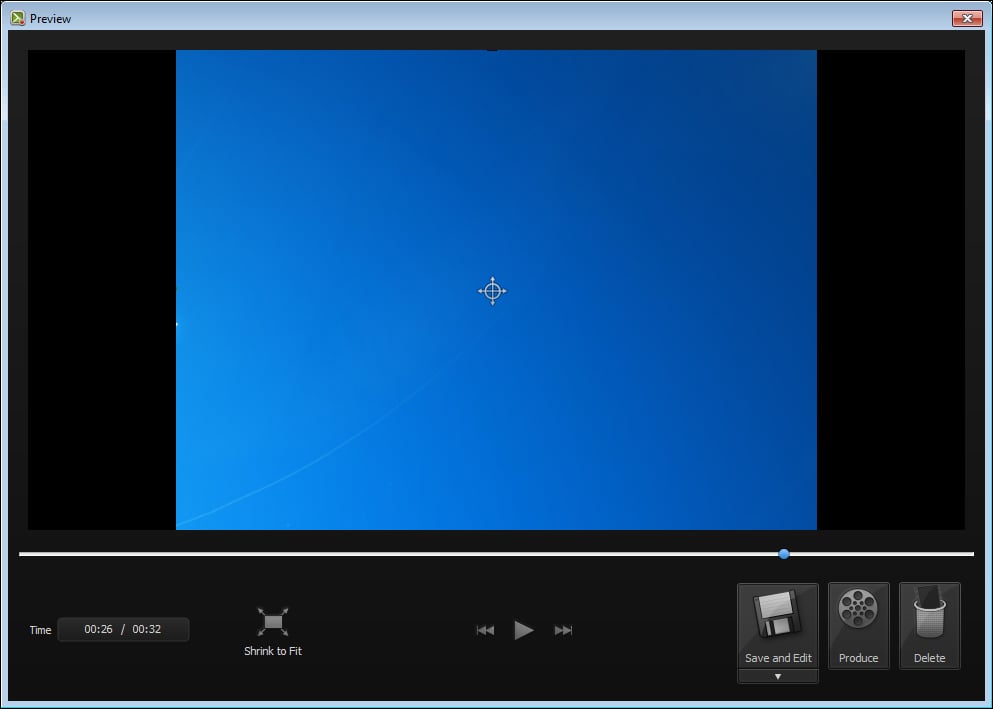
If we are happy with the recording, click on Save and Edit. If not, we can simply click on the Delete button to delete and start again.
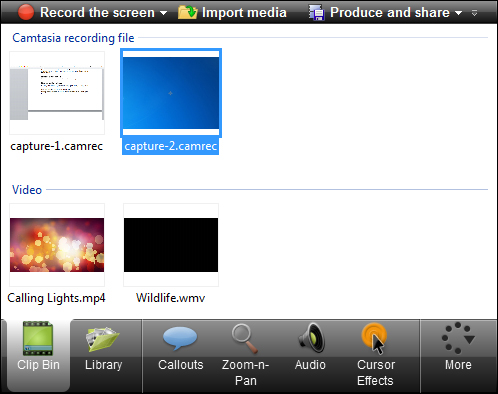
The recording is saved as a .camrec file and is made available in the Clip Bin window, as shown in the following screenshot. It is possible to produce the video here, but it is unlikely that we have the finished article from a single take, so we should resist the urge to produce it just yet.