Download code from GitHub
Getting a CentOS Server Up and Running
As a system administrator, one of the most fundamental tasks you may encounter is defining your roles and responsibilities. However, how to do this varies greatly depending on who you ask. Different individuals and companies may have their own unique perspectives on what the title of system administrator entails.
Welcome to the first chapter of this book, where we will be learning about server installations and management commands. Setting up a Linux system and keeping it up to date are the basic tasks that most system administrators perform in their day-to-day work. In this chapter, we will start by setting up a Linux server and then learn about the purpose of package management and how it provides an easy way to install software on Linux hosts. We will then explore commands that allow us to view the Linux file structure, add users and groups, and archive files.
By the end of this chapter, you will have a solid foundation of how to set up and manage Linux servers. We will begin by learning how to download the CentOS server installation file, set up a hypervisor, and install packages. We will also explore commands that allow you to view system, kernel, hardware, and processor information. With the skills you learn in this chapter, you will be able to set up and manage Linux servers with confidence.
In this chapter, we are going to cover the following main topics:
- Downloading the operating system (OS) installation file
- Downloading and setting up a hypervisor
- Package installation commands
- Information commands
Downloading the OS installation file
In this section, we will cover the process of downloading the Linux server operating system, including which Linux distributions are recommended and the requirements that need to be met.
When it comes to choosing a Linux distribution for your server, there are many options to choose from. Some popular choices include Ubuntu, Debian, and Red Hat. However, one of the most popular and stable choices for enterprise and web server environments is the Community Enterprise Operating System (CentOS).
CentOS is a free and open source Linux distribution based on Red Hat Enterprise Linux (RHEL). It is known for its stability and reliability, making it a popular choice for enterprise and web server environments. It is also widely used in the hosting industry, education, research, and for personal use. It is compatible with the Red Hat ecosystem, meaning that users can leverage their existing knowledge, skills, and tools of RHEL. The distribution is maintained by a large community of developers and users who work together to provide updates and security patches, making it a secure and stable choice. Additionally, it is designed to be fully compatible with the upstream vendor, Red Hat, and it provides an almost identical environment. This means that users can use the same set of commands and packages as in Red Hat Linux, and they can also access the Red Hat customer portal and support. As we’ll be making use of CentOS throughout this book, we’ll be downloading the installation image from the official website (https://www.centos.org/). The website offers both DVD and minimal ISO images, which can be used to install the server. Make sure to download the correct version for your architecture (32-bit or 64-bit).
When it comes to downloading the installation image for CentOS 8, there are two options available:
CentOS-Stream-8-x86_64-20220104-boot.isoCentOS-Stream-8-x86_64-20220104-dvd1.iso
The CentOS-Stream-8-x86_64-20220104-boot.iso file is a minimal image used for booting the system and performing a network installation. It is designed to be used with a network-based installation process and contains only the packages required to start the installation process. Additional files will be downloaded during the installation.
The CentOS-Stream-8-x86_64-20220104-dvd1.iso file is the DVD image containing all the packages included in the distribution. It can be used for a local installation (also known as an offline installation, as there is no need to download files during the installation), and it contains a complete set of packages.
It’s important to note that, depending on your system requirements and the intended use of the server, one of these images may be more suitable than the other. The minimal image is recommended for servers with limited resources, while the DVD image is recommended for servers with more resources and a wider range of needs. The following are the system requirements for setting up our own server:
- Processor: A 64-bit processor is required
- Memory: A minimum of 2GB of RAM is recommended, but 8 GB or more is recommended for servers with a high workload
- Disk space: A minimum of 20 GB of storage space is recommended, but the more storage space, the better
- Network connectivity: A network connection is required for downloading the installation image and performing updates
- Graphics card: A graphics card is not necessary for a server, but if you’re planning on using the server for graphical applications, a graphics card is recommended
- Operating system: A 64-bit version of Windows, macOS, or Linux is required for running a hypervisor
Now that we know our system requirements, our first step is to open a web browser and go to www.google.com:
- In the search bar, type
download CentOS ISOand press Enter. This will bring up the official website for CentOS, which is https://www.centos.org/ (see Figure 1.1).

Figure 1.1 – Google search

Figure 1.2 – x86_64 architectures
- Next, we select the available link for our region. As we can see from the figure, mine is http://mirror.web4africa.ng/centos/8-stream/isos/x86_64/:

Figure 1.3 – Selection by region
From the index /centos/8-stream/isos/x86_64/, we’ll need to download the CentOS-Stream-8-x86_64-20221222-dvd1.iso DVD version. As we have read previously, the DVD image contains all the packages that are included in the distribution, which means that it can be used to perform a local installation.

Figure 1.4 – DVD download page
After downloading the image, we’ll need to download a hypervisor.
Downloading and setting up a hypervisor
In this section, we will cover the process of downloading and setting up a hypervisor. A hypervisor is software that allows you to create and run virtual machines on a physical host. This is essential knowledge for a system administrator, as it allows for more flexibility and resource management. There are several hypervisors available, such as VMware, VirtualBox, and Hyper-V. In this book, we will be using VMware as an example.
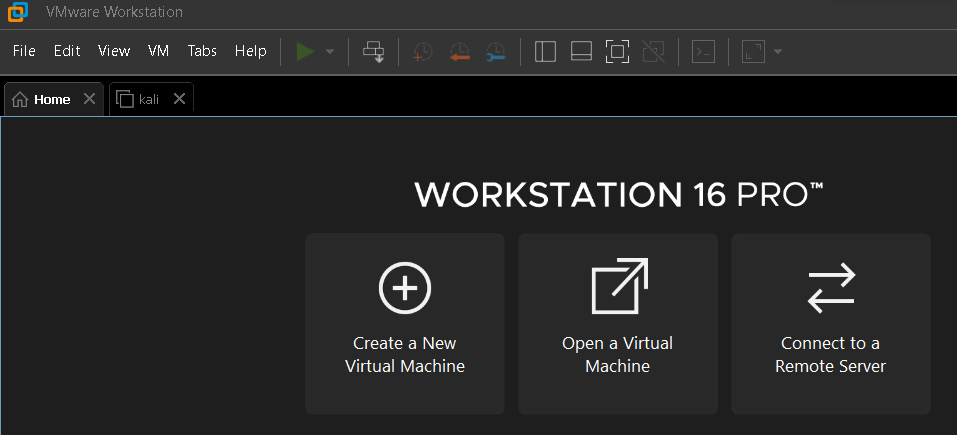
Figure 1.5 – VMWare (Workstation 16 Pro)
The steps for downloading and setting up a hypervisor are as follows:
- The first step is to download the VMware software from the official website:
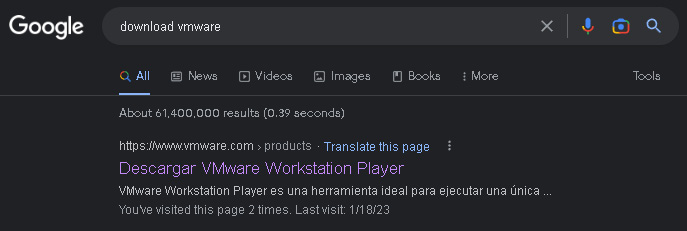
Figure 1.6 – Downloading VMWare Workstation
- Make sure to download the correct version for your operating system. Once the download is complete, you will need to install the software on your physical host. This process is straightforward and involves following the prompts during the installation process.
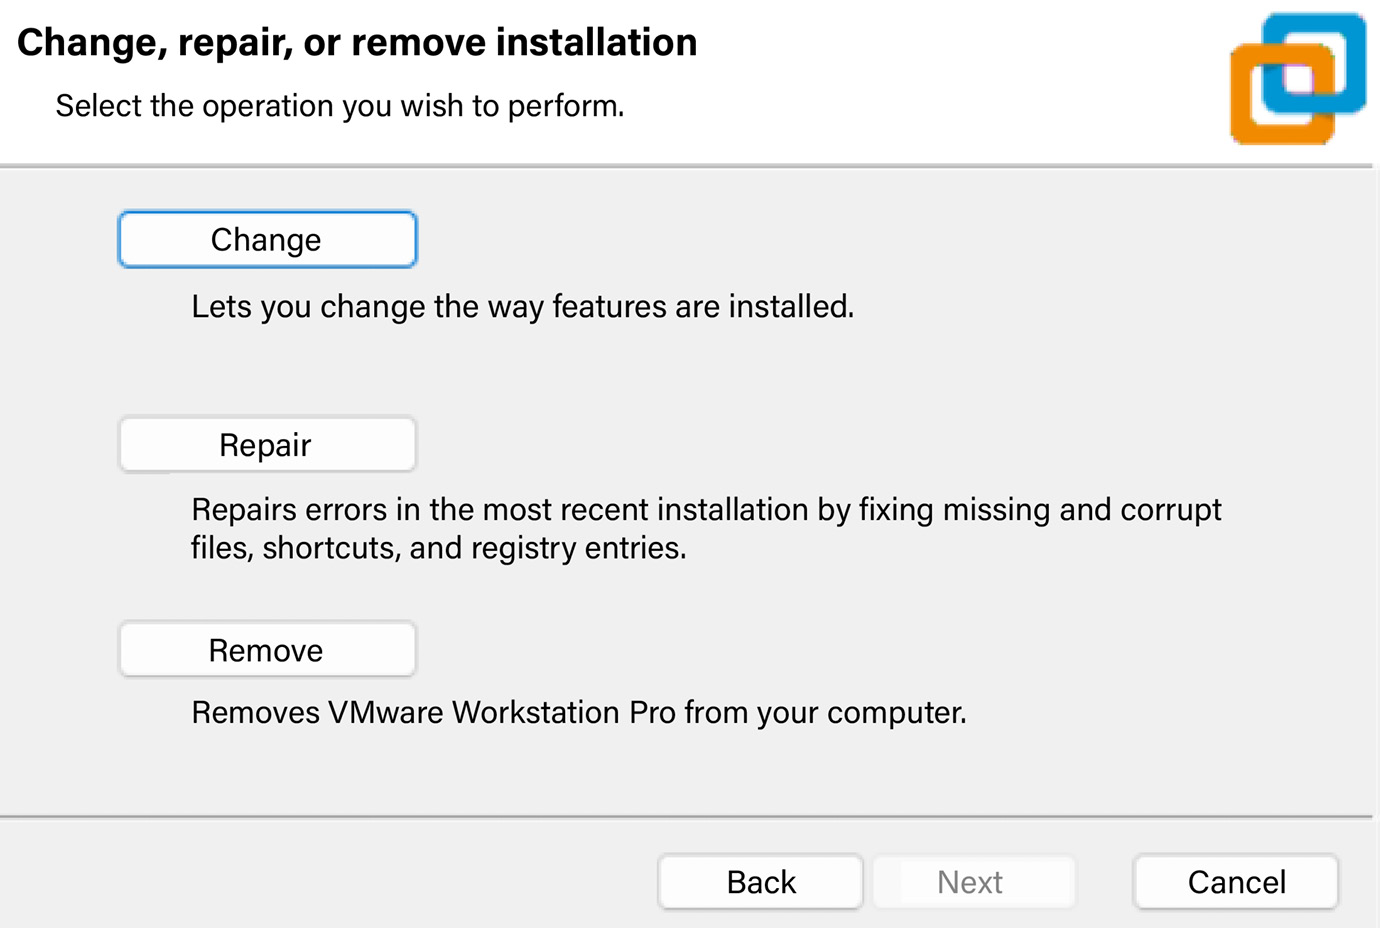
Figure 1.7 – Setting up
Once the installation is complete, you will need to create a new virtual machine.
- We’ll utilize the Custom configuration wizard. This process involves specifying the amount of memory and storage and the network settings for the virtual machine.
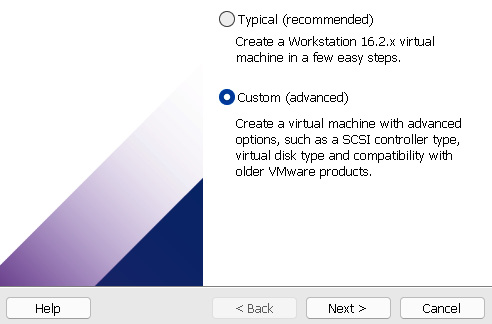
Figure 1.8 – Custom configuration wizard
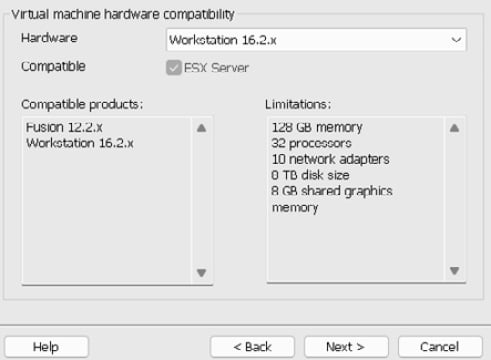
Figure 1.9 – Hardware compatibility settings
- Choose the operating system media, then choose the I will install the operating system later option for a hands-on setup process:
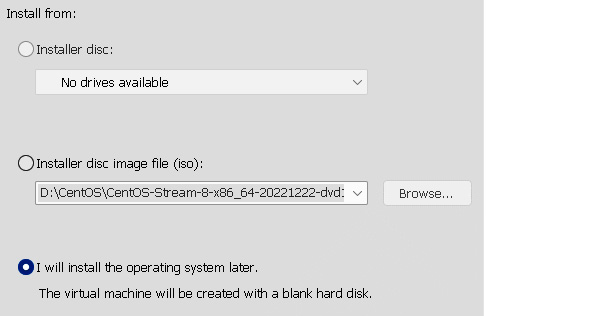
Figure 1.10 – Choosing the operating system media
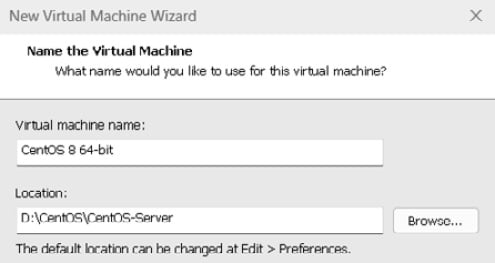
Figure 1.11 – Choosing a virtual machine name
- Select a guest operating system:
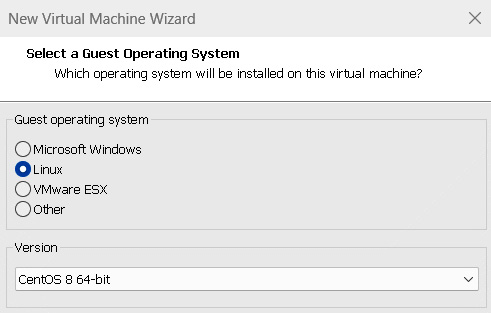
Figure 1.12 – Selecting a guest operating system
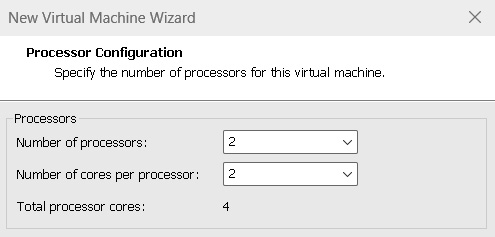
Figure 1.13 – Specifying the number of processors to allocate
- Allocate memory to the virtual machine. Calculating memory allocation should be approached in the same manner as processor allocation. Ensure that the host system has adequate memory and allocate the remainder to the virtual machine. For this example, we’ll be going with 8 GB or more.
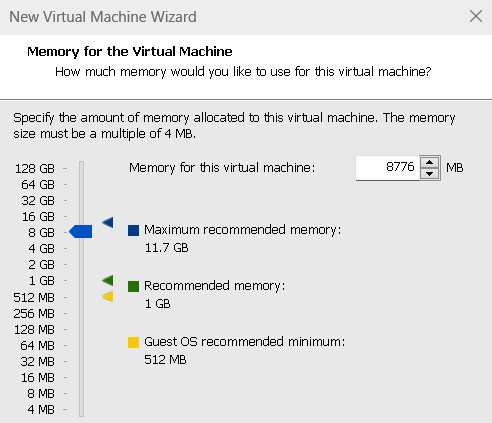
Figure 1.14 – Specifying the amount of memory
- Configure the network settings. Choose the network configurations that meet your needs, or just select the default NAT Network. Why do this?
Network address translation (NAT) in VMware is a networking feature that allows virtual machines to access the internet and other network resources with the use of a host computer’s IP address. This feature provides a secure and convenient way to access the internet for virtual machines that do not have their own IP addresses. In NAT mode, the virtual machine’s network traffic is transparently translated between the virtual network and the host’s physical network, allowing the virtual machine to access network resources as if it were directly connected to the physical network. NAT is often used in virtualization environments for testing and development, where virtual machines need access to the internet for downloading software, updates, and so on but do not require public access.
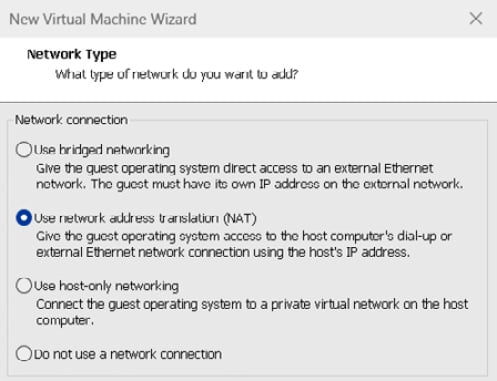
Figure 1.15 – Network type
- Select the I/O controller type.
The SCSI controller type is the type of controller that is used to control a virtual disk. The following figure contains these options:
- BusLogic: This controller type is not available for 64-bit guests. It is an older controller type that is no longer commonly used.
- LSI Logic (recommended): This controller type is recommended for most guests. It is a newer controller type that offers better performance and compatibility than the BusLogic controller.
- LSI Logic SAS: This controller type is designed for use with Serial Attached SCSI (SAS) disks. It offers better performance than the LSI Logic controller, but it is not as widely supported by guest operating systems.
- Paravirtualized SCSI: This controller type is a high-performance controller that is designed for use with VMware guest operating systems. It requires that the guest operating system have a special driver installed.
If you are not sure which SCSI controller type to choose, I recommend using the LSI Logic controller. It is a good all-purpose controller that is widely supported by guest operating systems.
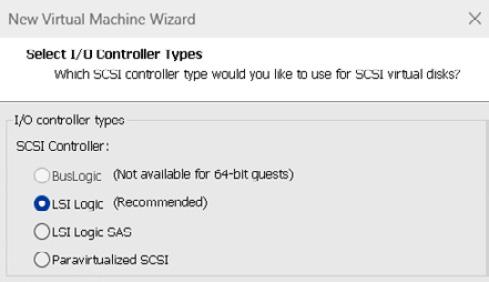
Figure 1.16 – I/O controller types
- Choose the disk type.
The screenshot that follows shows the different disk type options available in the New Virtual Machine Wizard window. The options are as follows:
- Integrated Drive Electronics (IDE): This is an older disk type that is not as fast as newer disk types, such as SATA and NVMe. However, it is still supported by most guest operating systems.
- Small Computer Systems Interface (SCSI): This is a faster disk type than IDE. It is also more versatile, as it can support multiple disks and devices.
- Serial ATA (SATA): This is the most common disk type in use today. It is faster and more reliable than IDE and SCSI.
- Open non-volatile memory express (ONVMe): This is the newest and fastest disk type. It is still under development, but it is becoming increasingly popular in high-performance servers and workstations.
If you are running a guest operating system that supports newer disk types, such as SATA and NVMe, then I recommend choosing one of those disk types. They will offer better performance and reliability.
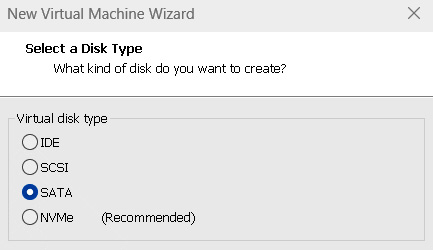
Figure 1.17 – Disk type
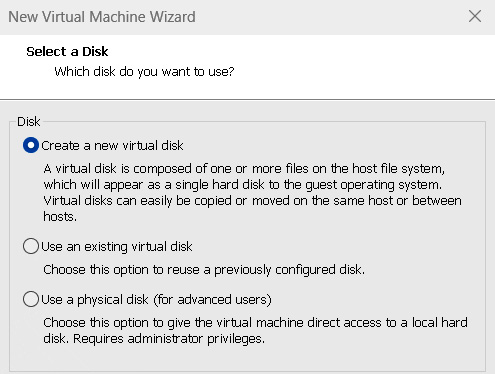
Figure 1.18 – Creating a new virtual disk
- Specify the disk capacity. The recommended disk space is 20 GB, but we’ll be allocating 30 GB of space to ensure sufficient room for your virtual machine. Be sure to tick the Store virtual disk as a single file option.
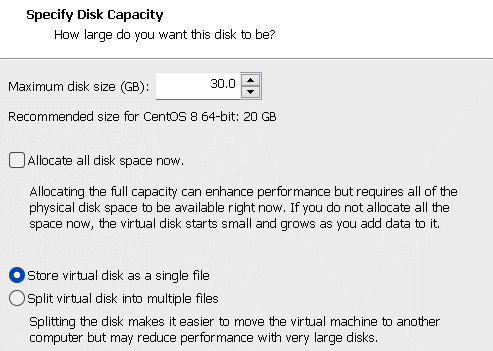
Figure 1.19 – Setting the disk capacity
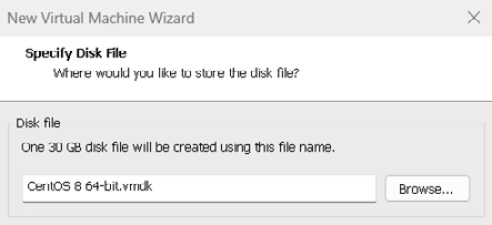
Figure 1.20 – Specify Disk File
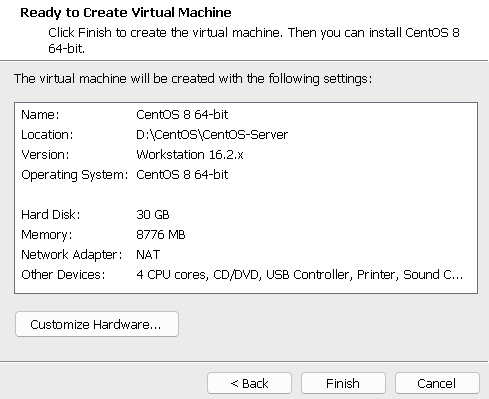
Figure 1.21 – Ready to Create Virtual Machine
- Next, to initiate the CentOS installation on VMware Workstation, provide the virtual machine with the CentOS ISO image. Once you’ve done this, click on the Power on this virtual machine option. This will create a new virtual machine and configure it according to the specifications you have provided.
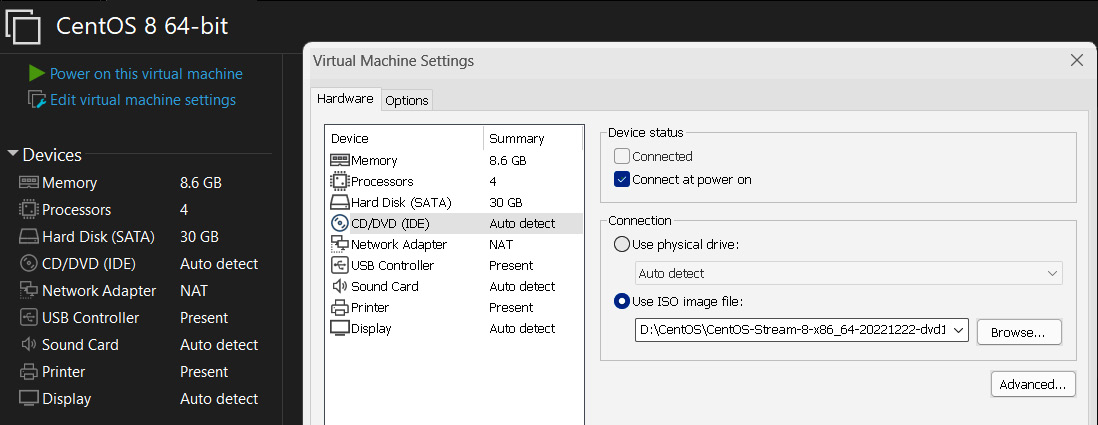
Figure 1.22 – Selecting the ISO image file
After the installation is complete, you will power on the newly created virtual machine, which will boot up and be ready for use. This process will allow you to have a fully functional CentOS installation running within a virtual environment, providing you with the ability to easily test, run, and manage multiple operating systems on a single physical machine.
The next step is to power on the virtual machine. This will bring the newly installed operating system to life and allow you to start configuring and using it. It is important to ensure that the virtual machine is properly configured before proceeding with the power-on process. This includes verifying the network configuration, memory and processor allocation, and disk space availability. Once you have confirmed that all the necessary parameters are set up correctly, you can power on the virtual machine by clicking the Power On button in VMware Workstation. This will move us into the next stage of the configuration process.
- We’ll select Install CentOS Stream 8-Stream from the list of options. To navigate between the options, use the arrow keys and press the Enter key to select the desired one.
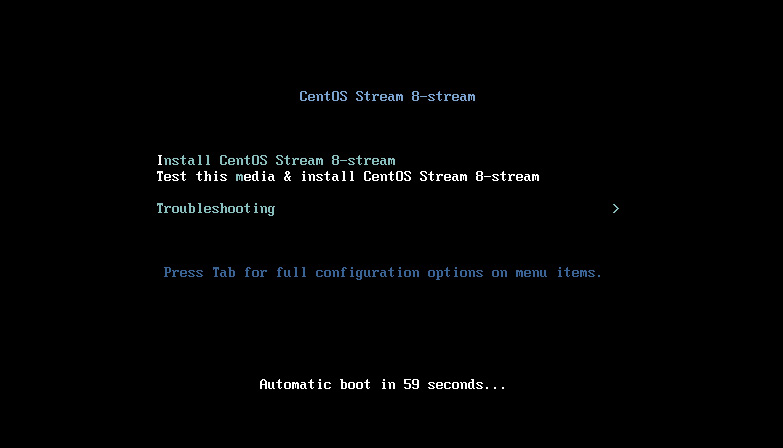
Figure 1.23 – Powering on CentOS 8-Stream
- Upon successful initiation of the CentOS installation, you will be presented with a welcome screen that gives you the option to choose your preferred language. Simply select your desired language and click Continue to proceed.
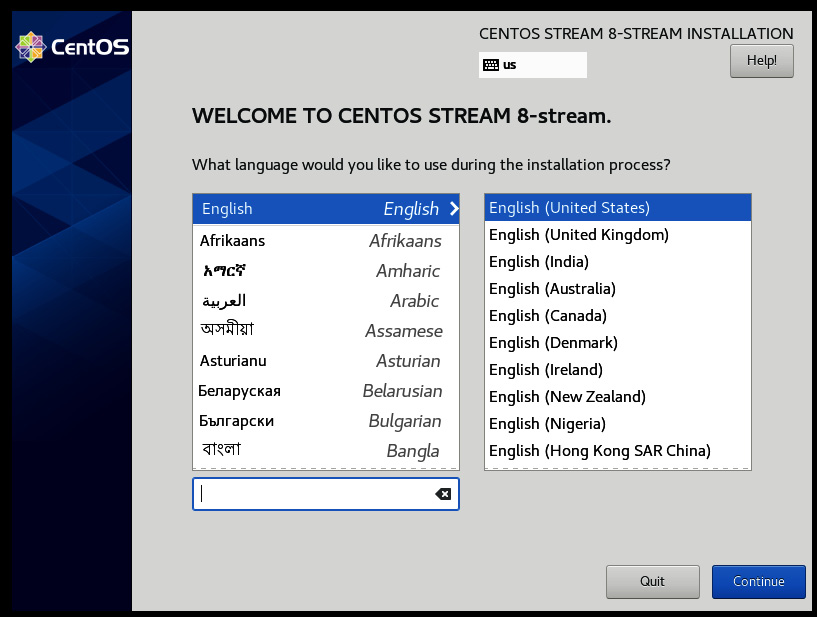
Figure 1.24 – Choosing your preferred language
- To move forward with the installation of CentOS, it is important to set up certain parameters such as keyboard layout, language support, time and date settings, software packages to be installed, root password, installation media, and disk partition information. These parameters will ensure a smooth and successful installation.
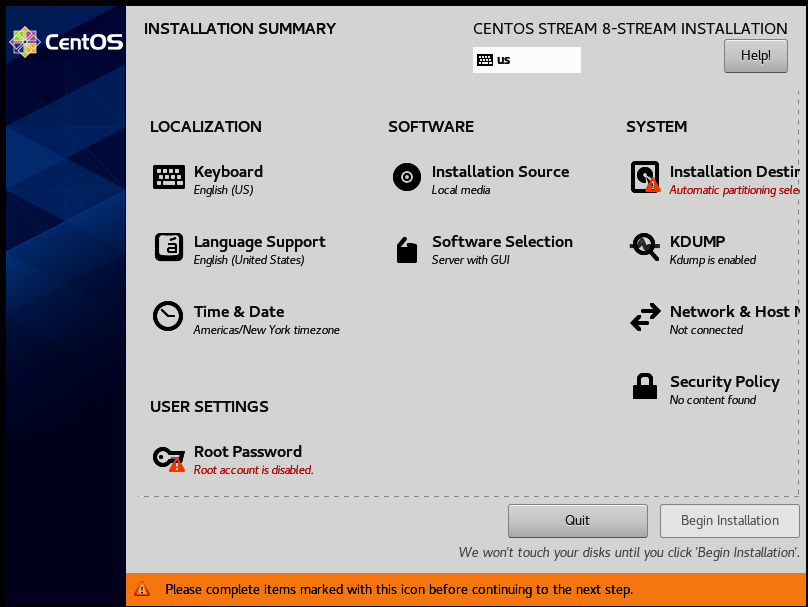
Figure 1.25 – The installation summary
- The installation wizard in CentOS 8 can automatically detect all the locally accessible network interfaces prior to the installation process. These interfaces will be displayed in the left pane (see Figure 1.26), allowing you to easily choose the desired network and configure it as active or inactive based on your specific requirements. This step ensures that the correct network connection is established for the system during the installation process.

Figure 1.26 – The Network & Host Name page
- With all the necessary settings configured, it’s time to commence the installation process. Click the Begin Installation button:
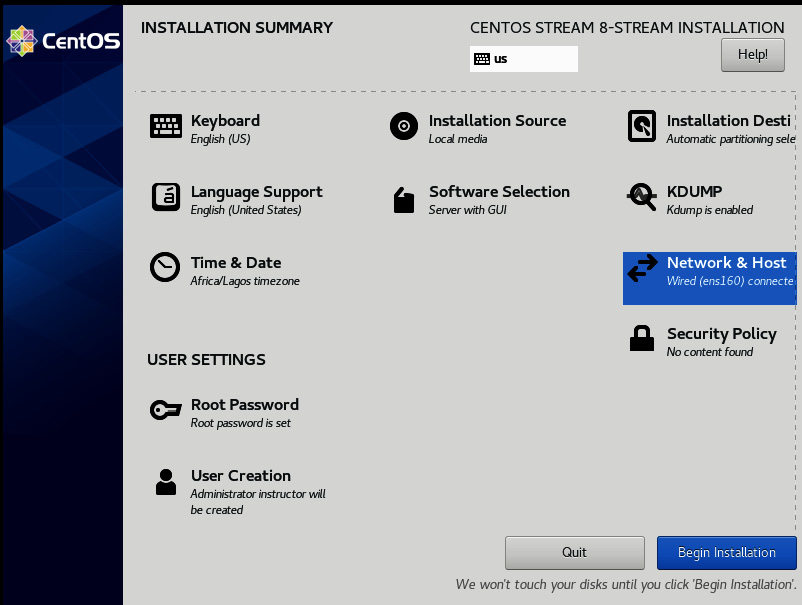
Figure 1.27 – The Begin Installation button
As the installation process begins, the setup wizard will commence the installation of CentOS. The process may take several minutes to complete, depending on the speed of your system and the configuration settings selected. Keep an eye on the progress bar to track the installation’s progress.
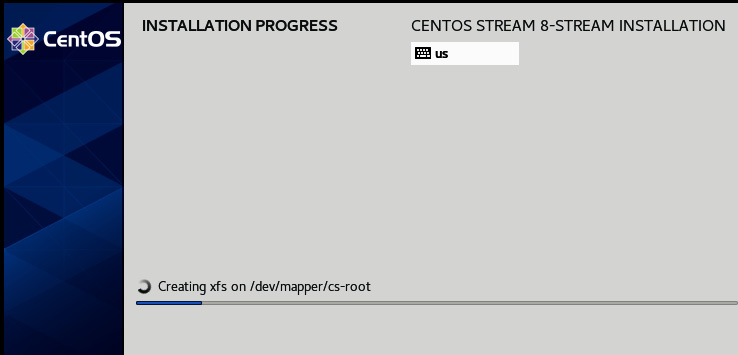
Figure 1.28 – Installation progress
- After the successful installation of CentOS, it’s important to reboot the virtual machine to ensure that all changes made during the installation process take effect. This will help in initializing the newly installed operating system and making it ready to use. To reboot the virtual machine, simply select the Reboot System button to restart from the system menu and wait for the machine to complete the reboot process.
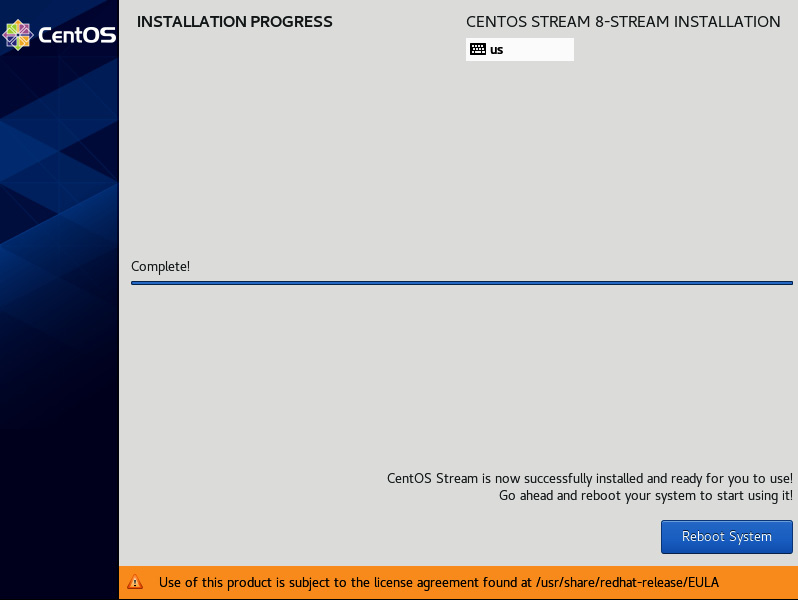
Figure 1.29 – The Reboot System button
- Upon rebooting the virtual machine, select the first option presented in the GRUB menu for successful boot into the installed CentOS operating system.
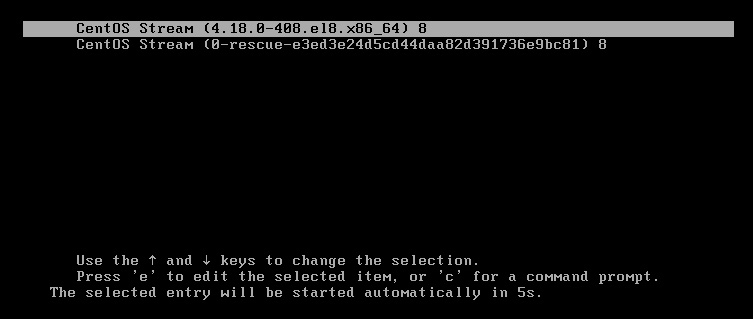
Figure 1.30 – The CentOS 8 GRUB menu
- One more important step to remember is to read and accept the license information, as it is required to proceed with the boot process.
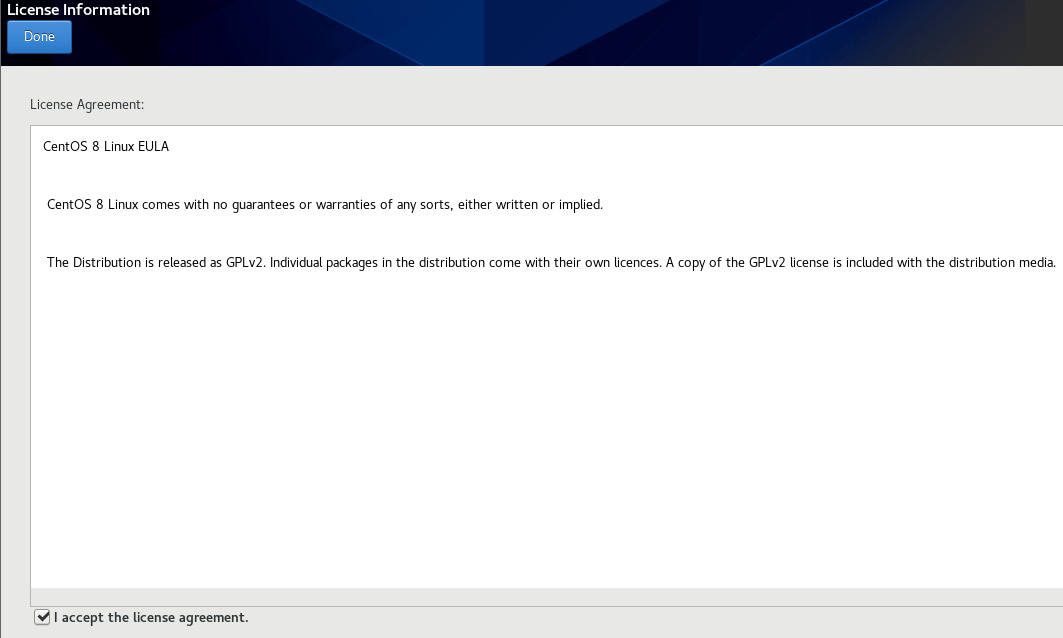
Figure 1.31 – Accepting the license information
- Upon accepting the license information, the final step in the process is to complete the configuration by clicking the Finish Configuration button. This action finalizes the setup and configuration process and enables the system to boot into the newly installed CentOS operating system.
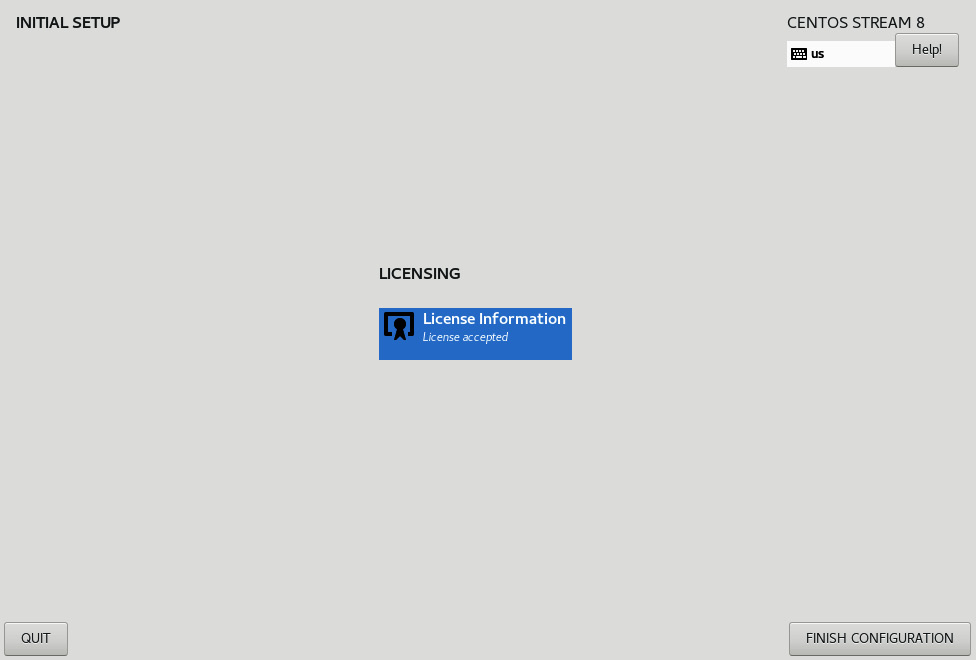
Figure 1.32 – Finishing the configuration
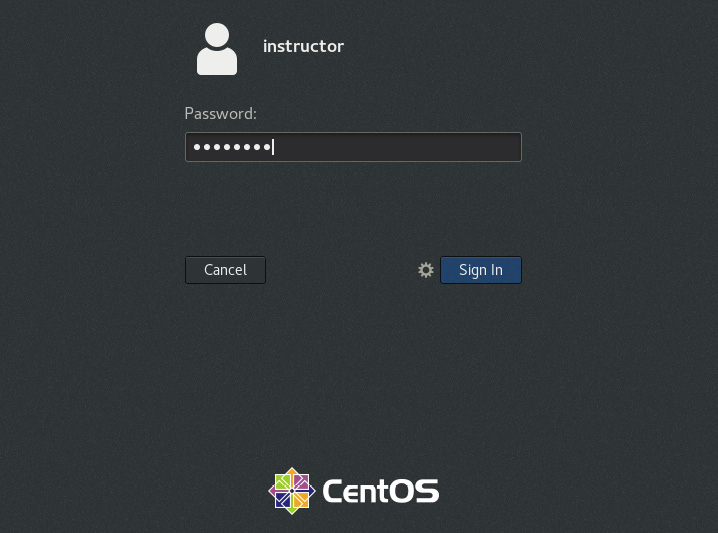
Figure 1.33 – Logging in
- Upon logging in, select the Start Using CentOS Linux option to begin utilizing the full functionality of the operating system.

Figure 1.34 – Ready to Go
It is recommended that you log in as the root superuser as soon as possible and run the commands in the next section to ensure your newly installed CentOS Linux system has the latest updates and fixes.
Package installation commands
Package installation commands are used in CentOS to install and manage software packages on the system. The package management system in CentOS is called Yellowdog Updater Modified (YUM), and it provides a centralized method for managing and installing software packages.
YUM package management system
YUM is the default package manager for CentOS. It makes it easy to manage software packages by resolving dependencies and downloading required packages. With YUM, users can install new packages, update existing packages, and remove packages as needed. YUM provides a command line interface that allows users to manage packages from the terminal, as well as a graphical user interface for users who prefer a visual approach.
Common package installation commands
The most common commands used with YUM include yum install to install a new package, yum update to update an existing package, and yum remove to remove a package. Additionally, yum list can be used to list all available packages, and yum search can be used to search for packages. It is important to remember that when using YUM to manage packages, it is necessary to have an active internet connection and to run the commands as root or with administrative privileges.
The following commands are the starting point of the 100 Linux Commands Every System Administrator Should Know journey:
yum upgrade: Theyum upgradecommand is used in CentOS Linux to upgrade all installed packages to their latest available version. The command updates the system with the latest packages, bug fixes, and security patches, ensuring the system remains secure and stable. Theyum upgradecommand is executed in the terminal and it is executed with administrative privileges, usually as the root user. By running the command, the system will upgrade all installed packages and resolve any dependencies or conflicts that might arise during the upgrade process.

Figure 1.35 – Upgrading the server
yum update: This package management tool is used in CentOS and other Linux distributions to upgrade and update system software packages. It downloads the latest package updates from a repository and installs them on the system, ensuring that your system has the most up-to-date security patches and bug fixes. Runningyum updateon a regular basis is an important part of system maintenance, as it helps keep your system secure and running smoothly.

Figure 1.36 – Updating the server
reboot: This command is used to restart a computer running on a Unix-based operating system such as Linux. It is used to apply changes made to the system or to refresh the system after completing a process. The command can be executed by a user with root or superuser privileges. Upon executing the command, the system initiates a reboot sequence and all running processes are terminated. Then, the system is restarted. Therebootcommand is often used after completing a system update or upgrade to ensure the changes are applied.

Figure 1.37 – Rebooting the server
Information commands
CentOS provides system administrators with a range of commands for obtaining information about various aspects of the system, including hardware, software, networks, and users. These commands are essential tools for monitoring and troubleshooting the system and its components, providing insight into the current status, configuration, and performance of the system. With the ability to obtain accurate and up-to-date information about the system, system administrators can quickly identify and resolve issues, ensuring optimal performance and the stability of the system. These commands provide information about the system’s hostname, disk usage, processes, CPU, and network interfaces, respectively, making them valuable tools for system administrators who need to diagnose and resolve system issues.
Here are a few commonly used information commands in CentOS:
uname: Theunamecommand is used to display information about the operating system and the system’s hostname. This command can also display the type of hardware, the version of the operating system, and the release number of the kernel.

Figure 1.38 – Displaying the operating system
The uname command comes with different flags that can be executed; for example, the -a parameter displays the whole information, including the system name, network node hostname, kernel release, version, and machine hardware name, as we can see in the following terminal:

Figure 1.39 – Displaying all system information
lsb_release: Thelsb_releasecommand is used to display information about the Linux Standard Base (LSB) version, distributor ID, and release number. The LSB is a standard that defines the Linux operating system and ensures compatibility among different Linux distributions.

Figure 1.40 – Displaying the Linux Standard Base version
To execute additional flags, we’ll make use of a flag commonly used by administrators to display the distributor indicator.

Figure 1.41 – Displaying Distributor Indicator
hostnamectl: Thehostnamectlcommand is used to display and modify the system hostname and to view various system settings such as the operating system architecture, boot mode, and system time zone. This command is useful for changing the hostname or viewing system settings without having to log in to the system as a root user.
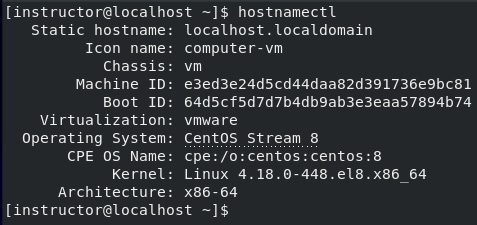
Figure 1.42 – Displaying the system settings and architecture
Let us execute hostnamectl with another flag, set-hostname. This flag is used to set the system hostname to a specified value. For example, you might execute hostnamectl set-hostname myhost:

Figure 1.43 – Setting a system hostname
The preceding useful information commands that we covered in this section will help you gather information about your system. Throughout this chapter, we emphasized the importance of proper server setup and installations, including regular software upgrades and updates, to ensure that your system runs smoothly and remains secure. By following the steps outlined in this chapter, you will be well on your way to setting up a reliable and secure server for your personal use, as well as building a foundation to further learn about Linux system administration.
Summary
In our first chapter, we focused on the steps involved in downloading and setting up a server. We began by discussing the process of downloading the server’s operating system, which is a crucial step in the setup process. We then delved into the topic of downloading and setting up a hypervisor, which is a virtualization platform that enables the creation of virtual machines. The hypervisor provides an isolated environment for each virtual machine, which allows multiple virtual machines to run on the same physical server.
Moving on, we discussed the importance of package installation commands in the server setup process. These commands allow system administrators to install, upgrade, and remove packages from the server, which are essential for the server to function properly. We also provided an overview of some common package installation commands such as yum.
Finally, in the fourth section, we highlighted the role of informational commands in the server setup process. These commands provide important information about the system, including information about the operating system and the hardware. We covered three common information commands in CentOS, including uname, lsb_release, and hostnamectl, and described their uses and benefits. These information commands are useful for monitoring and troubleshooting the server and ensuring that it is functioning optimally.
In our next chapter, we dive into Linux users and groups management. Essential for system security, stability, and resource allocation, this chapter covers key commands and tools for system administrators to manage users and groups.