

It is possible to use any editor (that you like) to write Python scripts and then import the scripts as text files but Blender's built-in text editor will probably be adequate for all programming needs. It features conveniences such as syntax highlighting, line numbering, and automatic indentation, and gives you the possibility to run a script directly from the editor. The ability to run a script directly from the editor is a definite boon when debugging because of the direct feedback that you get when encountering an error. You will not only get an informative message but the offending line will also be highlighted in the editor.
What is more, the editor comes with many plug-ins of which the automatic suggestion of members and the documentation viewer are very convenient for programmers. And of course, it is possible to write additional plug-ins yourself.
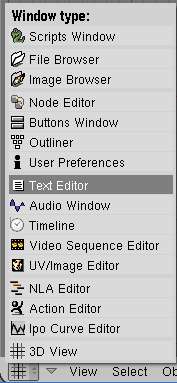
You can select the built-in editor by choosing Text Editor from the Windows menu:
When you start up you are presented with an almost empty area except for a strip of buttons at the bottom:

We can select the default empty text buffer TX:Text or create a new empty text by selecting ADD NEW from the drop-down menu available when we click on the Menu button.
The default name for this new text will be TX:Text.001, but you may change it to something more meaningful by clicking on the name and changing it. Note that if you would like to save this text to an external file (with Text | Save As...) the name of the text is distinct from the filename (although in general it is a good idea to keep these the same to avoid confusion). It is not mandatory to save texts as external files; texts are Blender objects that are saved together with all other information when you save your .blend file.
External files may be opened as texts by selecting OPEN NEW from the Menu button drop-down instead of ADD NEW. If for some reason an external file and an associated text are out of sync when Blender is started, an out of sync button is displayed. When clicked, it displays a number of options to resolve the issue.
Once a new or existing text is selected, the menu bar at the bottom of the screen is updated with some additional menu options:

The Text file menu gives access to options to open or save a file or to run the script in the editor. It also presents a number of template scripts that may be used as a basis for your own scripts. If you select one of these templates a new text buffer is created with a copy of the selected template.
The Edit menu contains cut-and-paste functionality as well as options to search and replace text or jump to a chosen line number.
The Format menu has options to indent and unindent selected text as well as options to convert whitespace. The latter option can be very helpful when the Python interpreter complains about unexpected indentation levels although there seems nothing amiss with your file. If that happens you possibly have mixed tabs and spaces in way that confuse Python (as they are different as far as the interpreter is concerned) and a possible way out is to convert selected text to spaces first and then back to tabs. This way mixed spaces and tabs will be used in a uniform way again.
To get used to the editor, create a new text buffer by choosing Text | New and type in the following example lines:
import sys
print sys.path
Most keys on the keyboard will behave in a familiar way, including Delete, Backspace, and Enter. The shortcut keys for cutting, pasting, and copying are listed in the Edit menu as Alt + X, Alt + V, and Alt + C respectively but the Ctrl key equivalents Ctrl + X, Ctrl + V, and Ctrl + C (familiar to Windows users) work just as well. A full keyboard map can be consulted on the Blender wiki, http://wiki.blender.org/index.php/Doc:Manual/Extensions/Python/Text_editor
Selecting portions of the text can be achieved by clicking and dragging the mouse, but you can also select text by moving the text cursor around while pressing the Shift key.
Text will be uncolored by default, but reading scripts can be made a lot easier on the eye by enabling syntax highlighting. Clicking on the little AB button will toggle this (it will be black and white when syntax highlighting is off and colored when on.) Like many aspects of Blender, text colors can be customized in the themes section of the User Preferences window.
Another feature that is very convenient to enable, especially when debugging scripts, is line numbering. (You might write a faultless code in one go, but unfortunately yours truly is less of a genius.) Every Python error message that will be shown will have a filename and a line number, and the offending line will be highlighted. But the lines of the calling function(s), if any, will not be highlighted although their line numbers will be shown in the error message, so having line numbers enabled will enable you to quickly locate the calling context of the trouble spot. Line numbering is enabled by clicking on the lines button.
Running a script is done by pressing Alt + P. Nothing is displayed in the editor when there are no errors encountered, but the output will be shown on the console (that is, the DOSBox or X terminal Blender started from, not the Python interactive console that we encountered earlier).